Tips & Tricks for Heat-Set Inserts used in 3D printing
Thanks for purchasing high-quality threaded inserts for 3D printing from us! Over the last years, we noticed that there is a significant interest and demand for heat-set inserts, so we carefully selected a supplier that is able to produce parts for us with the level of quality we demand. By purchasing these inserts you’re not only able to lift the quality of your 3D printed assemblies to the next level, but you’re also helping us with the content production and research that we deliver on YouTube.
🛒Buy CNC Kitchen Heat-Set Inserts🛒
CNCKitchen.store
Global Resellers
Why Use Threaded Inserts?
Threaded inserts not only look great in 3D printed parts, but they also have a practical use. Everyone has had a device that was assembled with screws. After disassembling and reassembling it a few times, you realize that if the screws dug directly into the plastic, they won't hold anymore. Each time you screw the parts together, the material gets plastically deformed at the threads, which eventually leaves you with nothing but a ragged hole where nothing can grab. This is where thread inserts come into play. By melting them into your parts, they are positively bonded to the plastic and no longer move. The screws are now turned into durable and also low-friction brass and thus will last forever.
The use of inserts also results in the strength of the connection being increased, as the thread insert is connected to more material, compared to directly screwing into a smaller plastic hole.
Another point is also the reliability of the connection. If a screw gets turned directly into the plastic and is slightly overtightened, the threads in the plastic will often shear off and any strength of the connection will be lost. Standard length inserts are typically designed to withstand more torque than is normally required for a screw connection and are therefore rarely overtightened.
Installation Process
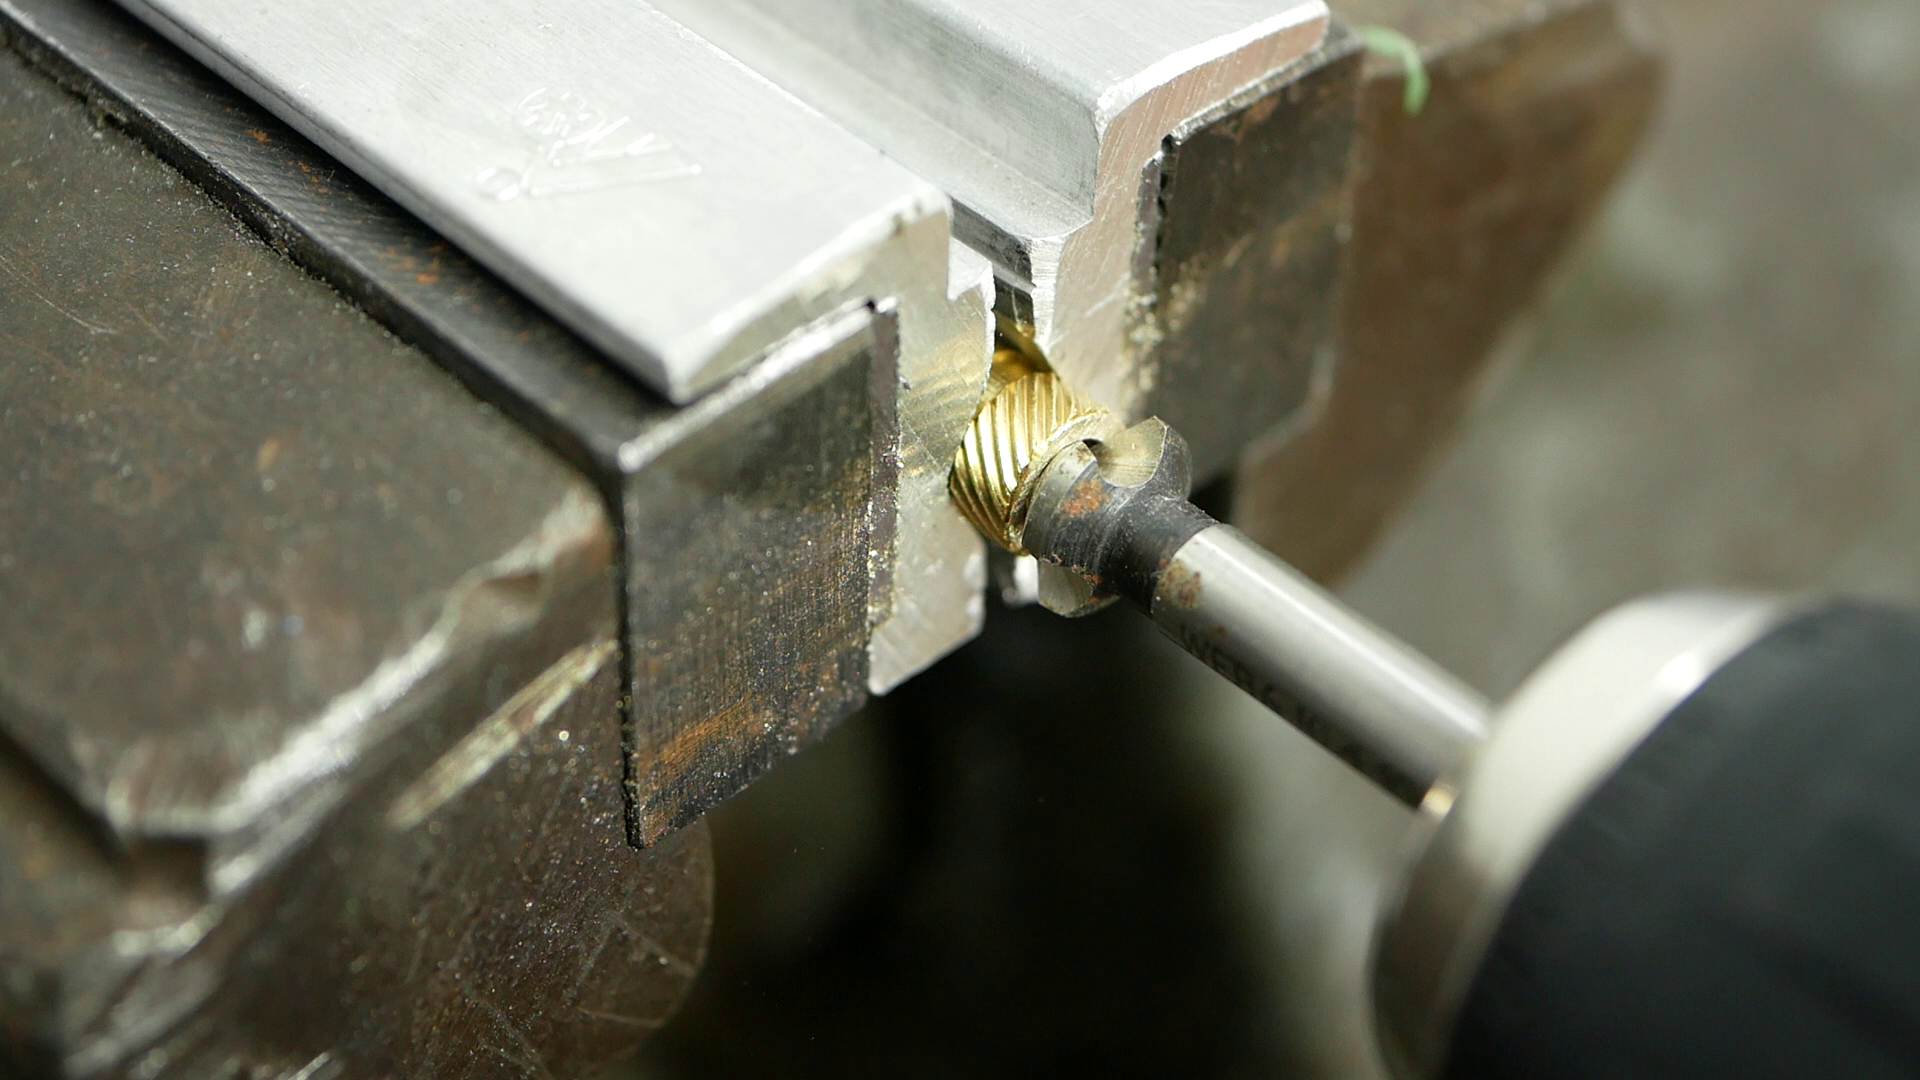
Our brass heat-set inserts can be installed into 3D printed parts with a standard soldering iron. If you have an adjustable one, the inserts can be reliably melted into the 3D printed components if you select a temperature of approx. 10 - 20 °C higher than you use for printing. For PLA this is around 225 °C, for PETG 245 °C, and for ABS 265 °C. Since not every material is the same, the values may vary slightly. If your soldering iron is not adjustable, you can still melt inserts into the components, but you may have to be a little more careful. Often they get a little hotter than the temperatures we recommend, which can lead to the decomposition of the plastic. Therefore, be careful not to overheat the insert and rather pull the soldering iron away early. Since the threaded inserts store heat, you can still press them the rest of the way into the component with a tool such as a screwdriver or tweezers.
Basically, you should always melt the inserts only to about 90% of the depth with the soldering iron tip and do the last, short way with a tool. After ensuring they are flush with the surface wait a short time until the plastic has solidified again since the inserts have a tendency to move slightly out of the component immediately after melting.
If you are working with large inserts (e.g. M5 or the 1/4"-20 camera thread), you may not be able to get enough heat into the threaded insert quickly enough, making the installation process difficult. In this case, we recommended using a thick soldering tip and to increase the temperature a bit. Try to build up as much contact as possible with the insert to improve the heat transfer. It can also help to use special soldering tips for inserts that other suppliers sell.
🛒 OUR SOLDERING TIPS FOR Heat-Set Inserts
How to design for inserts?
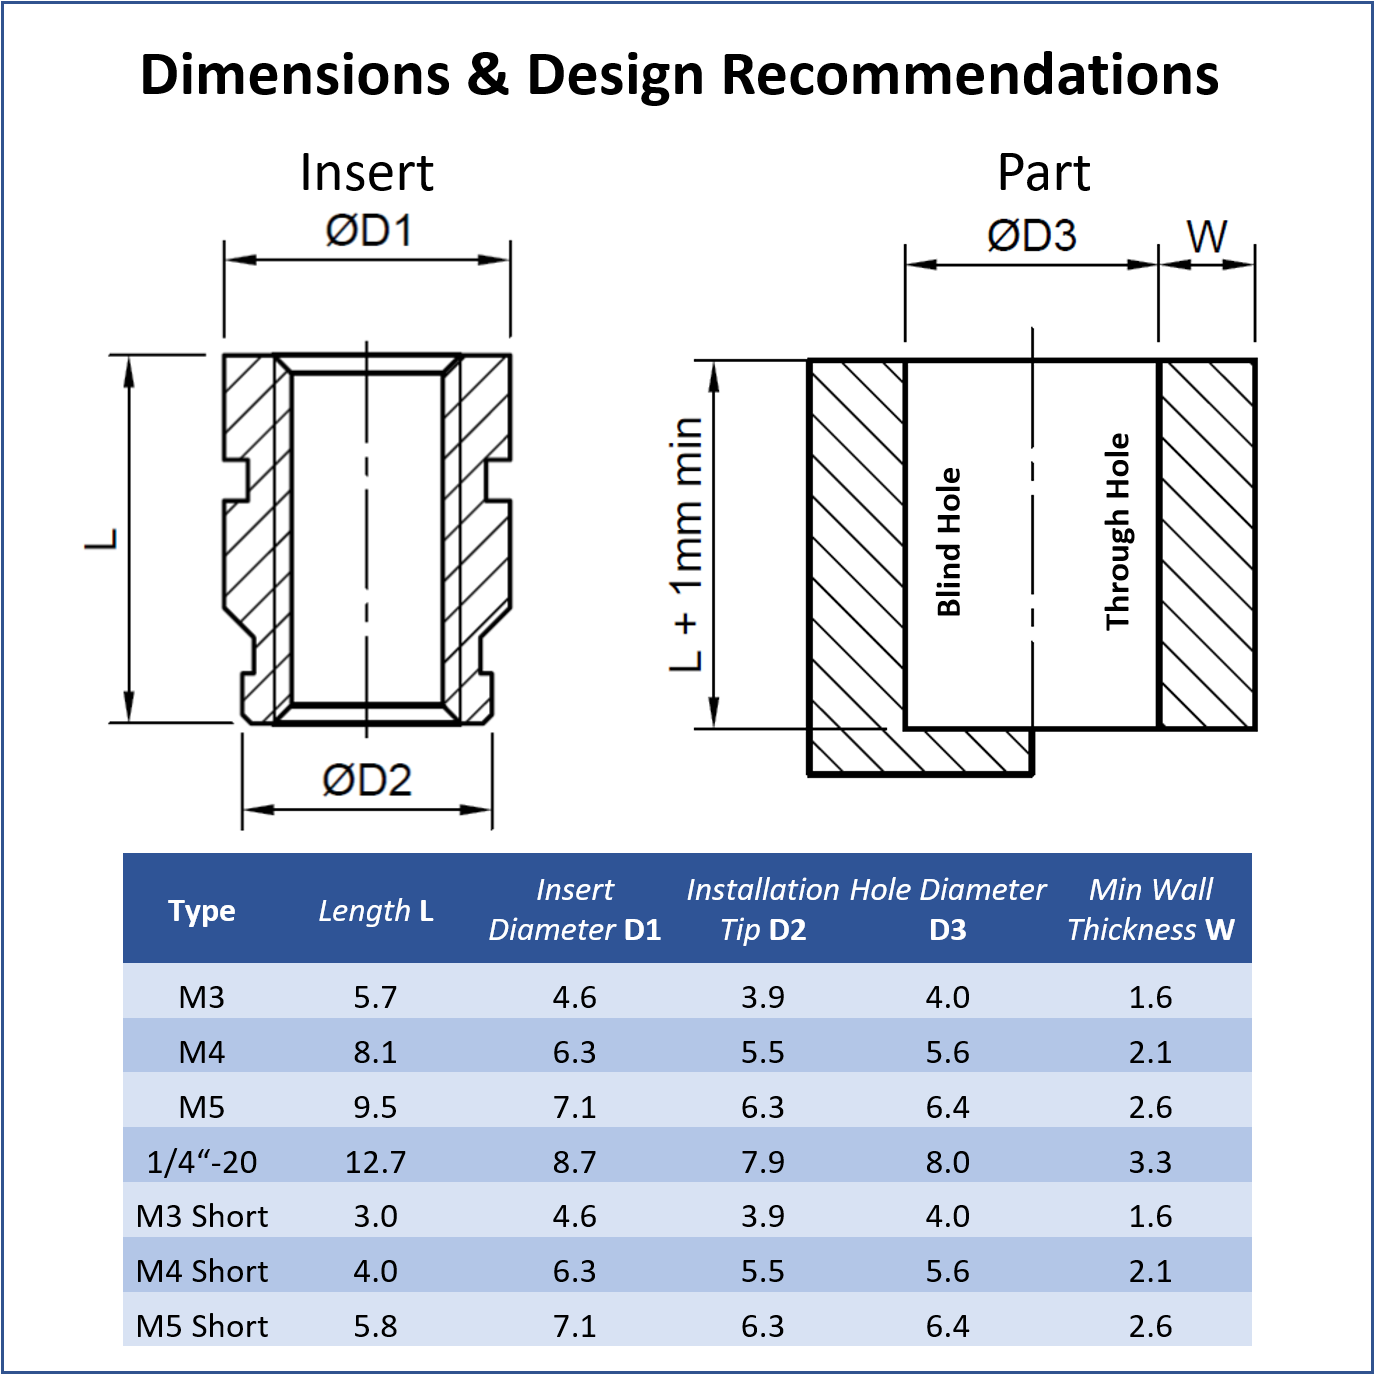
If you want to use threaded inserts in your parts, there are only a few things you need to keep in mind when designing. The critical dimensions are summarized in the table next to the article and here are some more tips:
The bore diameter must be adapted to the threaded insert used. It should be just large enough so that the installation tip can be easily inserted and that no burr remains under the insert after melting. Since holes in 3D printed parts usually come out smaller than in CAD, a test specimen is linked further down in the article, with which you can determine the appropriate diameter in various printing orientations
A blind hole should be slightly deeper than the length of the insert (approx. 1 mm)
Through holes do not need to be longer than the insert
To ensure strength you should make sure to stick to the minimum wall thickness
Holes should be straight (not tapered)
Normally, no chamfer is required at the hole edge
How to use the inserts in resin prints
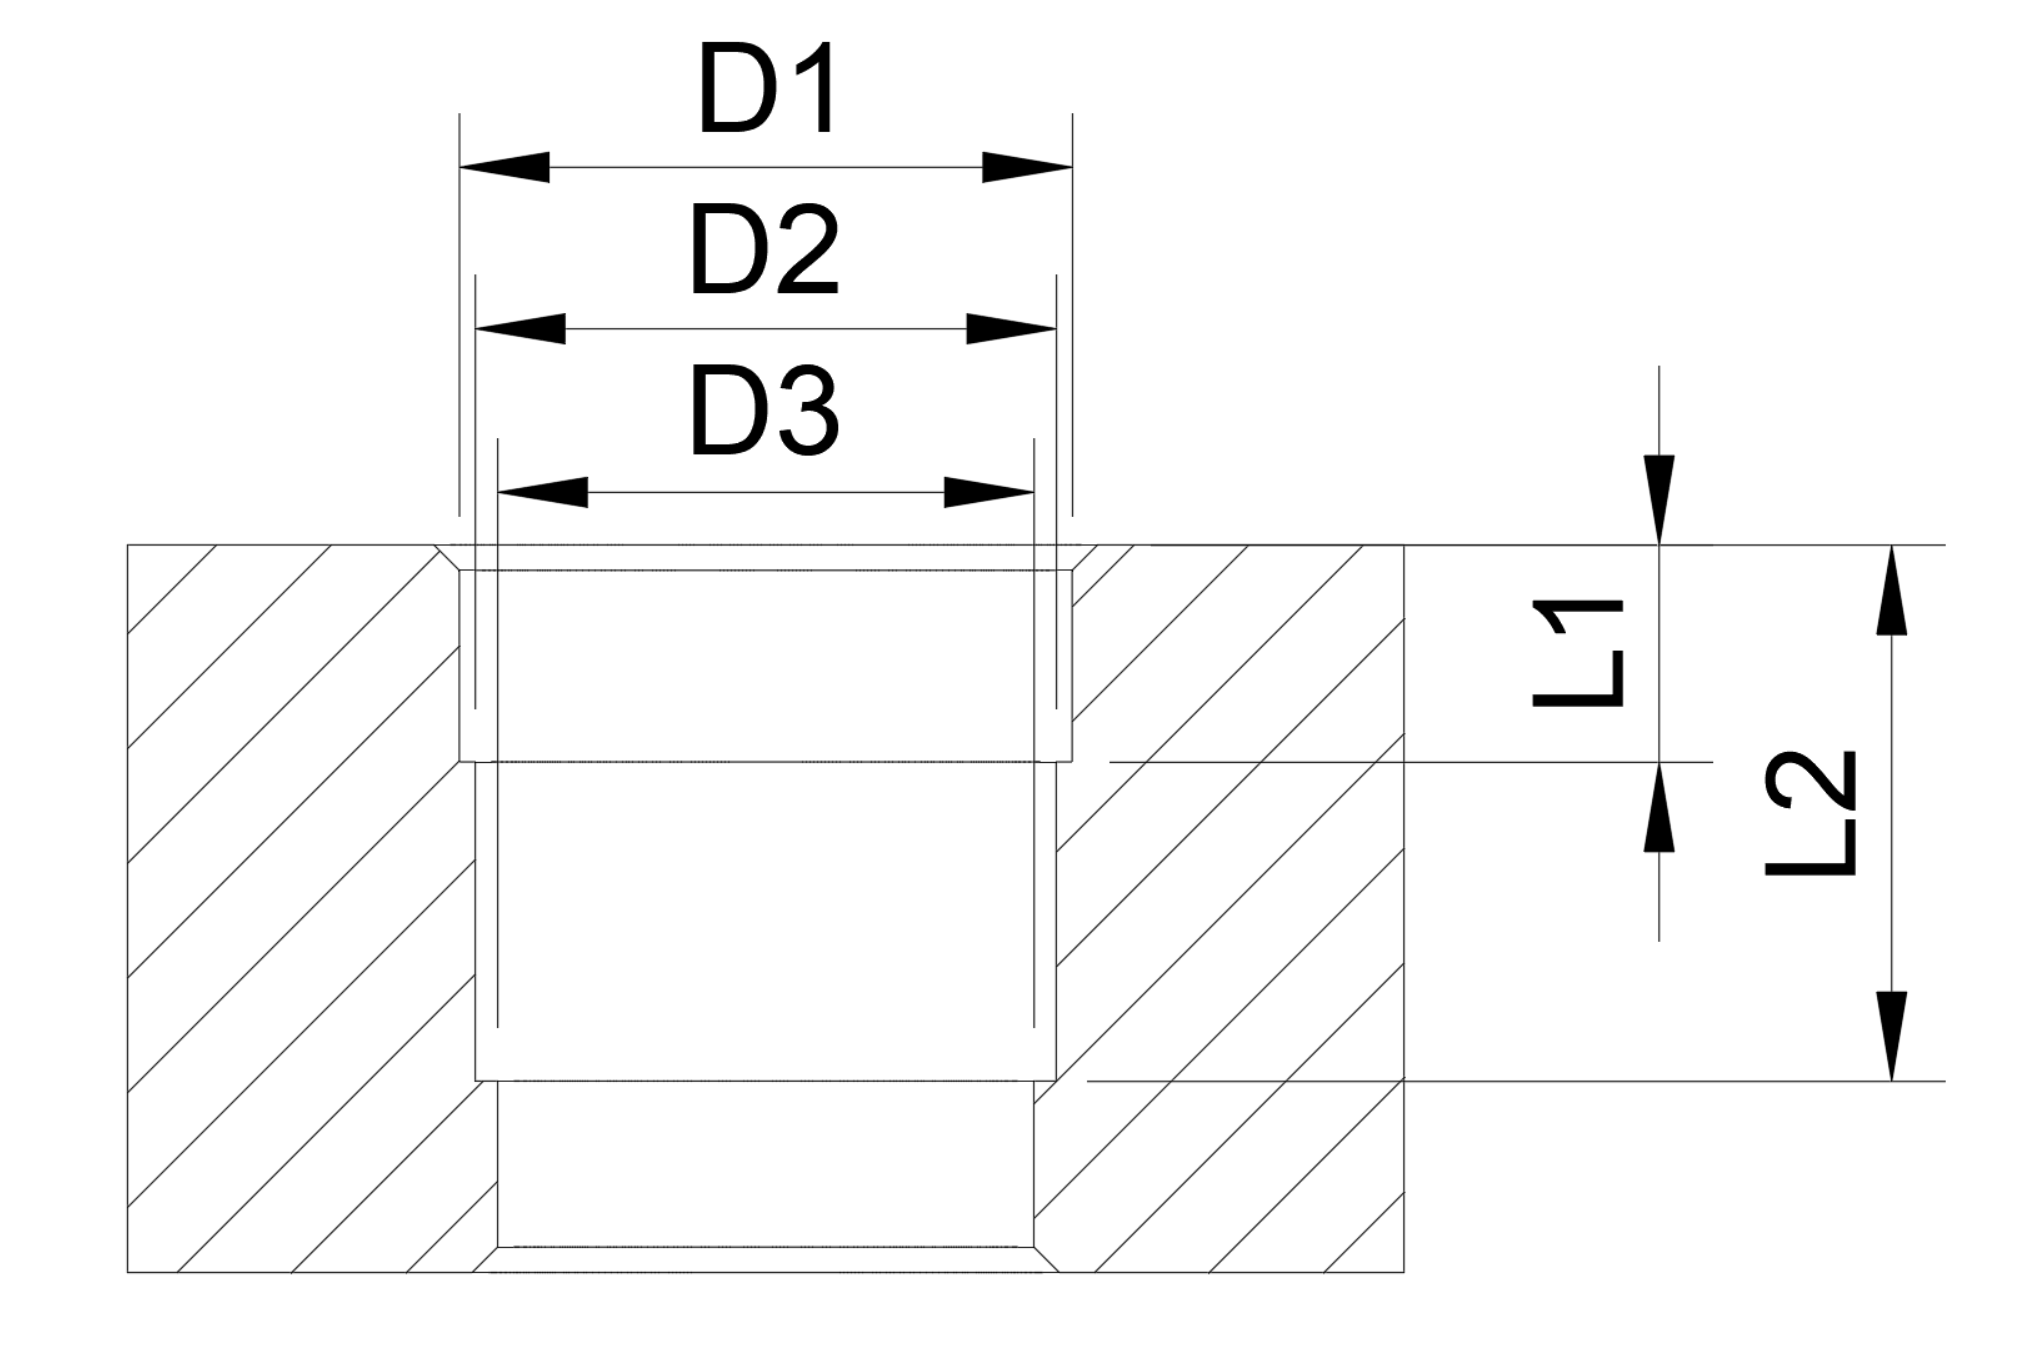
Stepped bore
Our threaded inserts can also be used in your SLA prints, yet you can’t melt them into your parts but have to glue them. The inserts will be glued into your part, once it’s fully cured. We recommend using thick CA glue to fix the inserts in their respective holes. Even though you can glue them in streight holes, we recommend using stepped holes for an easier workflow and better strength. Please refer to the values listed below. The inserts should be inserted with minimum force. If the holes are too tight, increase the dimensions in 0.1 mm steps:
For more information you can also watch this video:
Problems & FAQ
The large inserts are difficult to insert into the components!
The large threaded inserts have a lot of heat capacity and require a lot of heat to melt the plastic. Use slightly higher temperatures and make sure that the soldering iron tip transfers the heat well into the brass. In addition, there are special soldering tips that can be used to produce even better heat transfer.
🛒 OUR SOLDERING TIPS FOR Heat-Set Inserts
Can the inserts be installed ultrasonically?
Yes, the threaded inserts are designed to be inserted into components using heat as well as ultrasonics.
Can I use the inserts in my SLA resin/resin prints?
Yes, you can! Yet, you need to glue the inserts into your parts. The strength of the inserts will be depending on the glue you use. Please follow the instructions above.
Can I use the inserts in material XY?
Heat-set inserts are suitable for virtually all thermoplastics, that is, all materials that you use on an FDM 3D printer.
My thread inserts are not flush with the surface!
Always melt the inserts only 90% of the way in with the soldering iron and press them the rest of the length into the part with a tool. Hold them in the final position for a few seconds until the plastic has cooled back down and solidified.
My bolt is hard to screw in once they reach the end of the threaded insert!
Probably your printed hole was too small and caused a burr when you installed the insert. Next time make the hole a little bigger.
Are the inserts also available in larger quantities or other diameters?
Just write us a message and we will surely find a solution!
I have another question!
Just contact us via the contact form on the website.
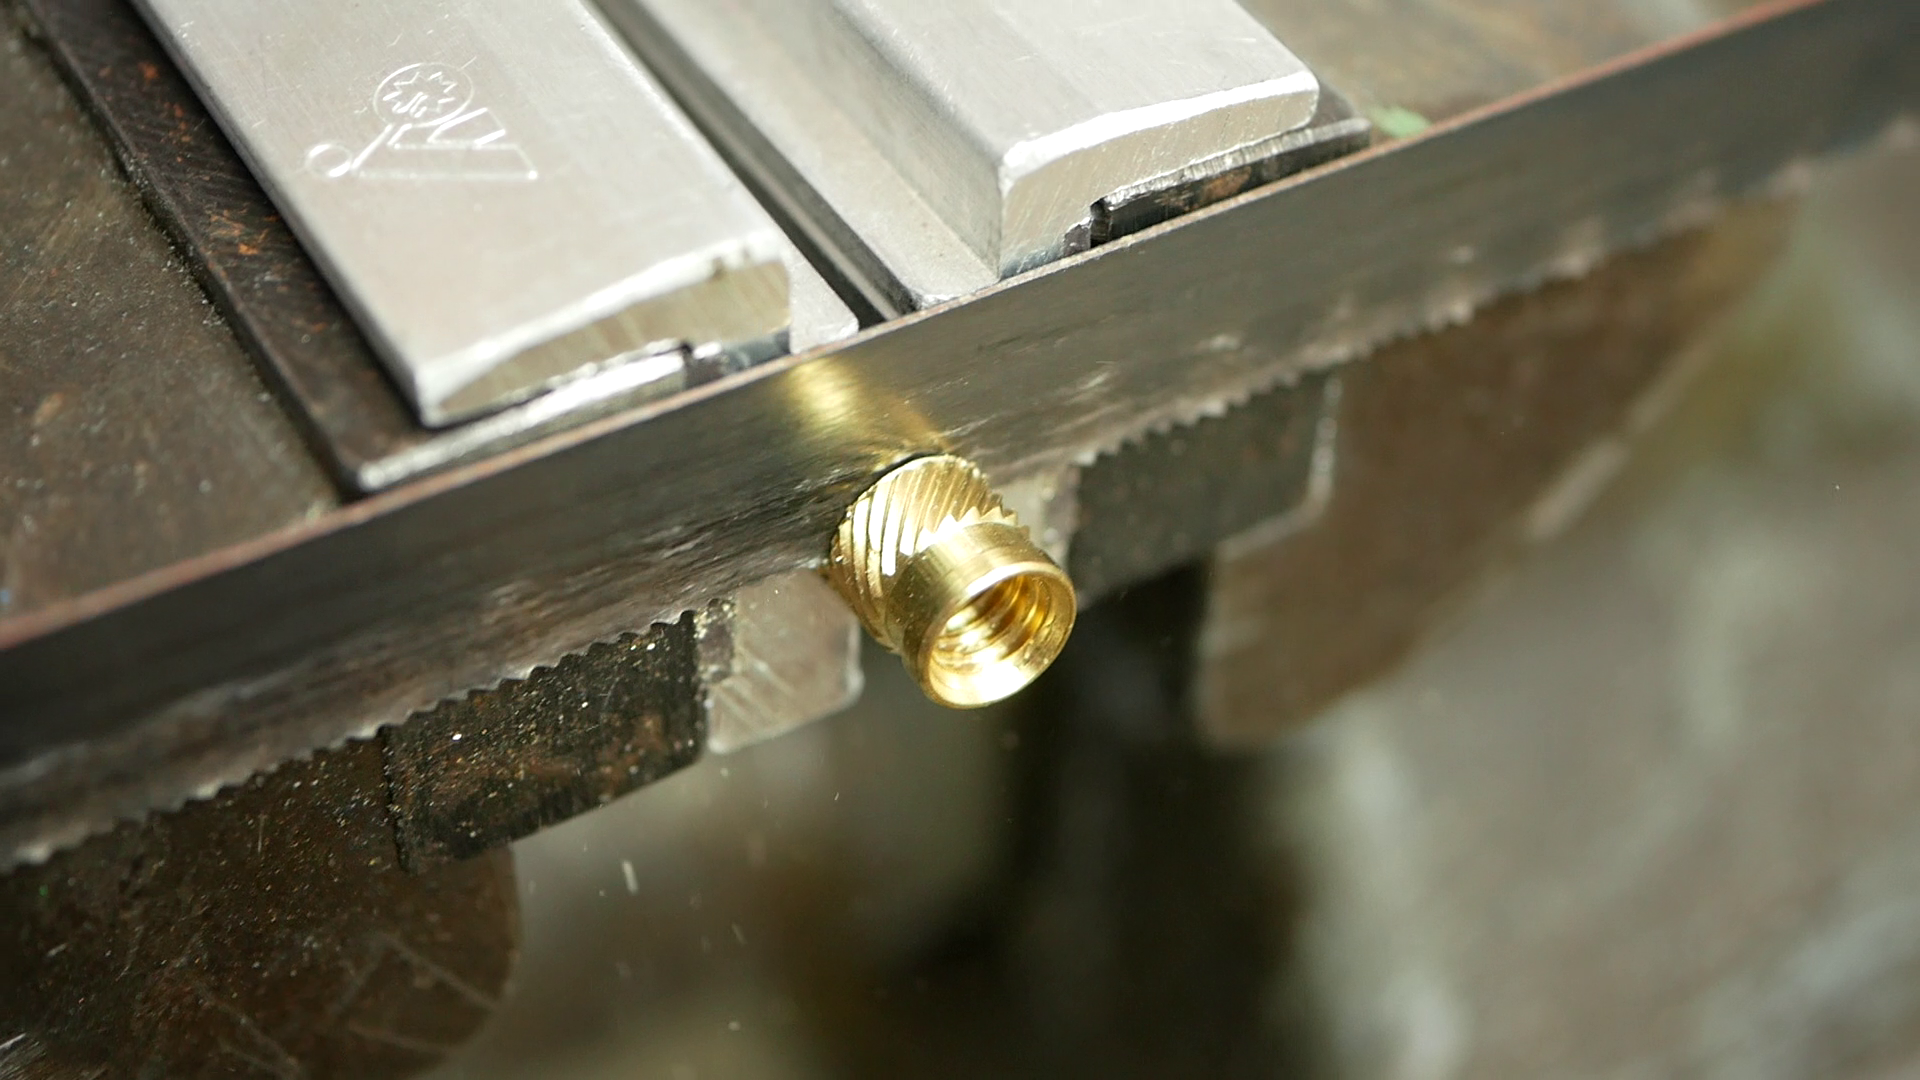
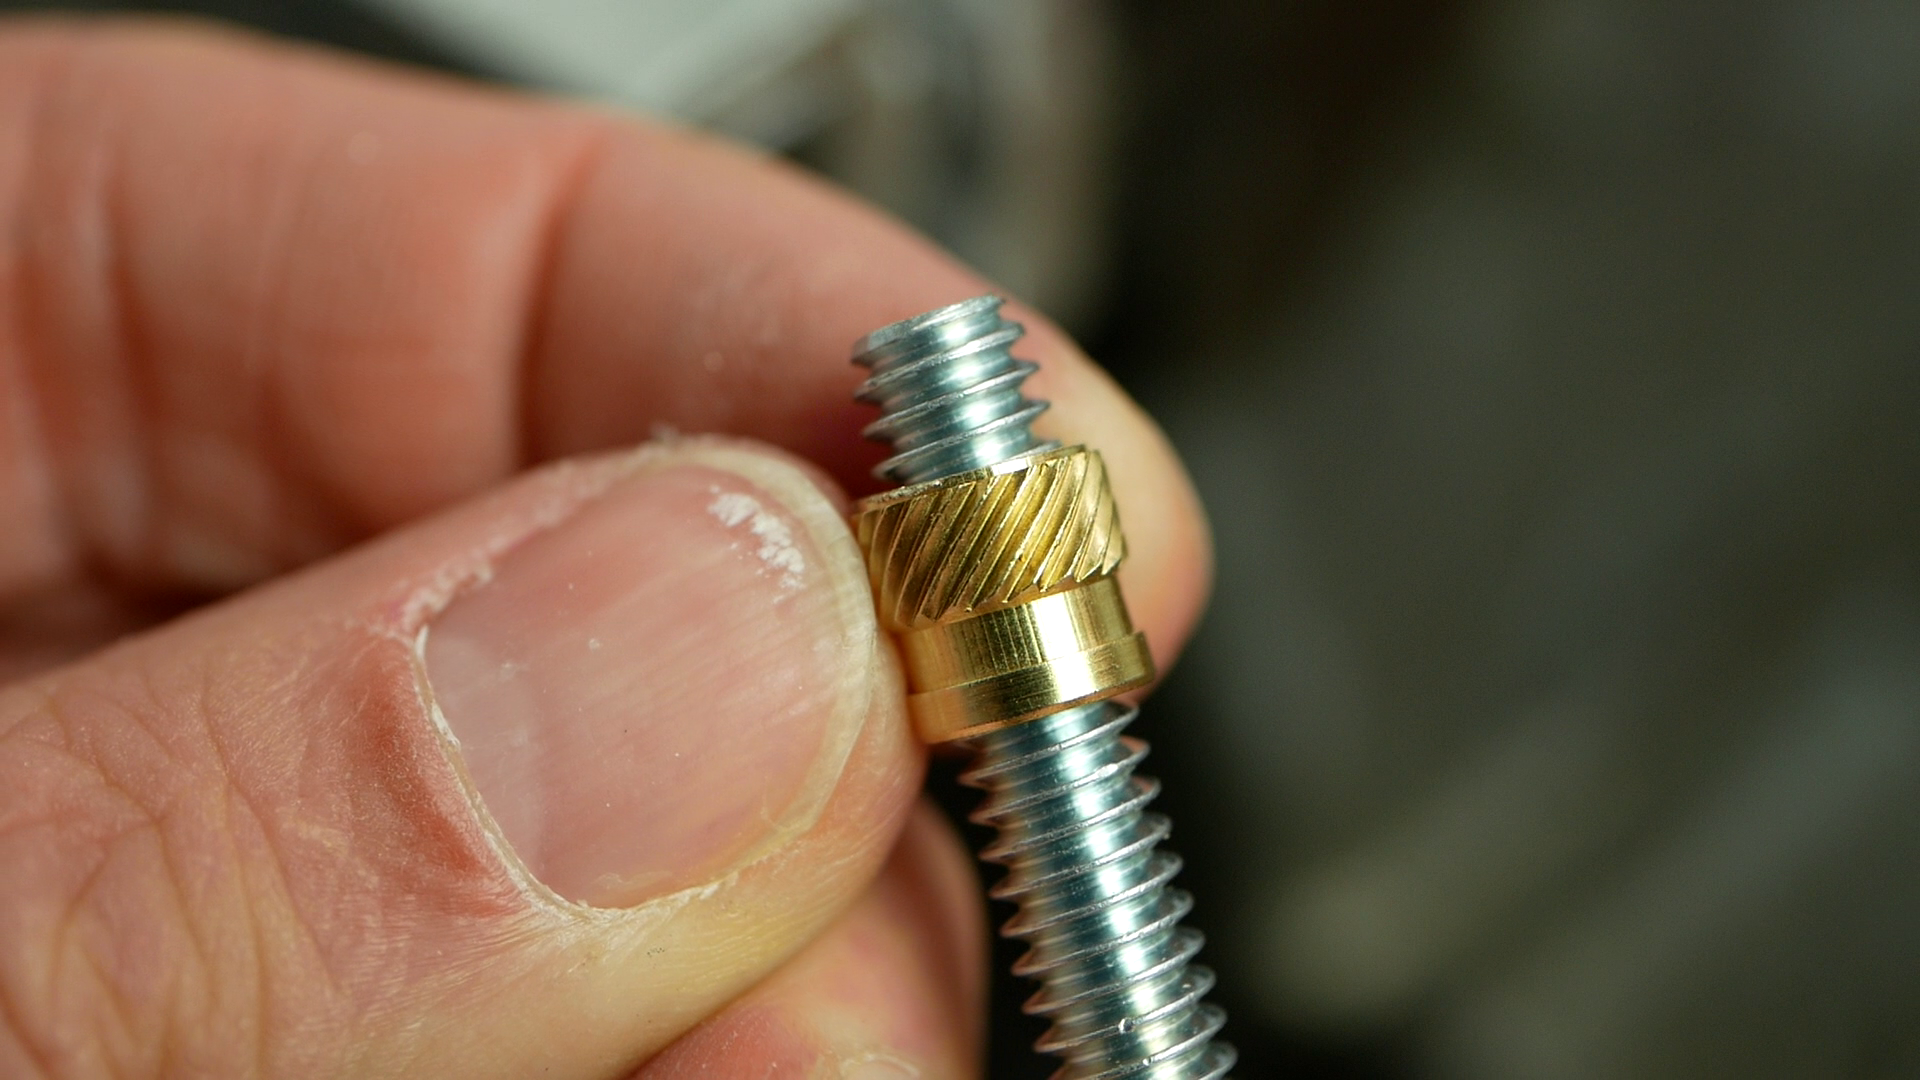
Shorten your inserts!
Sometimes it can happen that the threaded inserts are too long for your application and you don’t have any short inserts from us at hand. However, the larger inserts, in particular, can be easily cut between the two knurls with a hacksaw, thus almost halving the length. After that use a countersink to create a small chamfer on the thread and push out the burr by screwing in a bolt from below. Keep in mind, however, that the strength of the connection will also decrease since there is not as much material available anymore.
CAD
If you want to integrate our inserts directly into your CAD, you can find STP and STL data here.

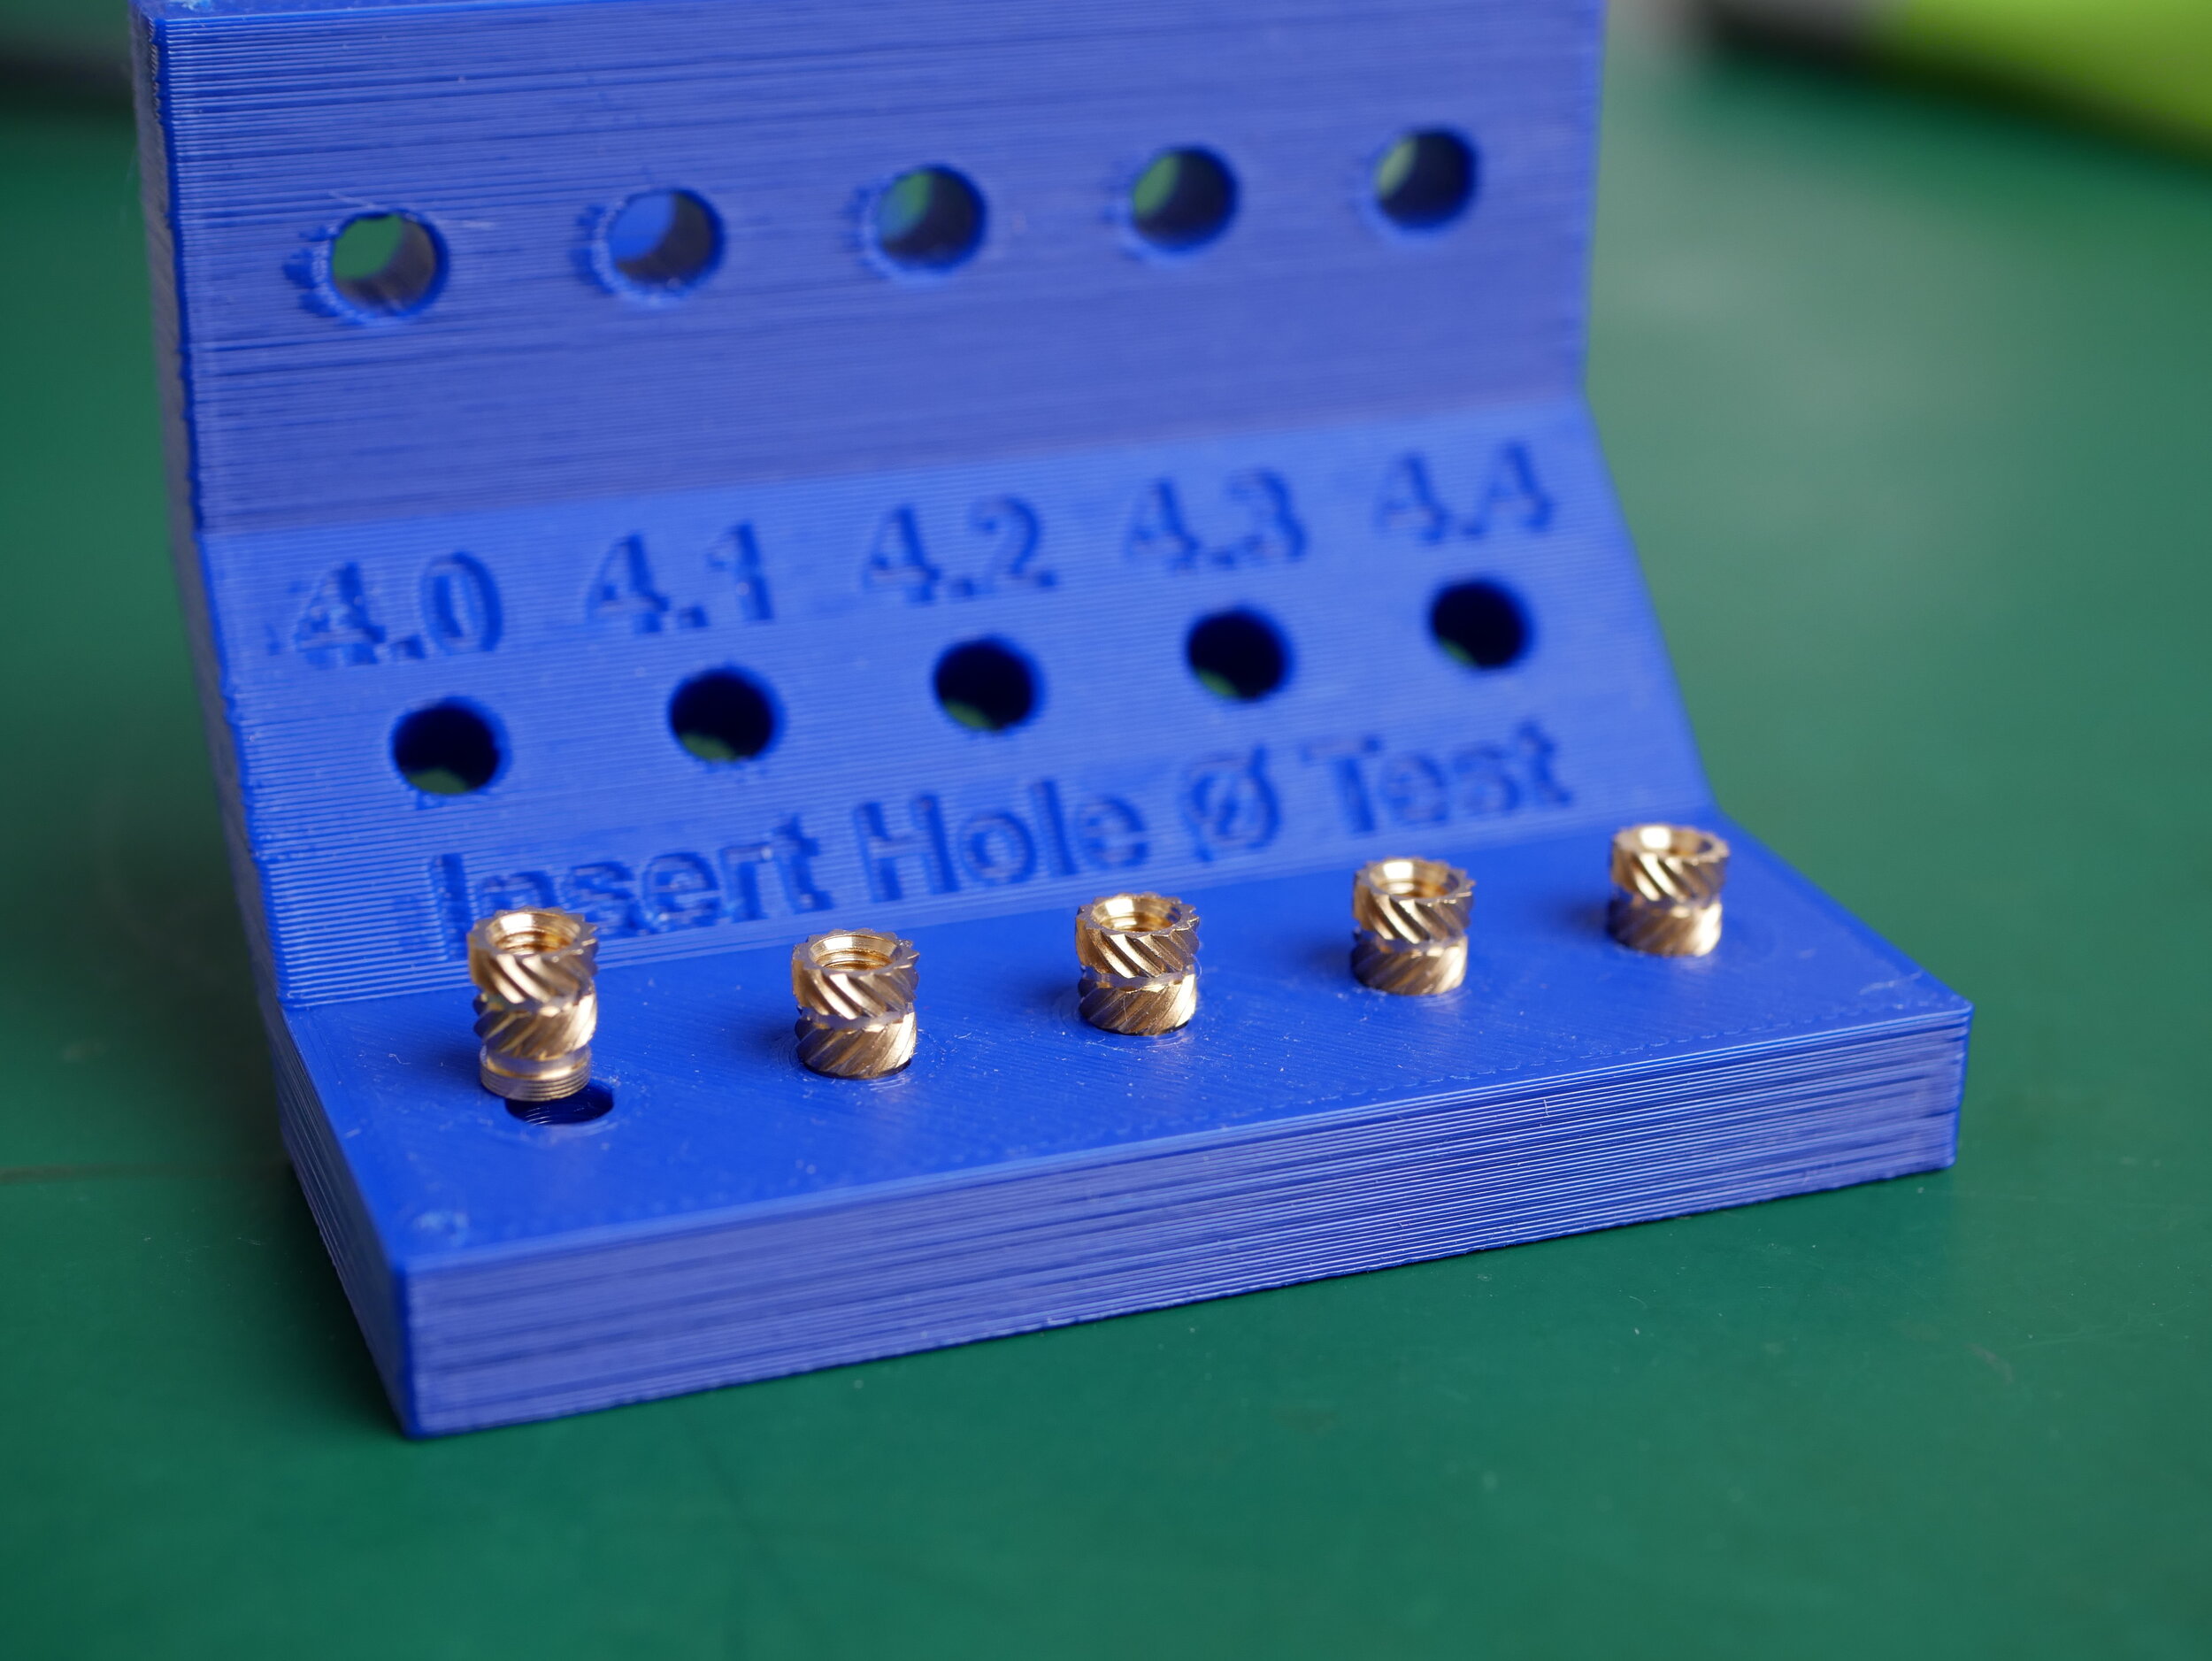
Test parts to find the optimal hole diameter
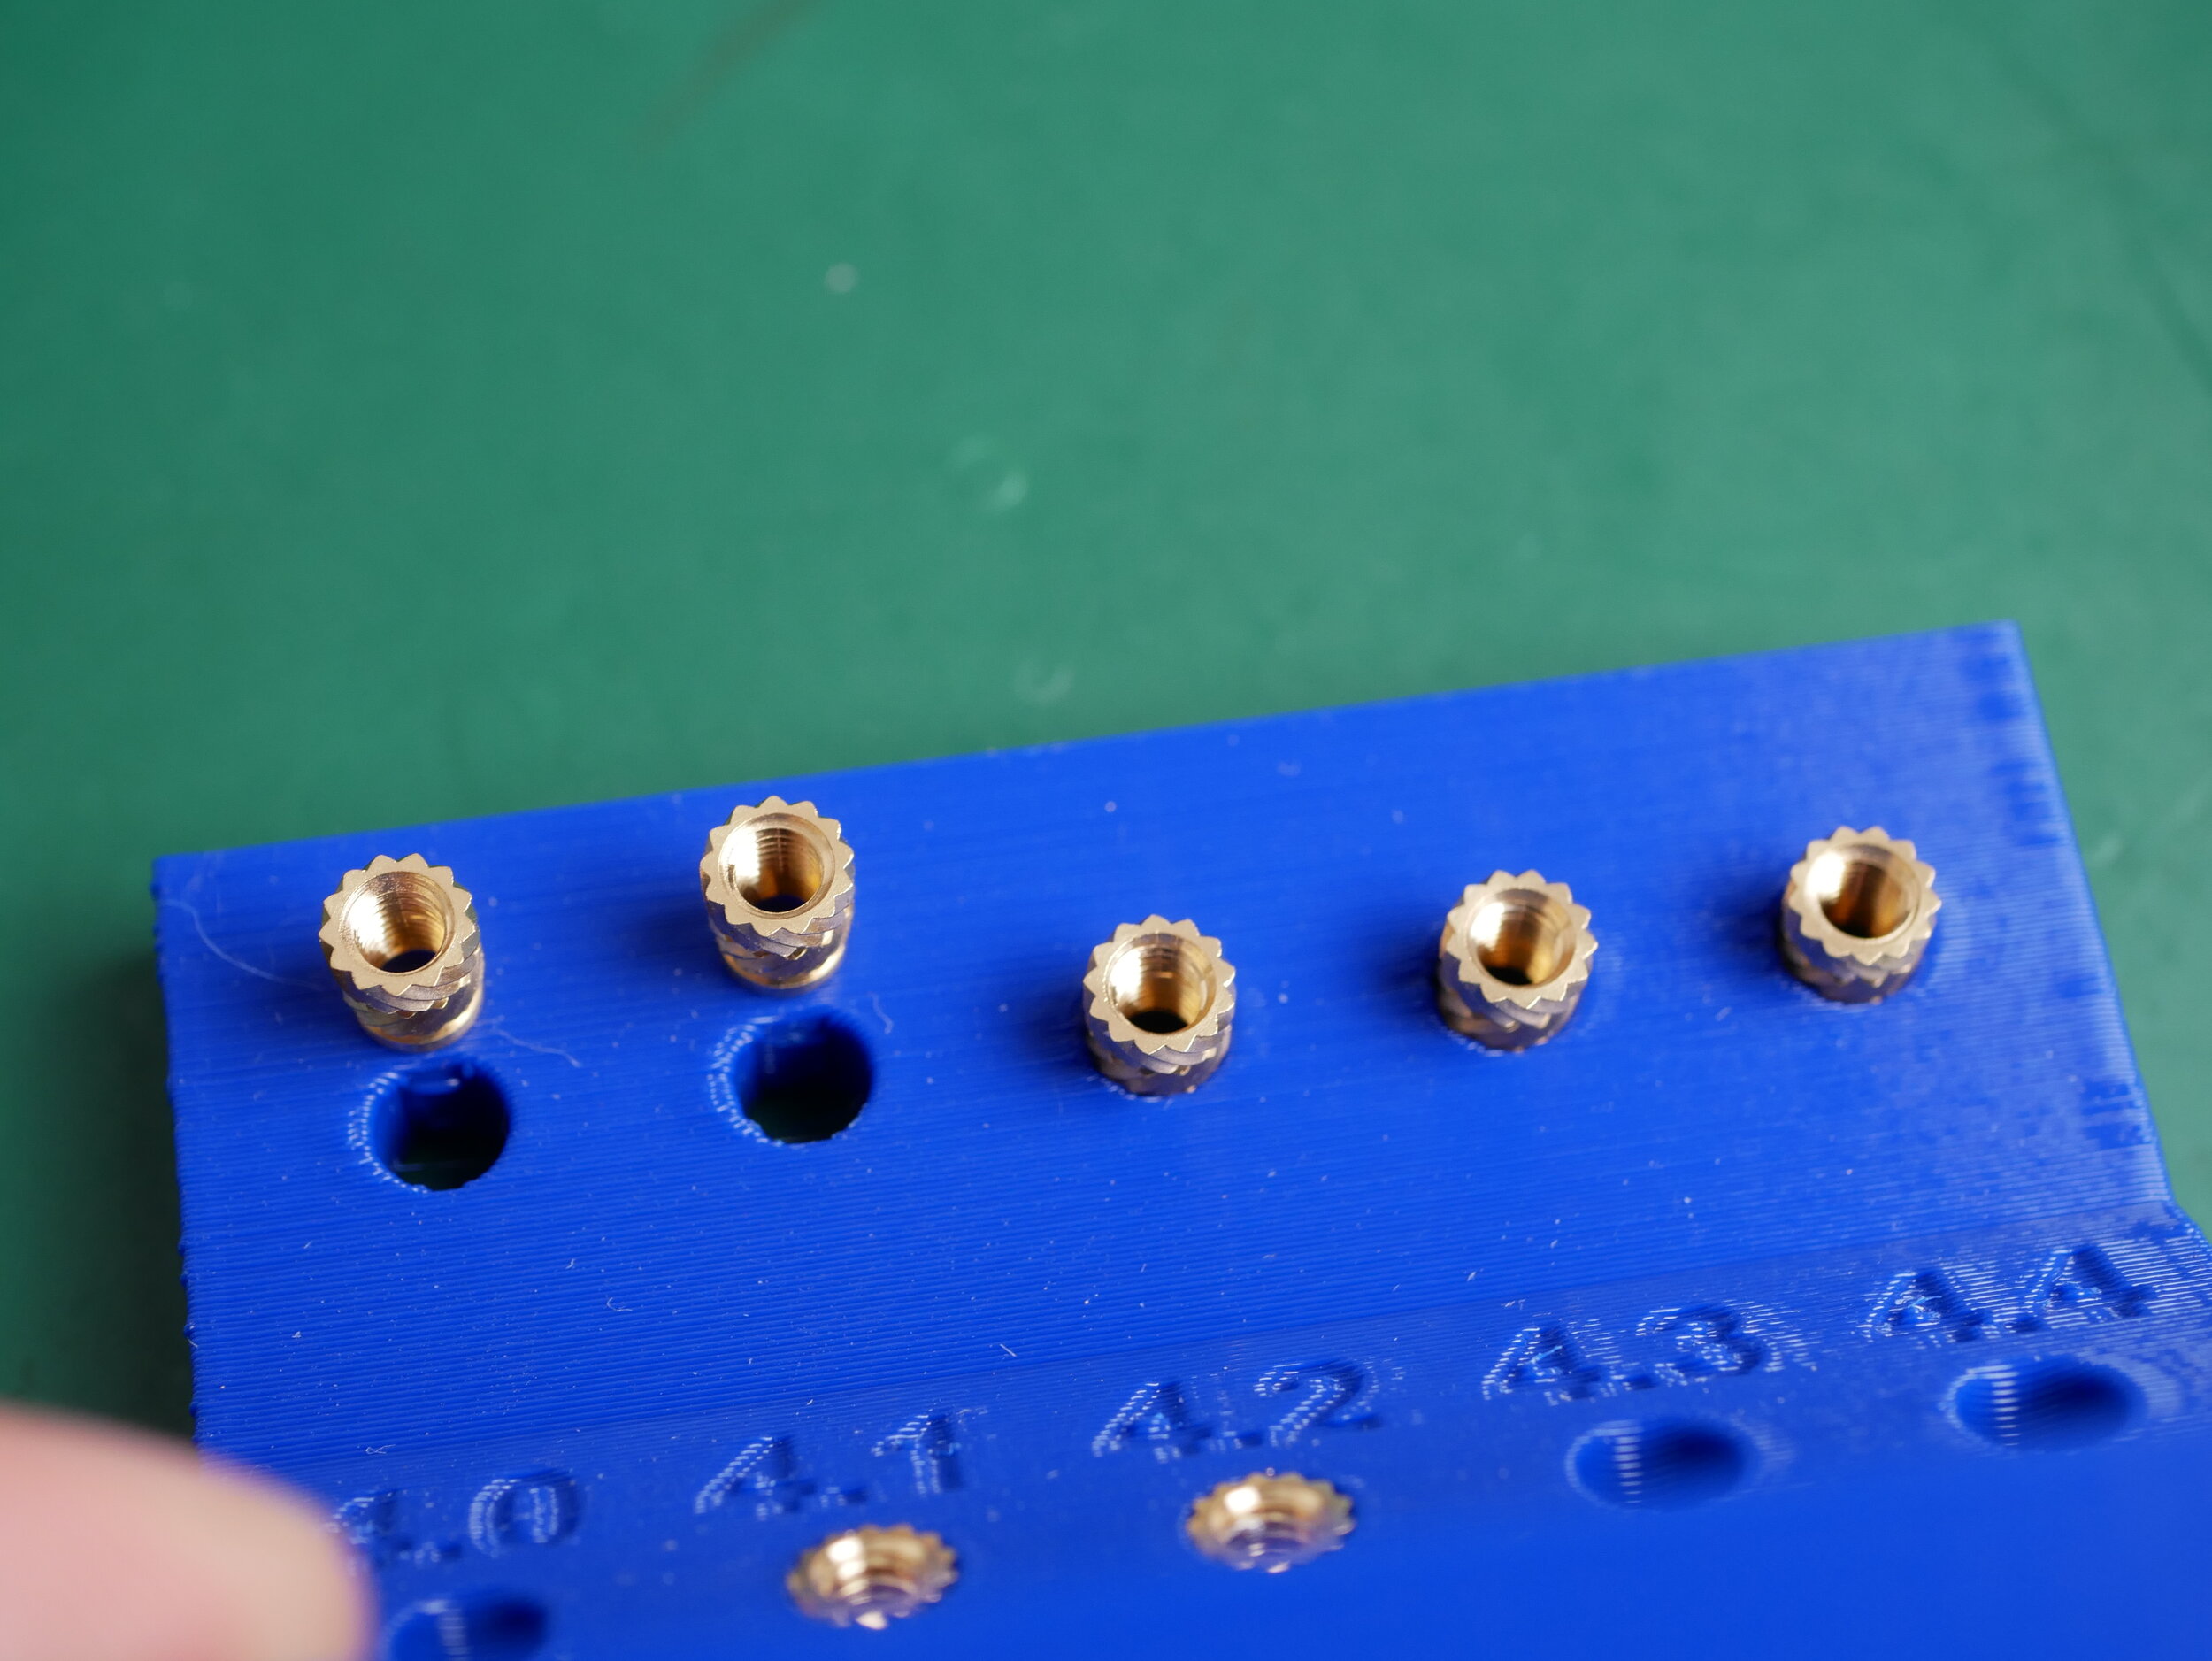
In order to find out which diameters you should design in CAD to optimally melt our inserts into your prints, we came up with test parts. Influencing factors such as the triangulation of your components, the accuracy of your printer, over- and under-extrusion can influence the dimensional accuracy of your components and lead to the installation holes for our inserts being too tight or too loose. To find the optimal setting, print the test parts with the same material and the same settings for wall thickness and infill, that you later want to use.
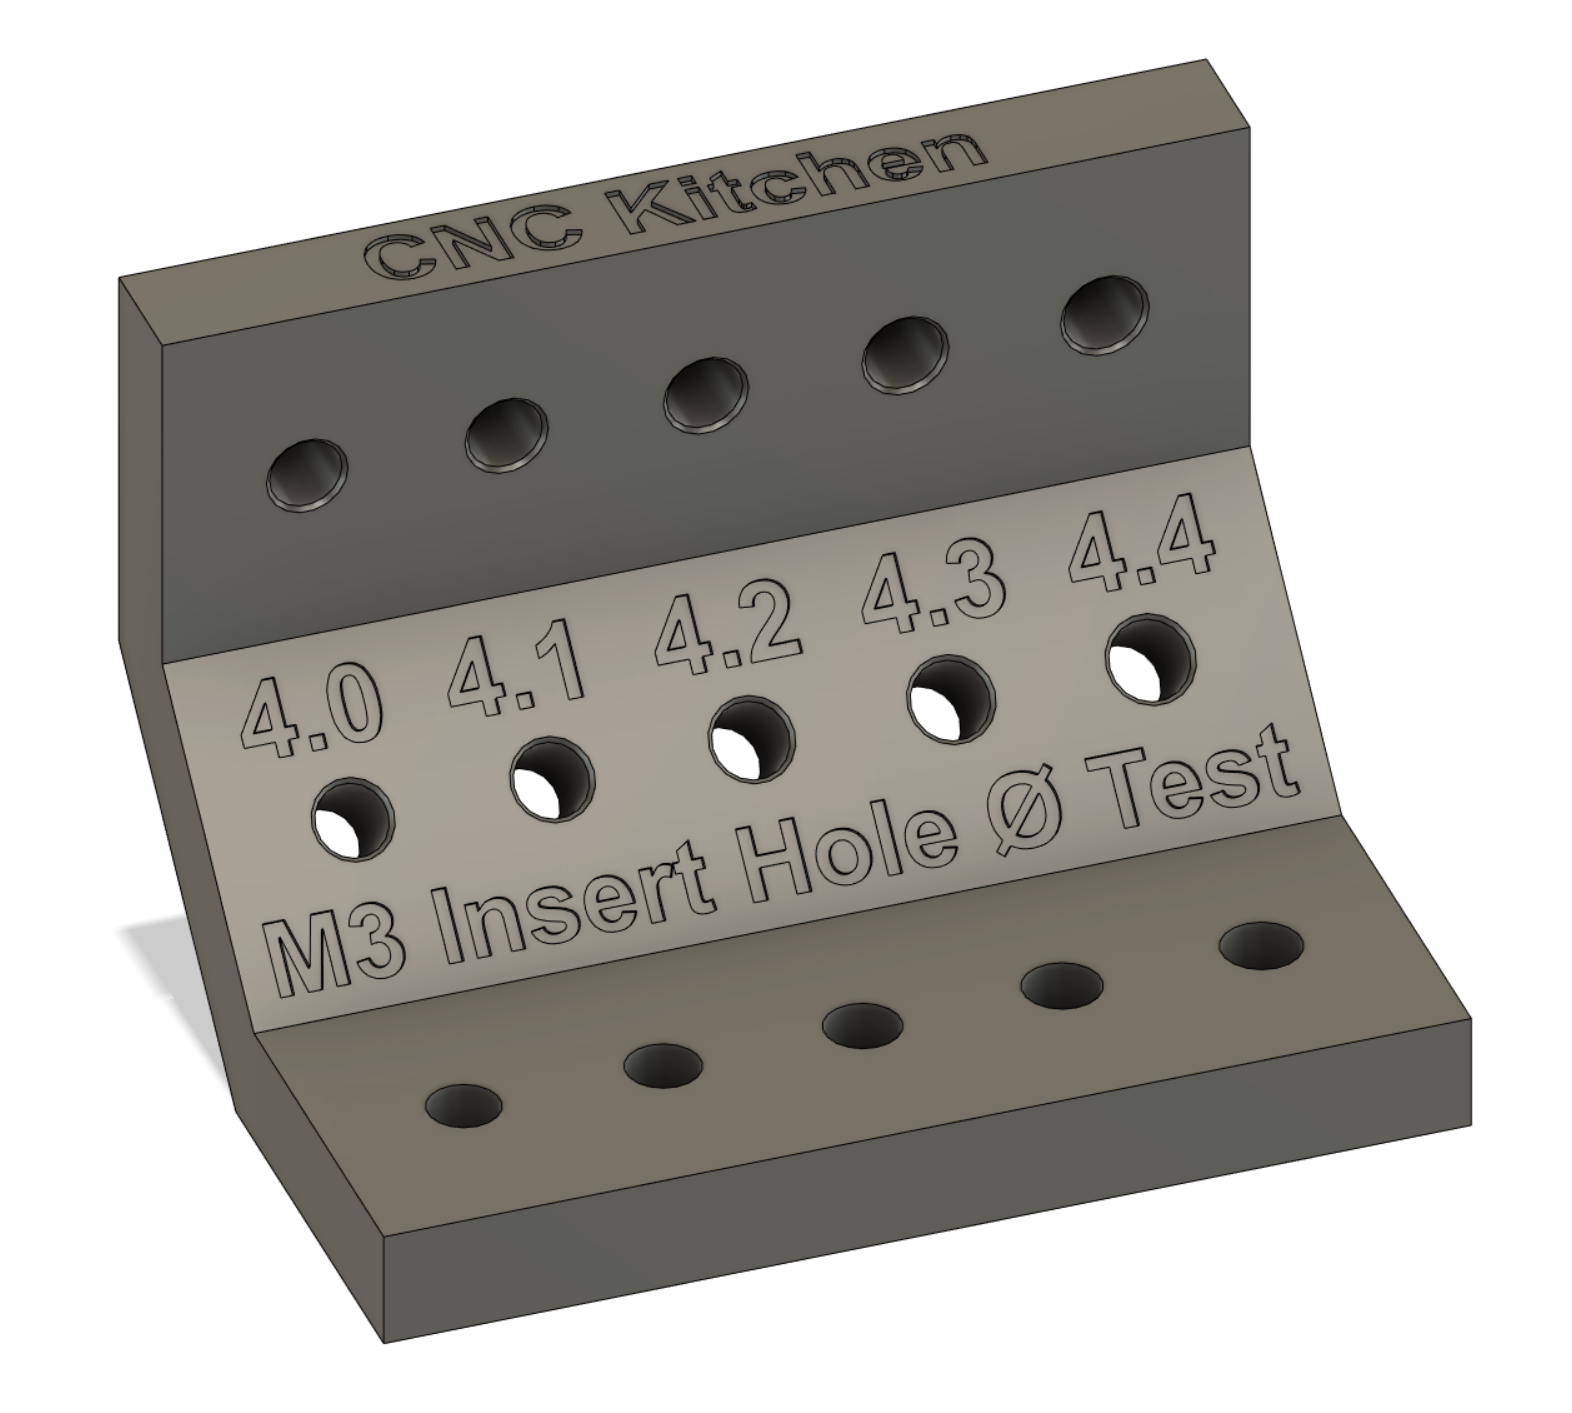
Now go from the smallest to the largest diameter. The hole should be large enough so that you can easily place the insert with the installation tip. Now melt the insert into the part 0and look at the back of the component. If a slight burr has been pushed along, the hole is probably still too small. Melt in the next diameter step and see if the result is better. In the best case, no material is pushed along that could block the screw.

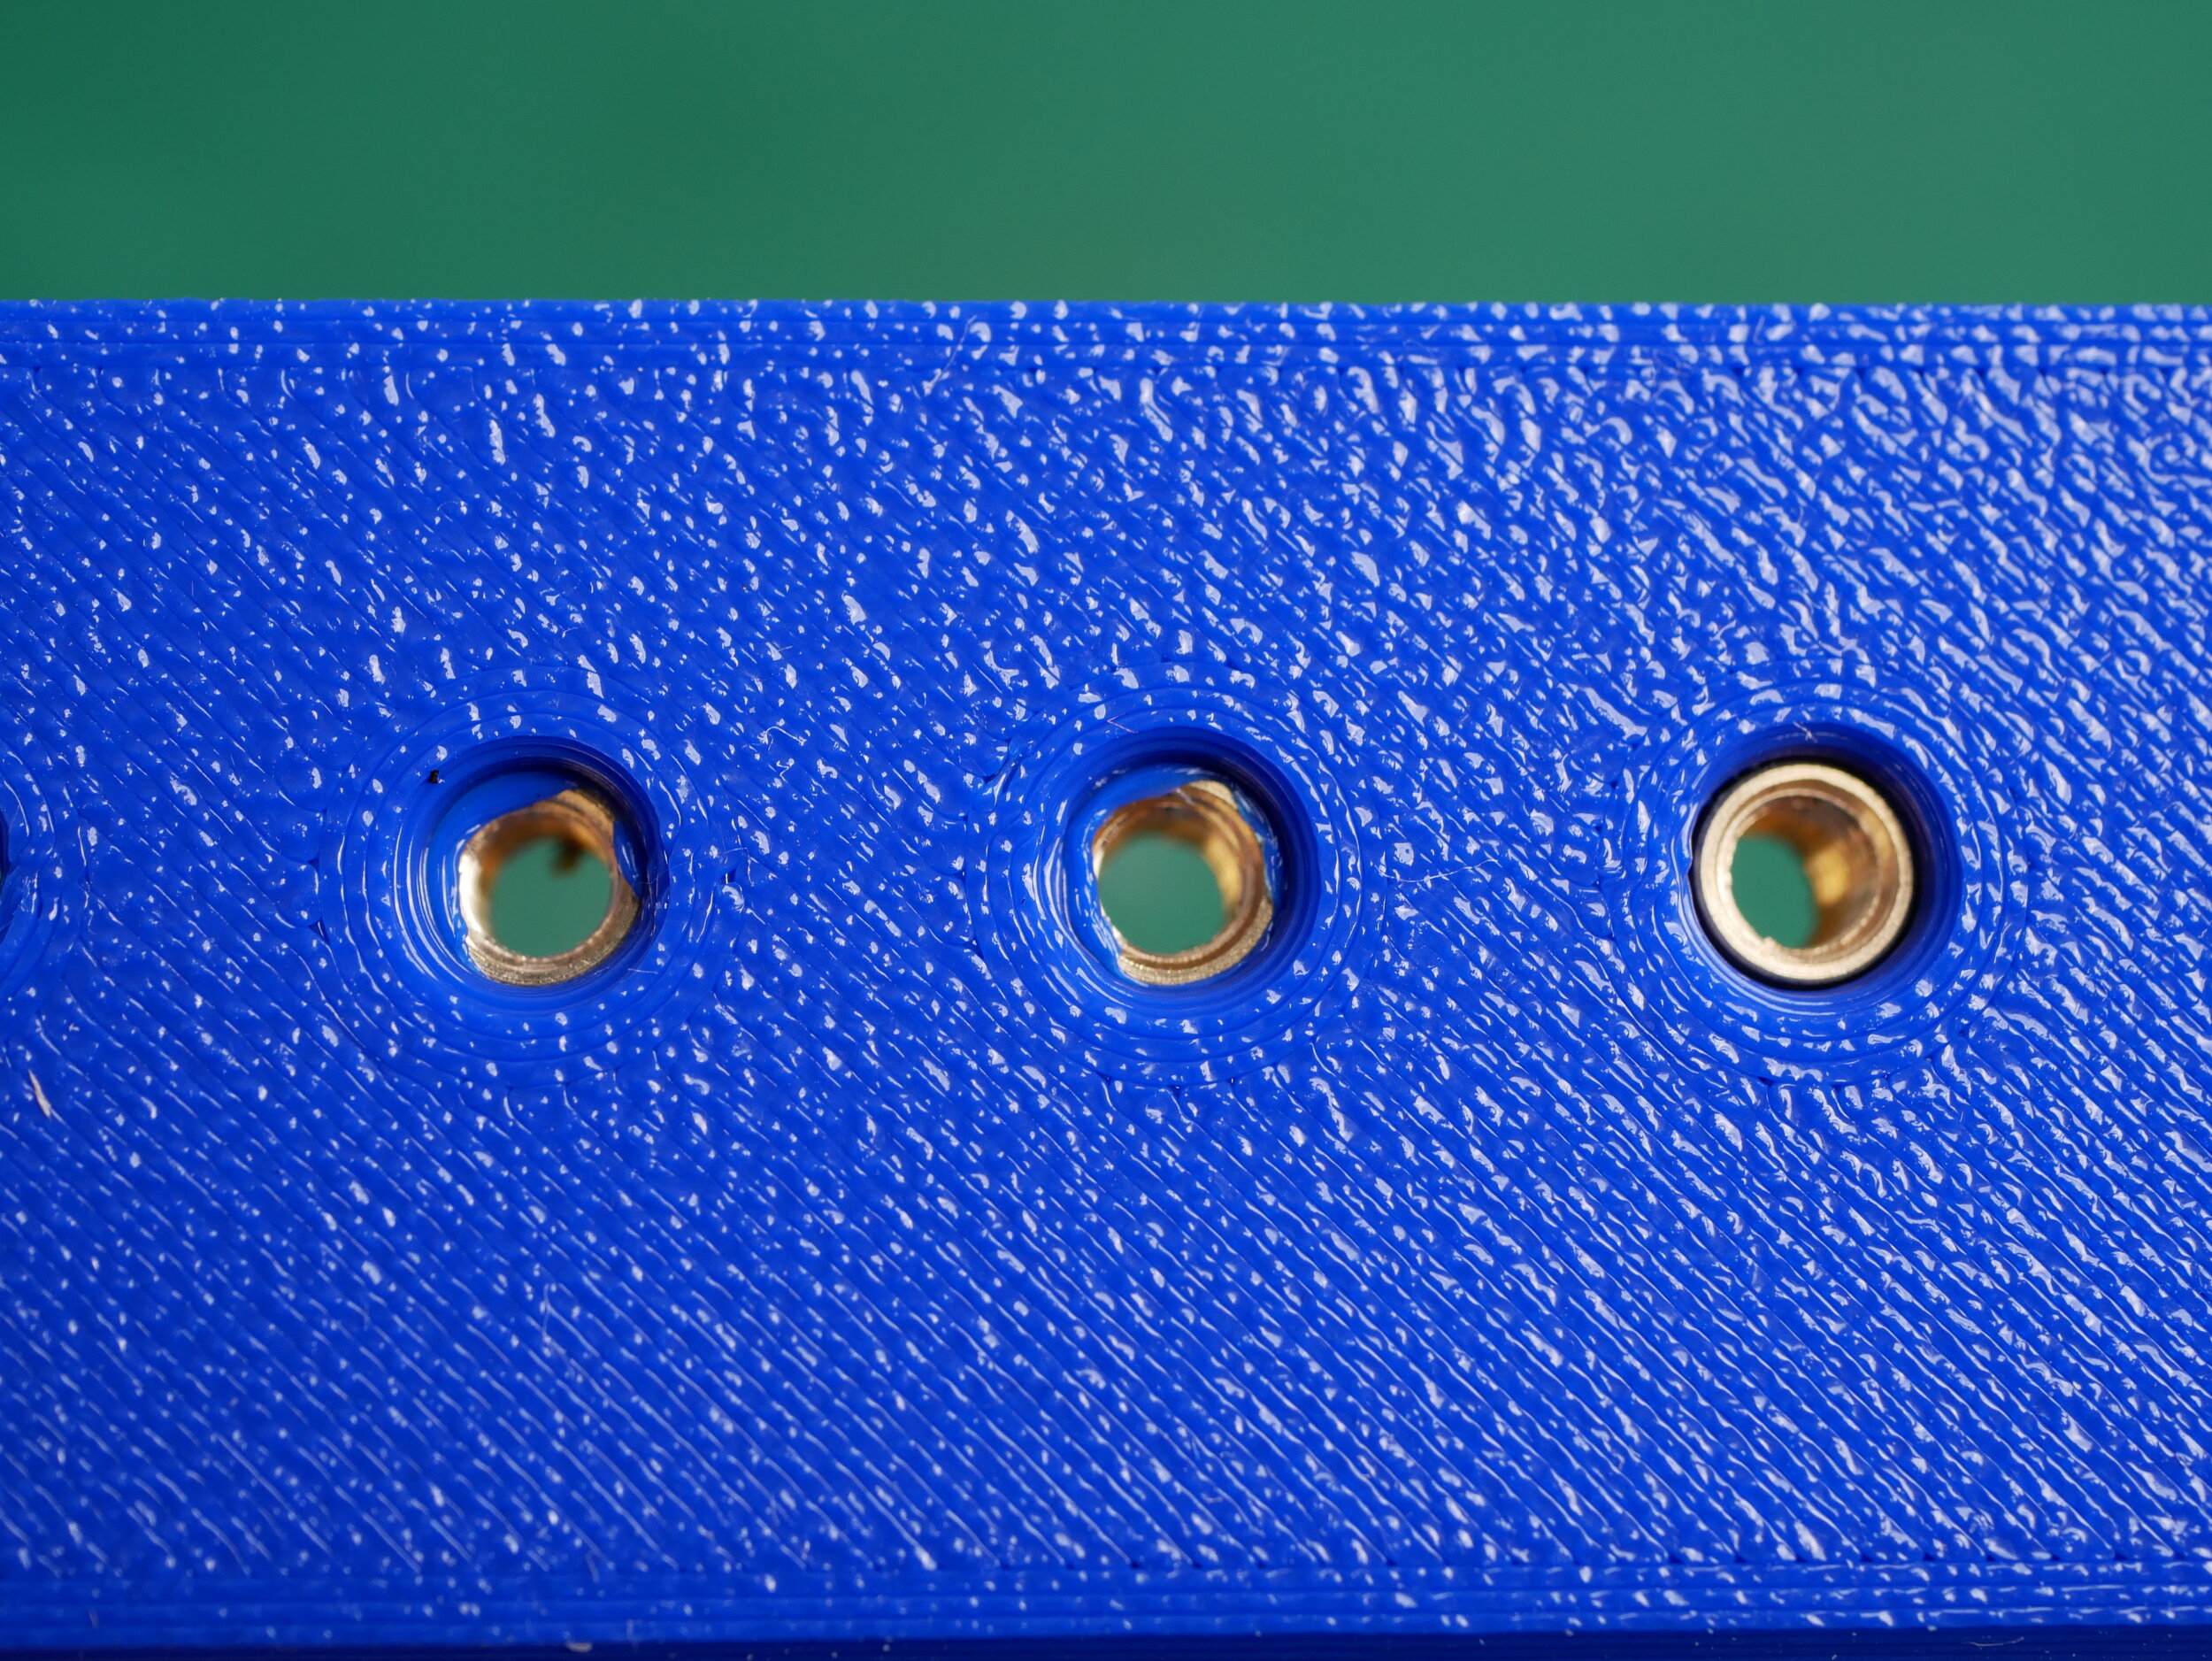
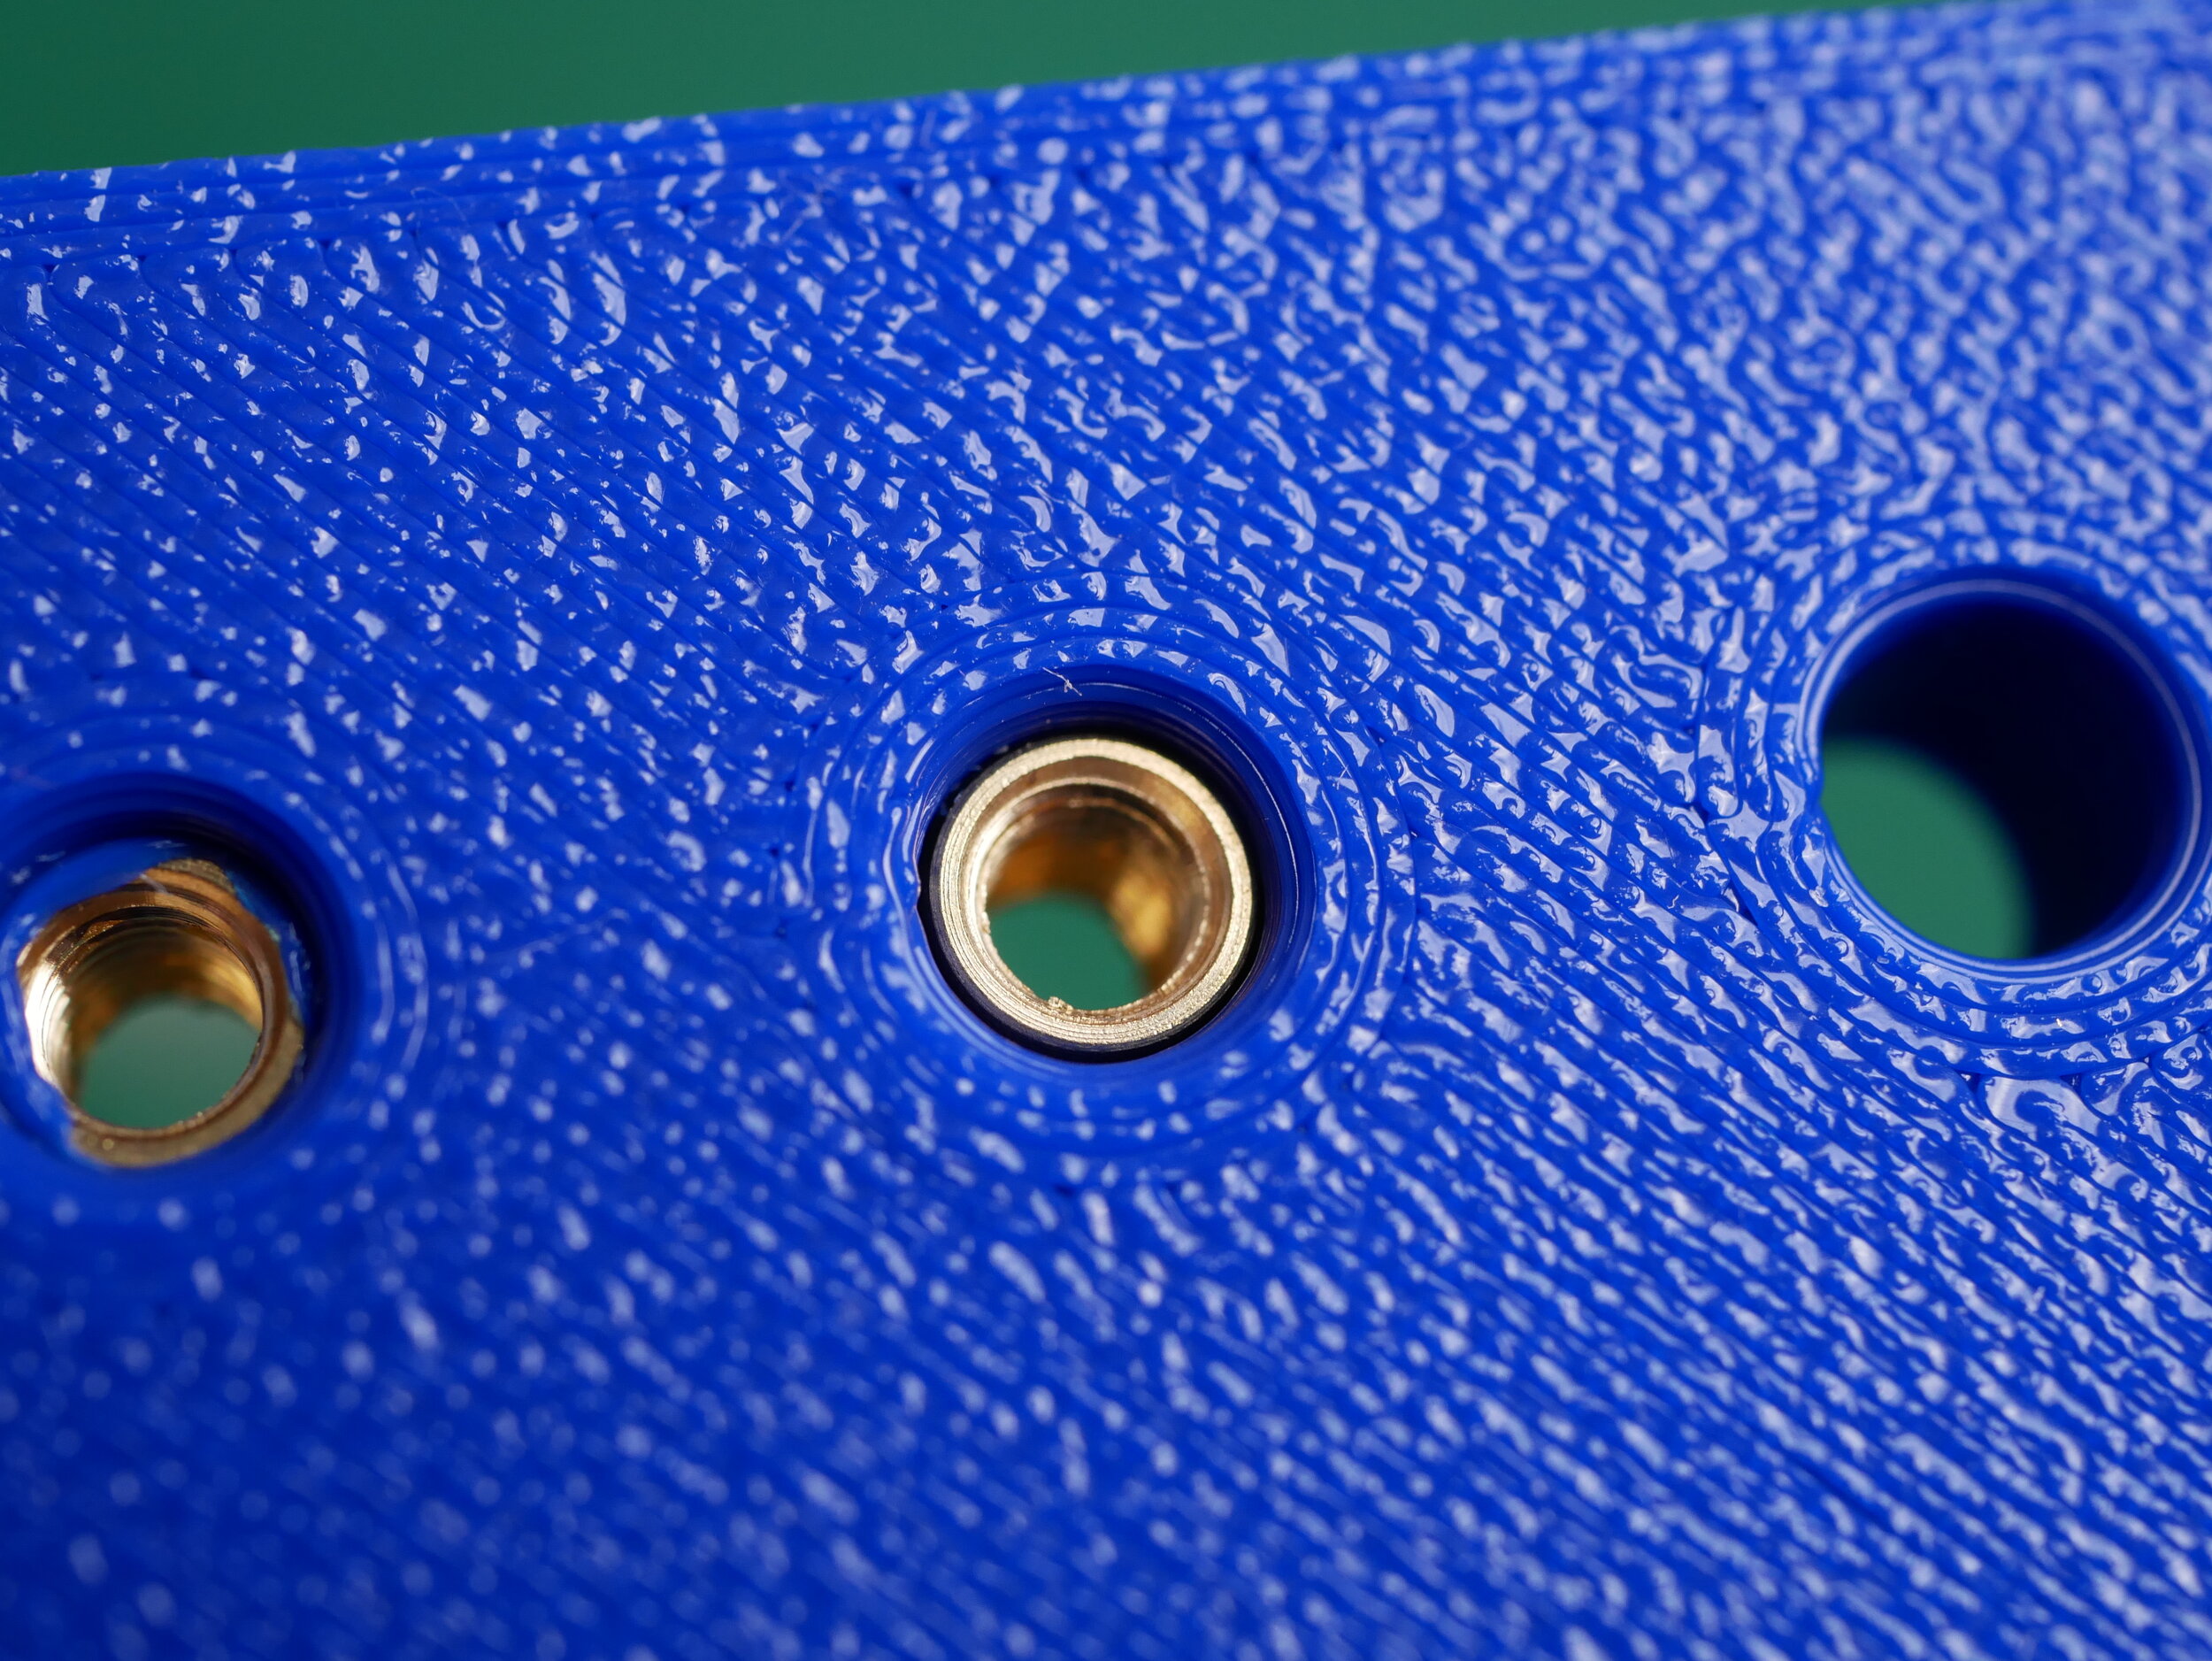


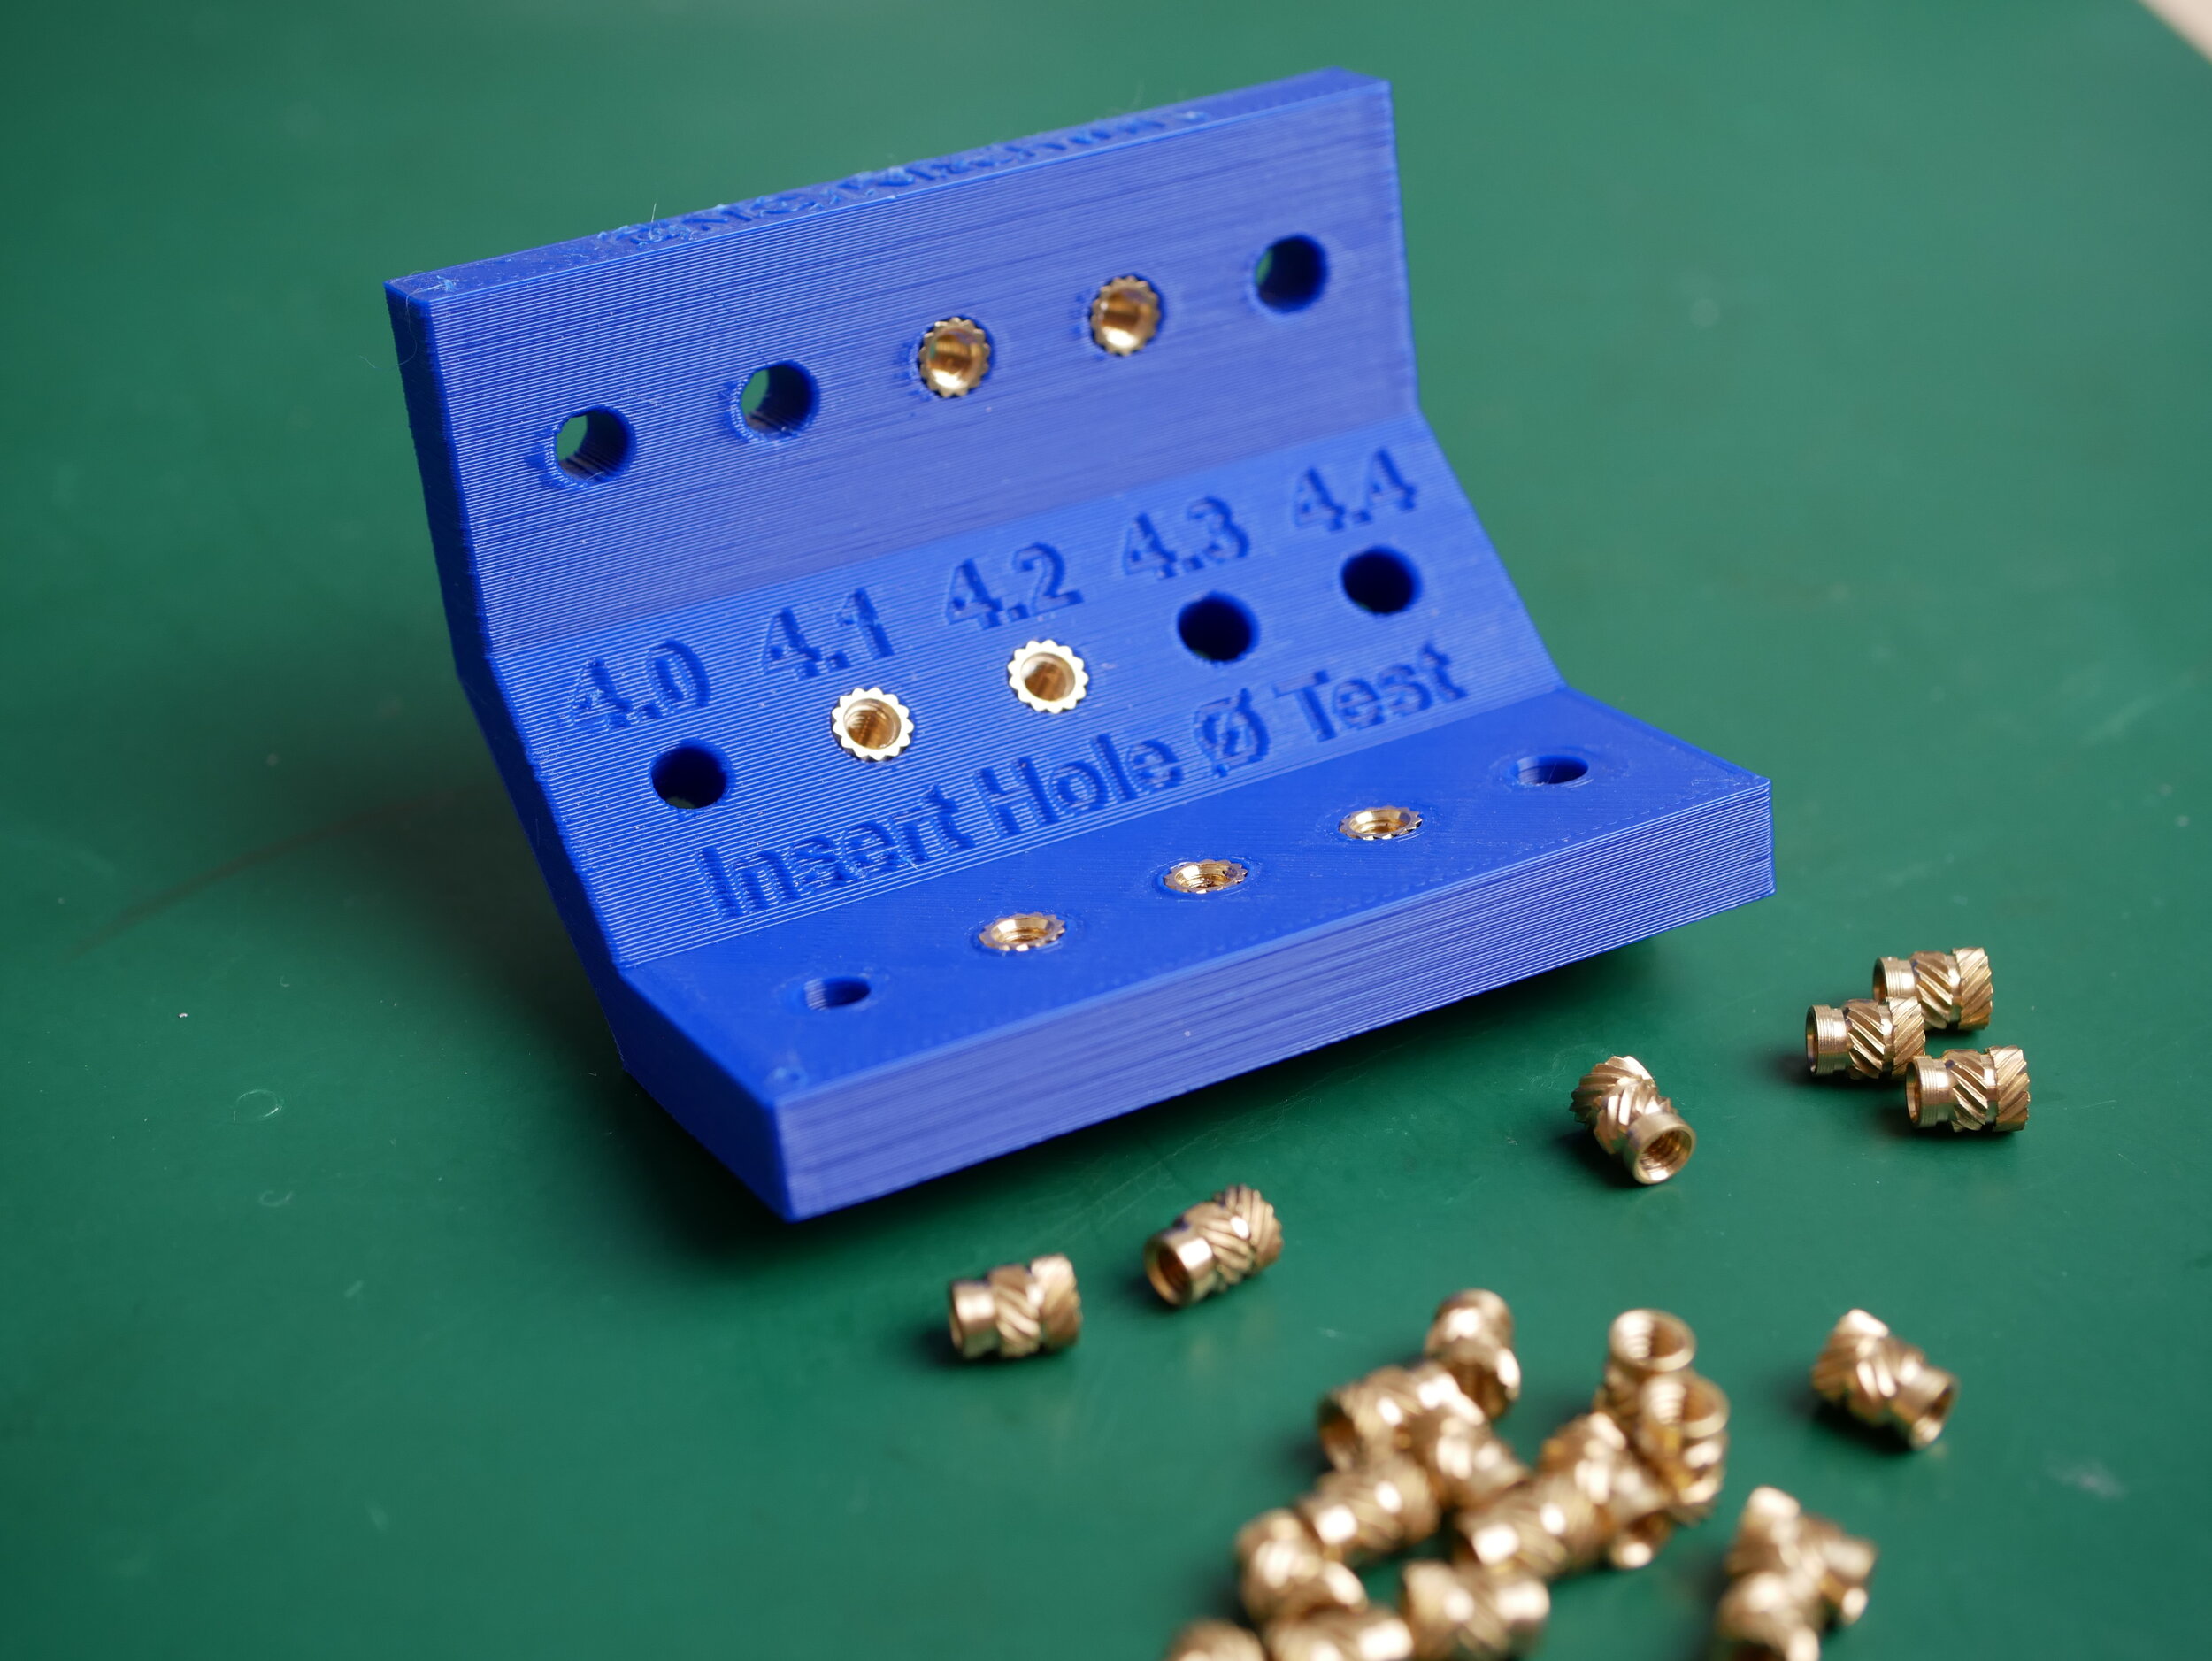
It may happen that you get different optimum diameters for the individual orientations. In particular, it may happen that the upper part of horizontal (on vertical surfaces) holes is slightly smaller due to material hanging down. If this is the case, perhaps optimize your cooling or bridging settings or design such holes with a different diameter in CAD.
Download
Test part for M3
Test part for M4
Test part for M5
🛒Buy CNC Kitchen Heat-Set Inserts🛒
CNCKitchen.store
Global Resellers