GUIDE: Resuming a failed 3D print
Just a quick PSA before we start. If you’re currently reading this because this happened to you only minutes ago, make sure you go back to your printer and keep the bed heated so that your part doesn’t release from it.

I’m quite sure that almost anyone who owns a 3D printer already had a long print fail at some point just because no material somehow got extruded anymore. This is precisely what happened to me a bunch of weeks ago while filming my filament recycling video. I was easily able to continue mine with some simple G-Code trickery and thought this is actually an essential skill I’d like to teach you. Maybe even make a print fail on purpose and try to recover it with these methods before this happens with a precious 3-day print! Let me know in the comments if you ever recovered a failed print and how you were able to do it! My print failed because I had a small piece of metal in my recycled filament that at some point blocked the nozzle. In your case, you could also run out of power, encounter heat creep, have a knot in your filament, or even run out of filament without a material sensor.
The highest priority is that you keep your print attached to the print bed, and if you have a removable print sheet, then also don’t move it in any way because otherwise, we won’t be able to resume the print at the correct location.
Fallback Solution: Only re-print missing parts
If your model is already loose or you’re not able to recover your print like I’ll show you, there is still the possibility to measure the height you were able to print, enter your slicer of choice, cut off as much of the part as you’ve already printed, or just move it in the z-direction by that amount.
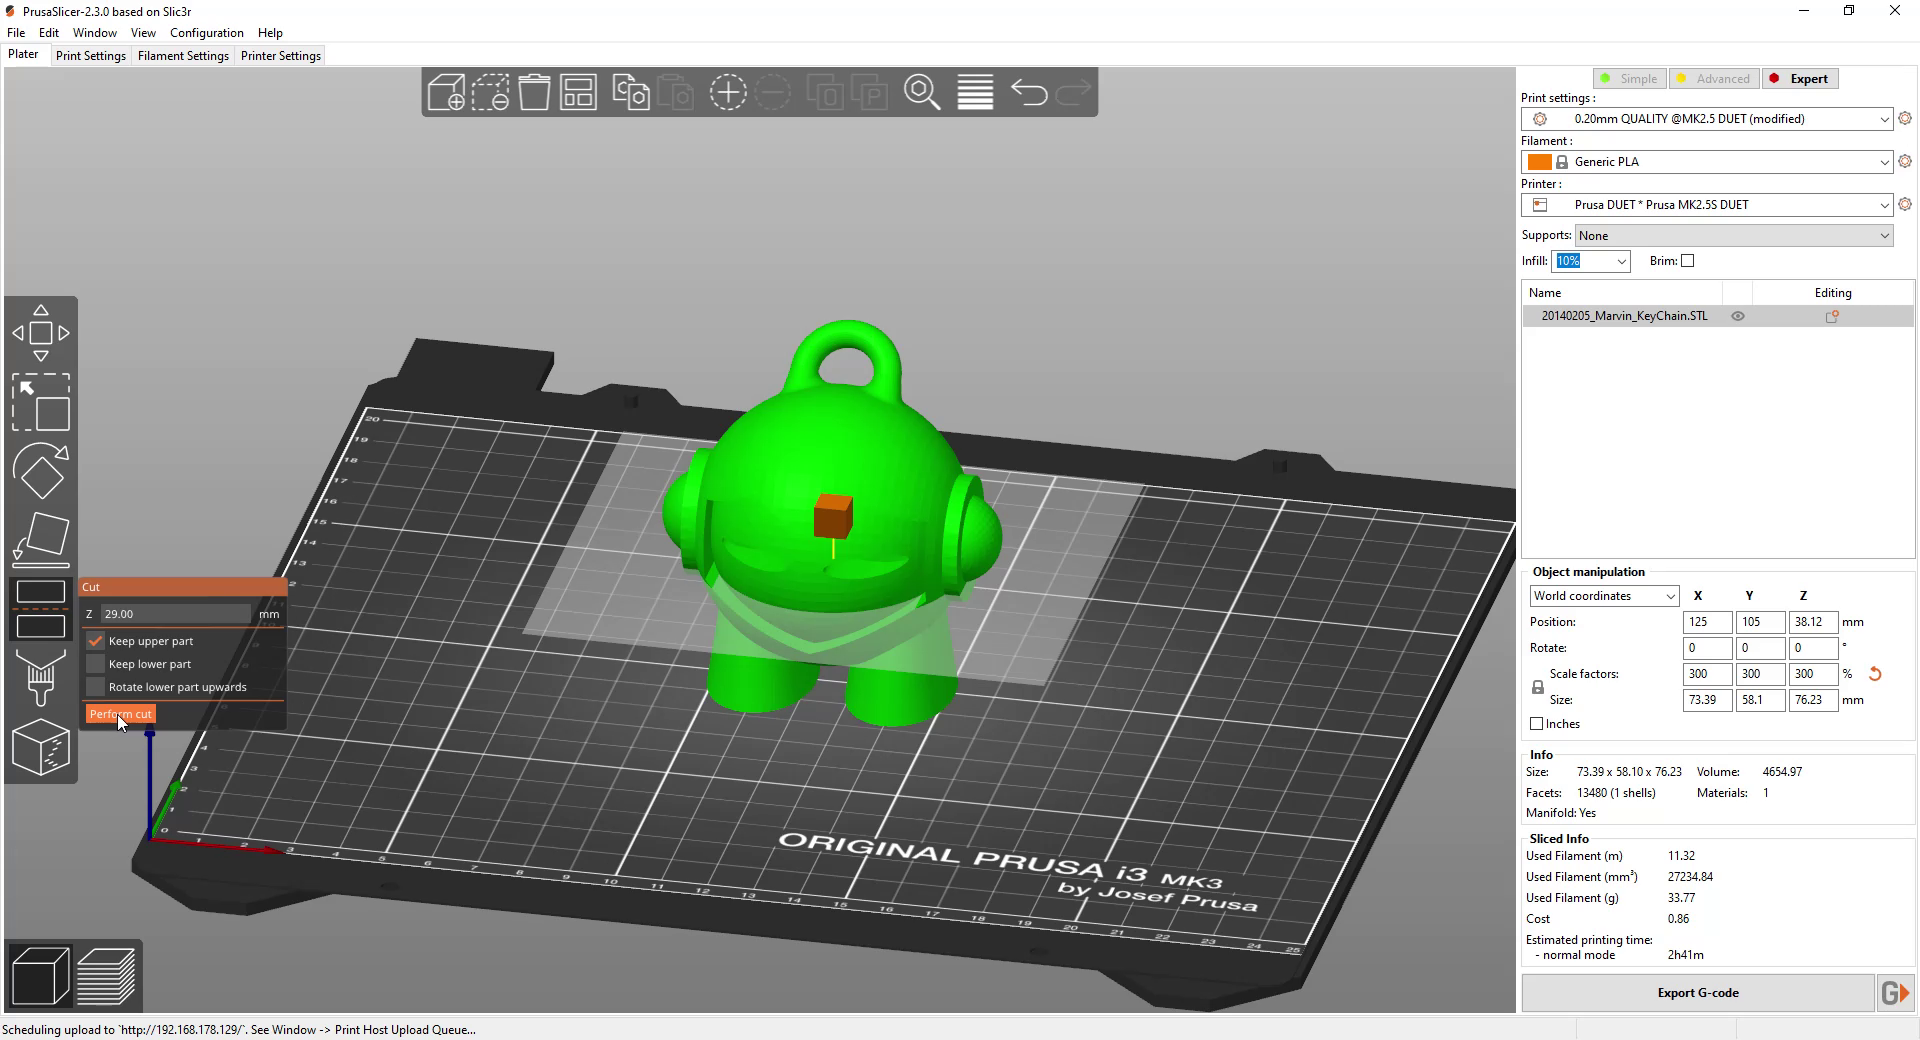
Sectioning an STL in PrusaSlicer
Print the parts you’re still missing and just glue everything together. Done!
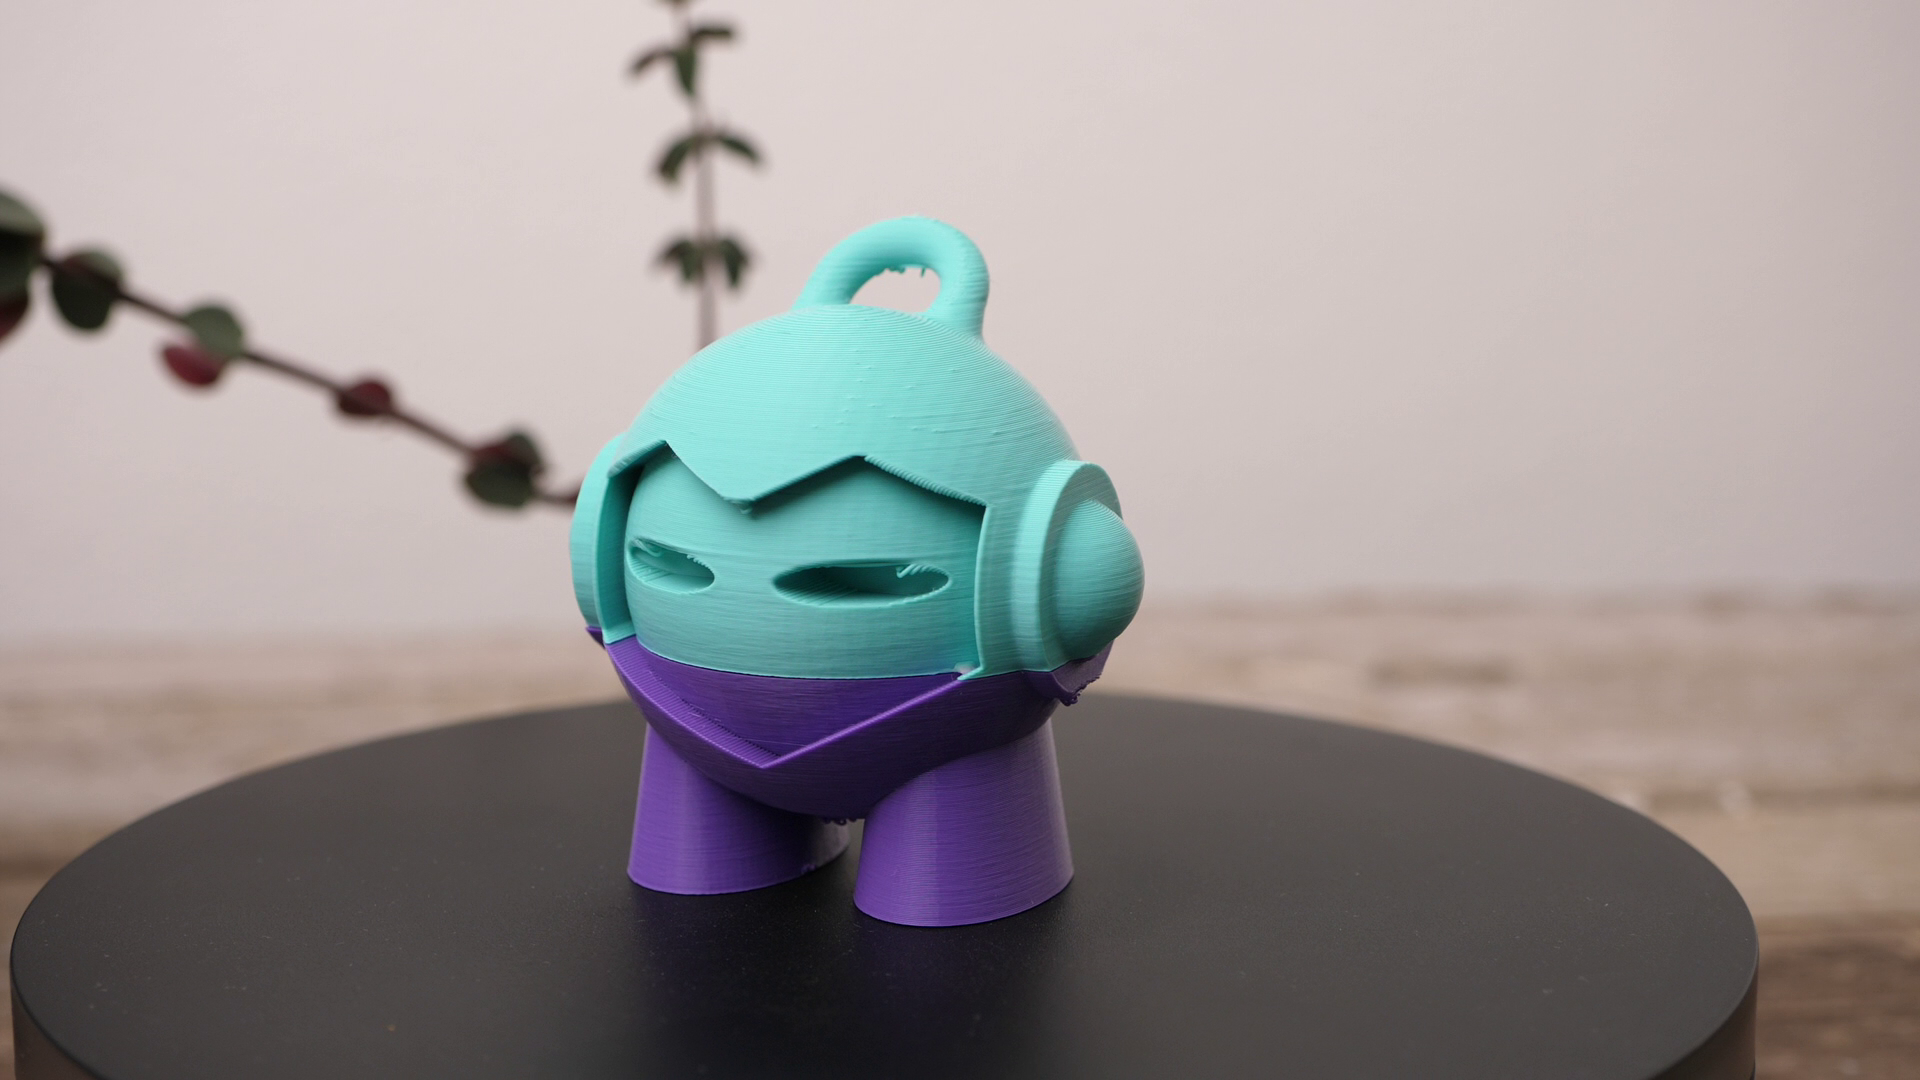
Final 3D print, glued together from two halfs
Option 1: All axes can be homed
If your part is still attached to the bed, there is a good chance that you can recover your 3D print with a bunch of simple steps.
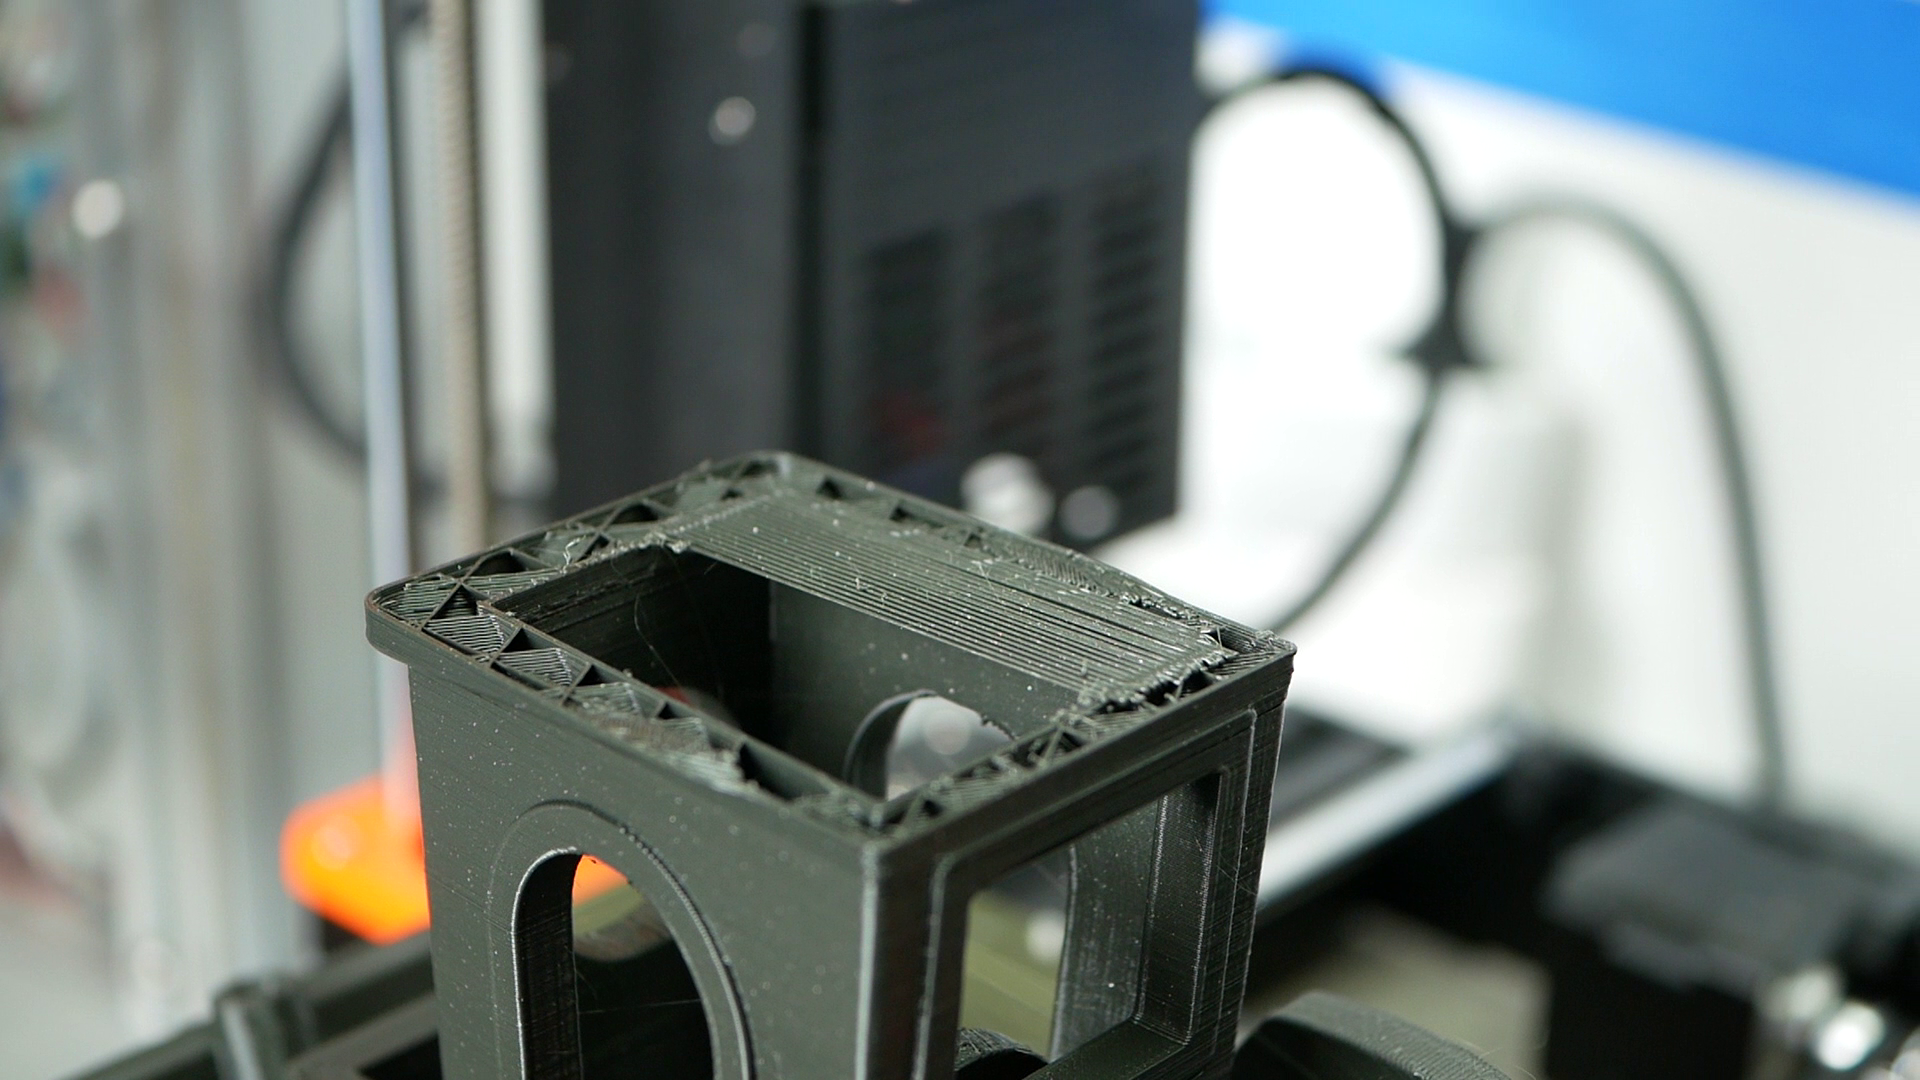
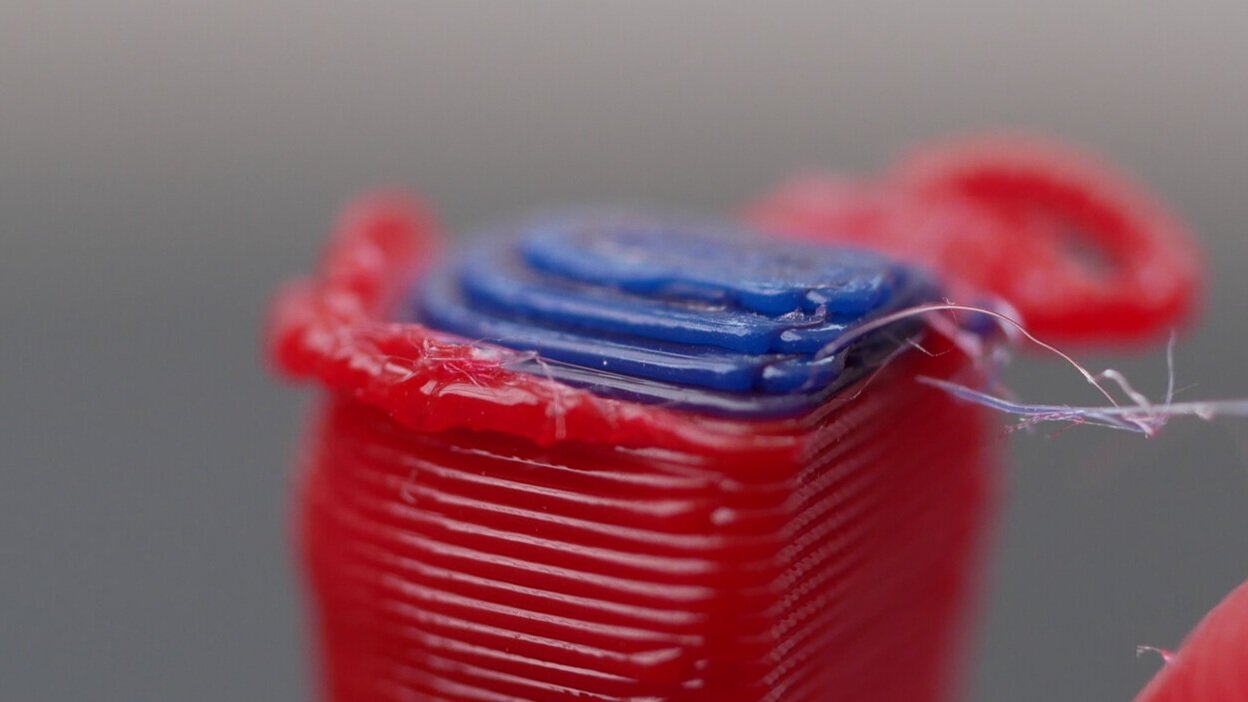
Step 1: Clean the last layer
First, remove all the zits and leftover material on the layer that wasn’t correctly printed anymore. We need a clean and even surface to start with.
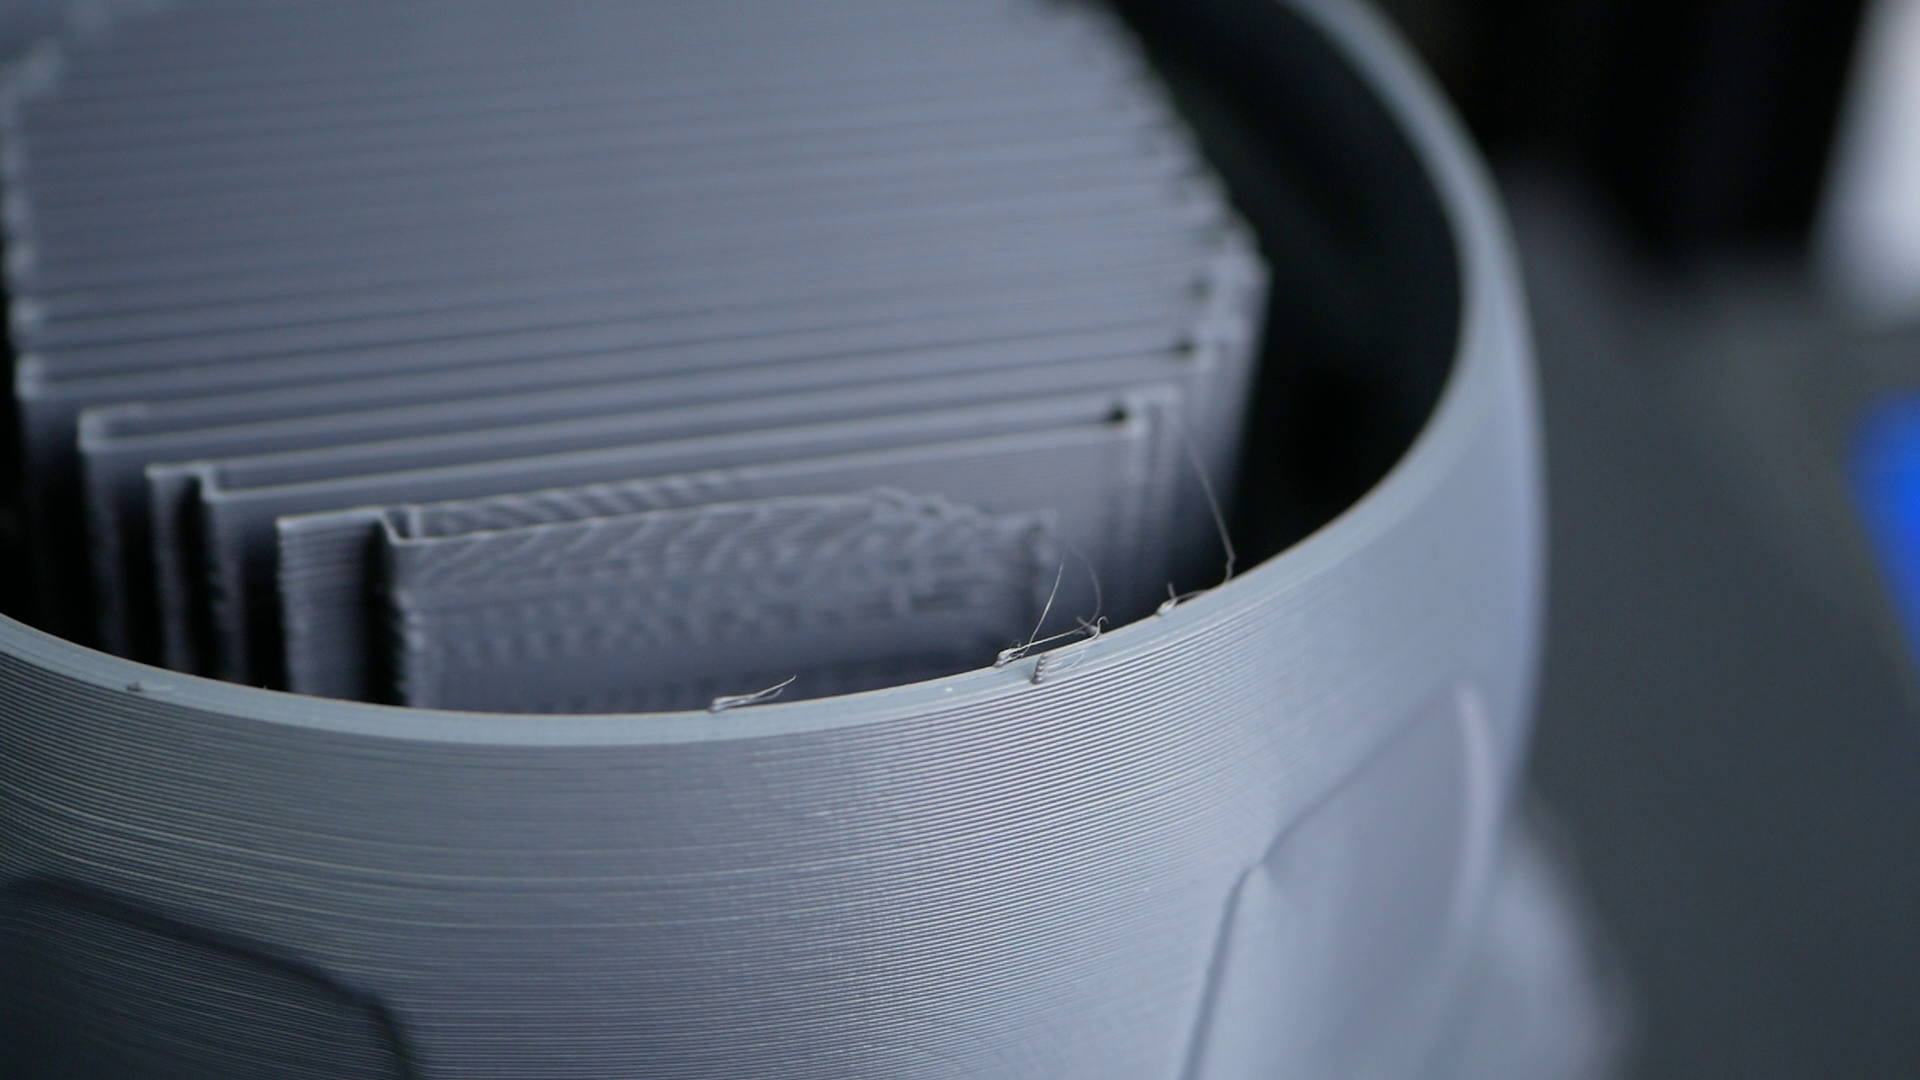
Small material leftovers, when the print failed
Step 2: Measure the failure height
Next comes the most important step, and that’s measuring the height of your part so we can determine where we need to resume printing. I tend to use three methods for that.
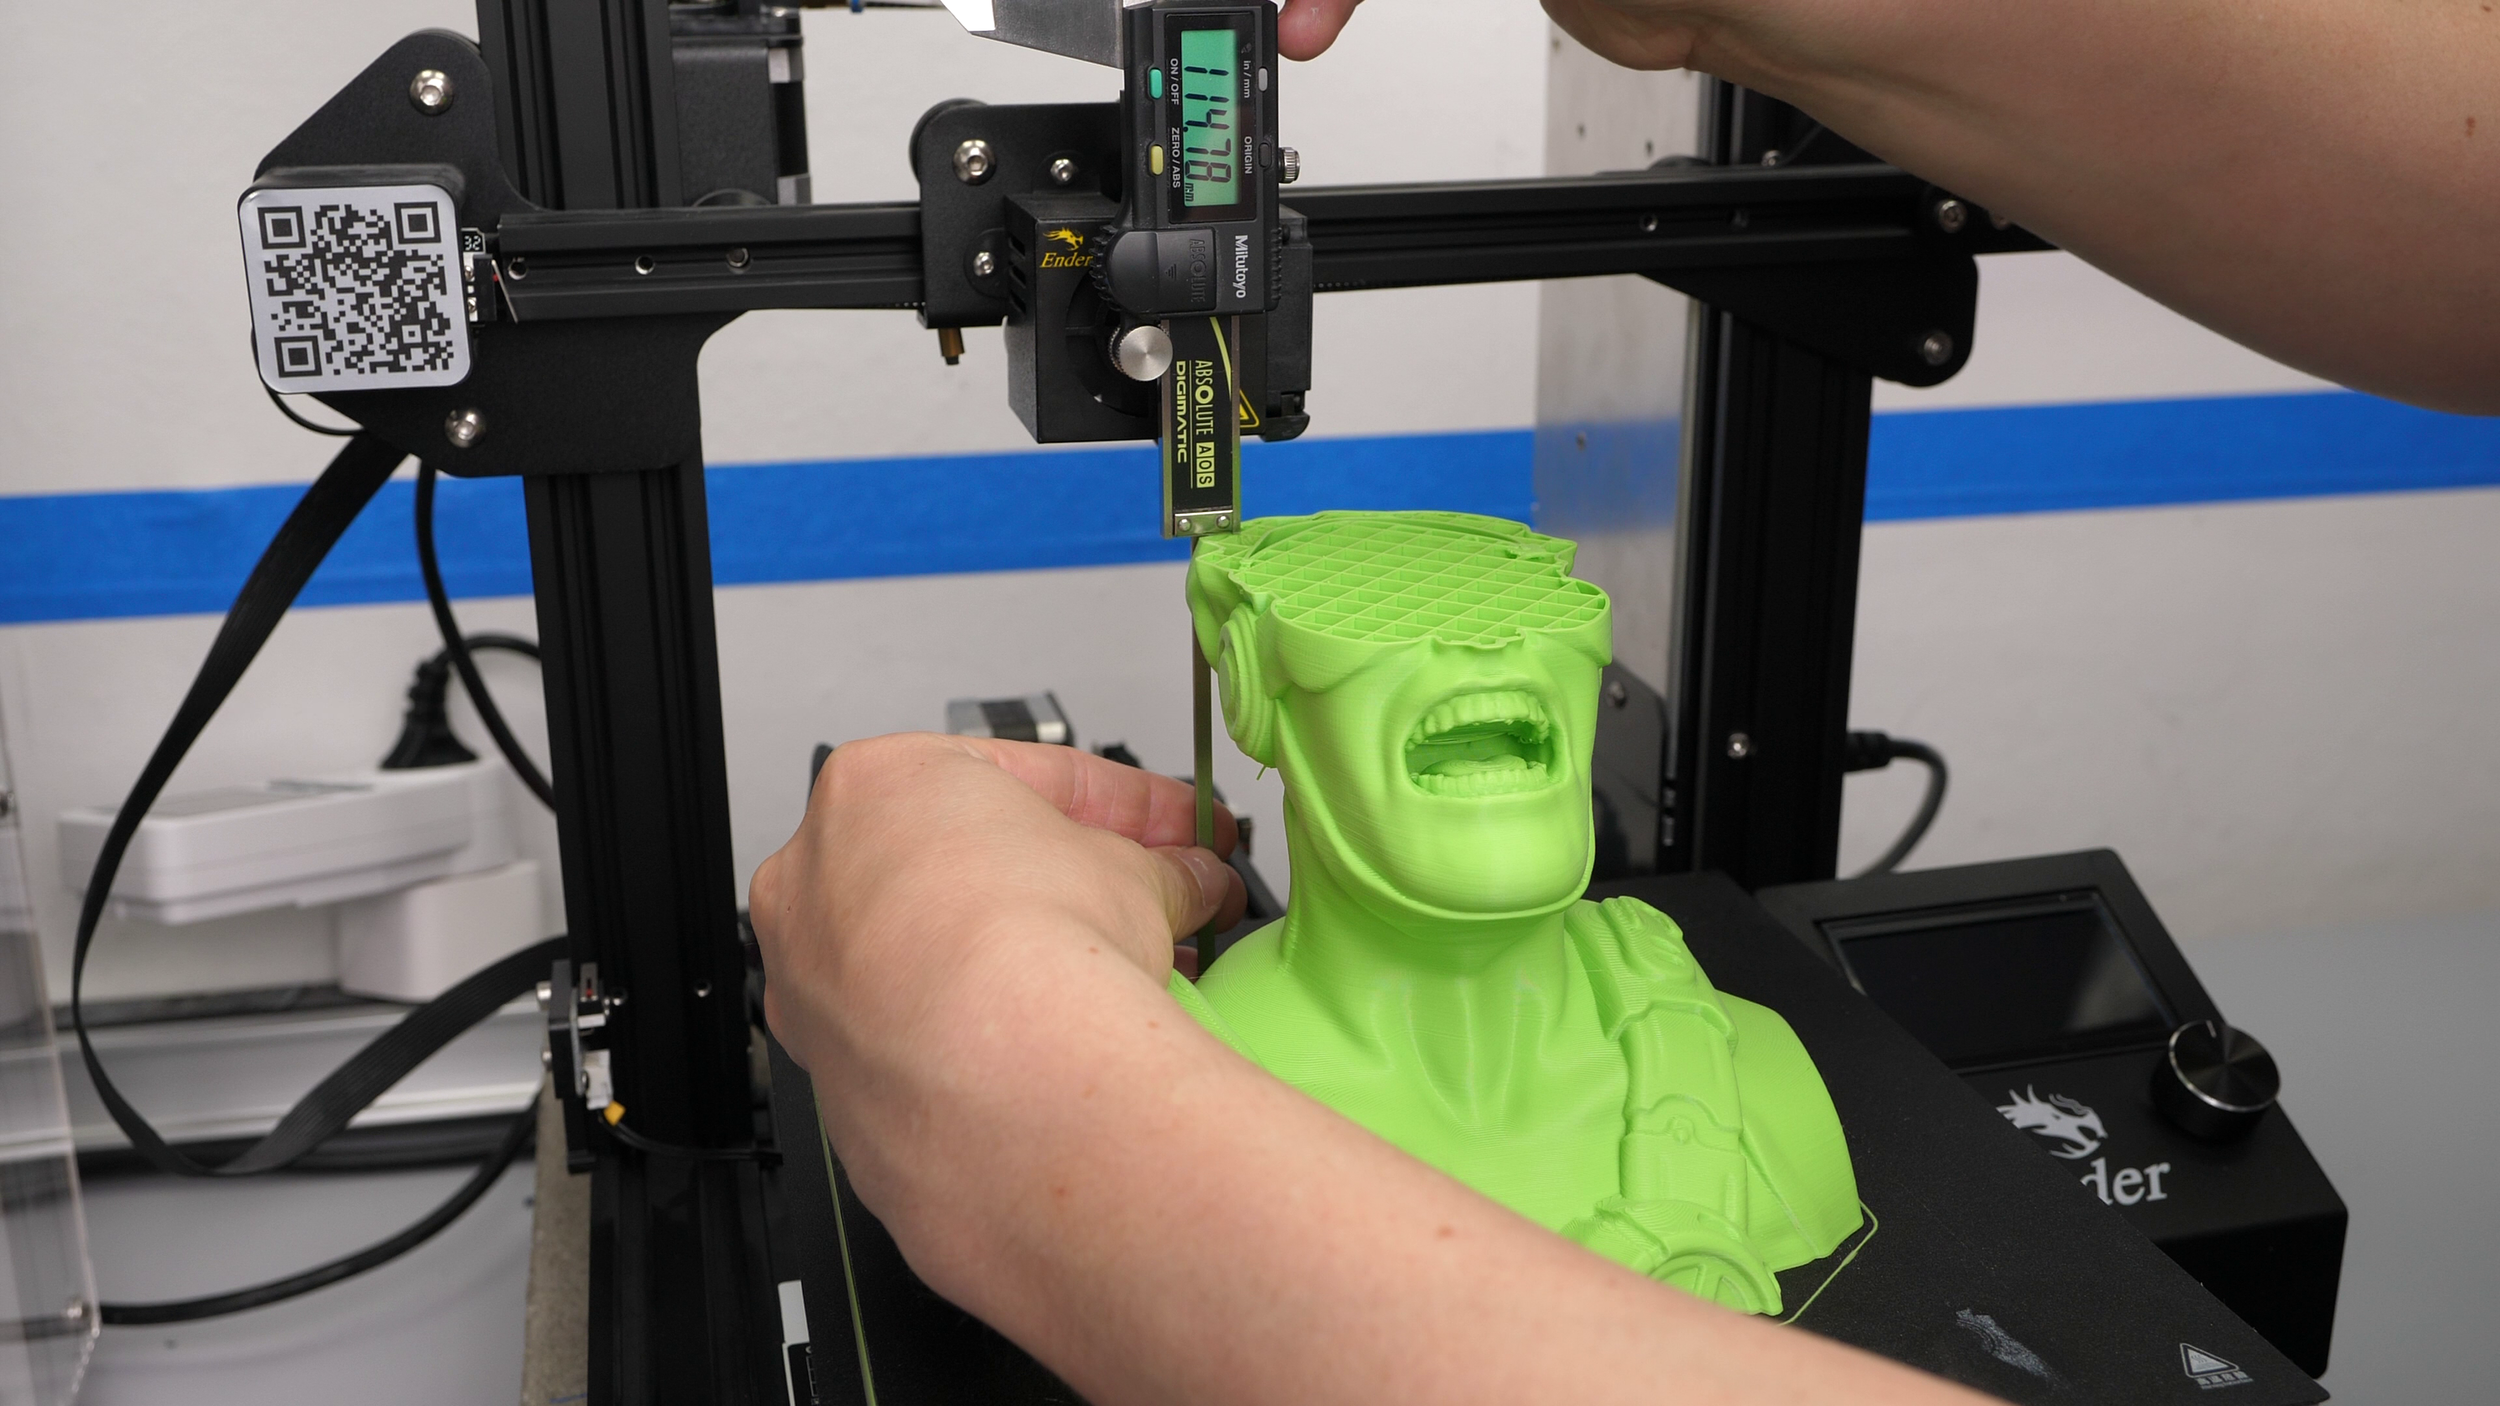
Step 2a: Use calipers or a ruler
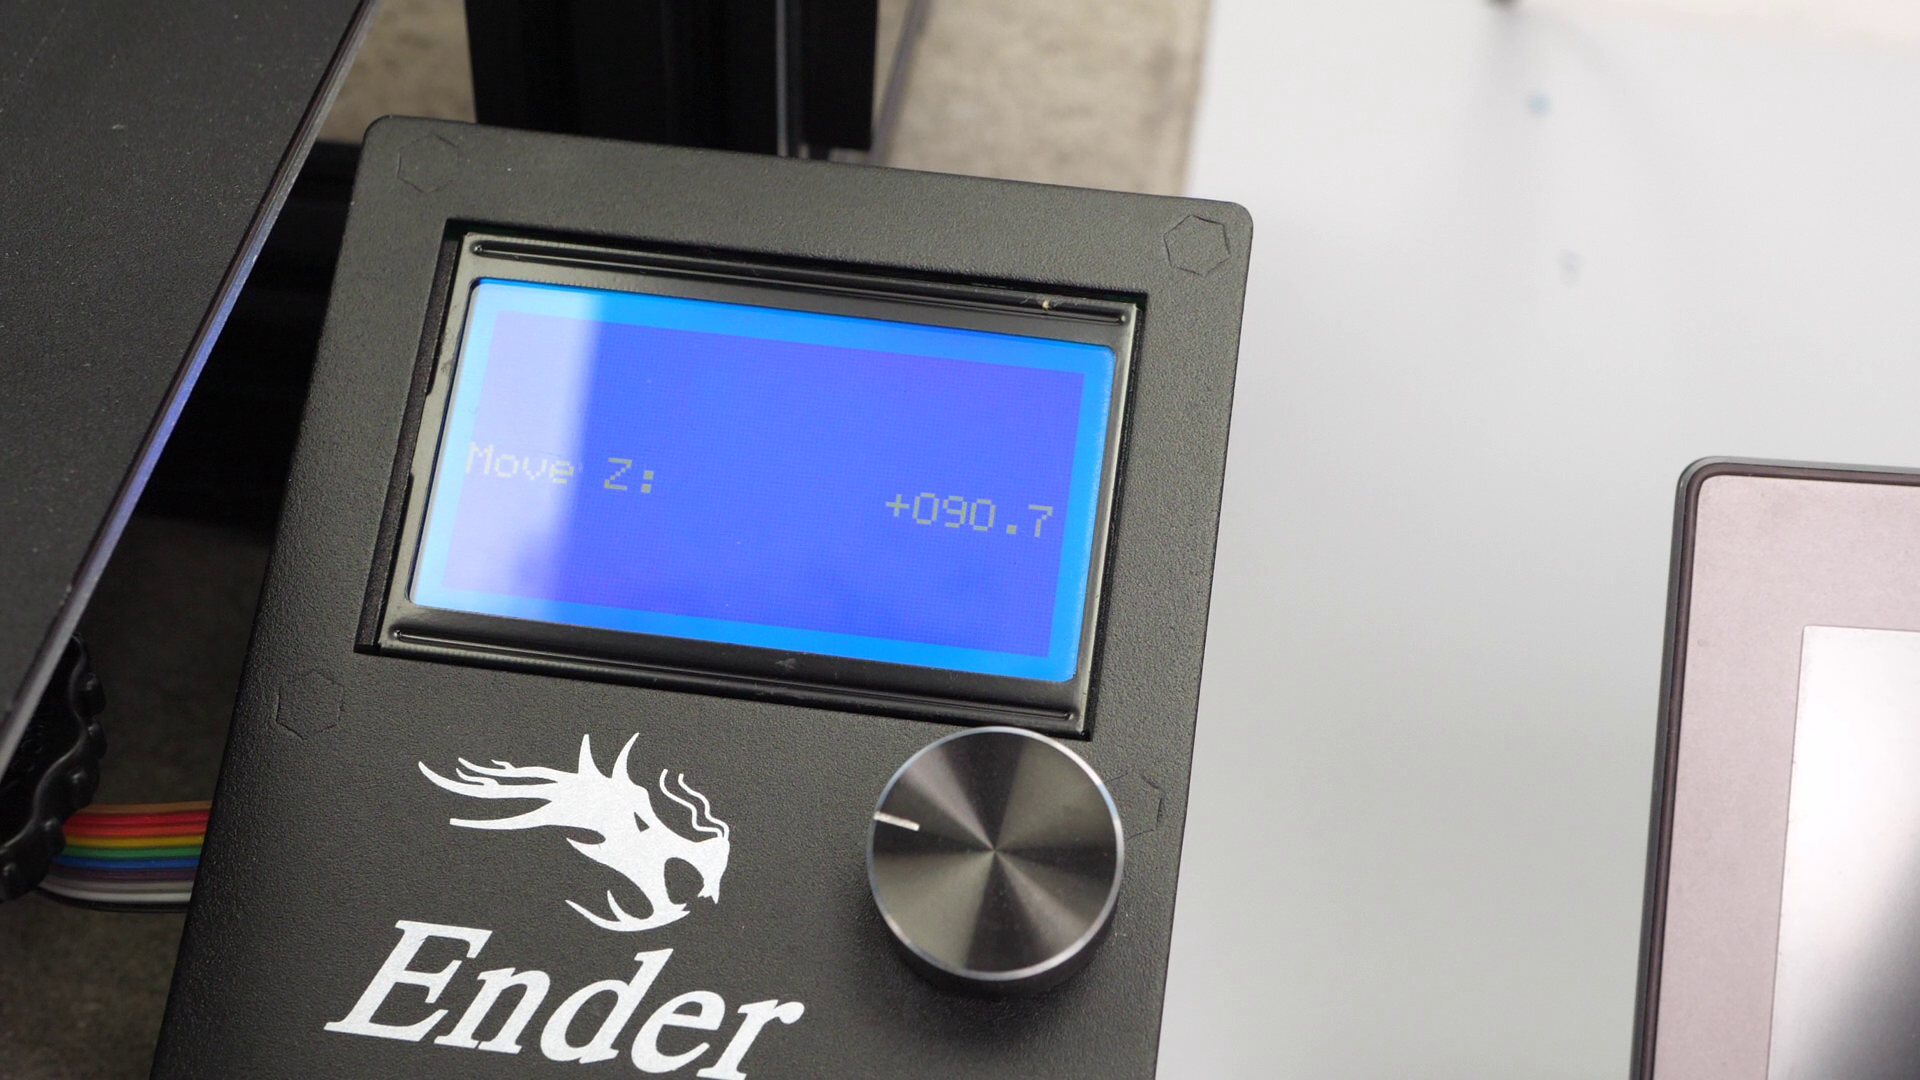
If your part allows it and you have long enough calipers, simply measure the height with them. Make sure to measure perpendicular and all the way down to the bed, so not only onto the brim. If you don’t have suitable calipers, you can also try to use a ruler, which might be precise enough for your purpose. Make sure to measure more than one point on your part to avoid measuring errors. On my sample, I measured 90.7 mm.

Step 2b: Determine height from geometrical features
Another very simple yet precise way is to use the geometrical features of your print. For that, you need to open the G-code you used for printing in a G-Code-Viewer. CURA and many other slicers allow you to do that, though I tend to use the G-code Viewer that comes with PrusaSlicer that also works well with G-code from many other slicers.
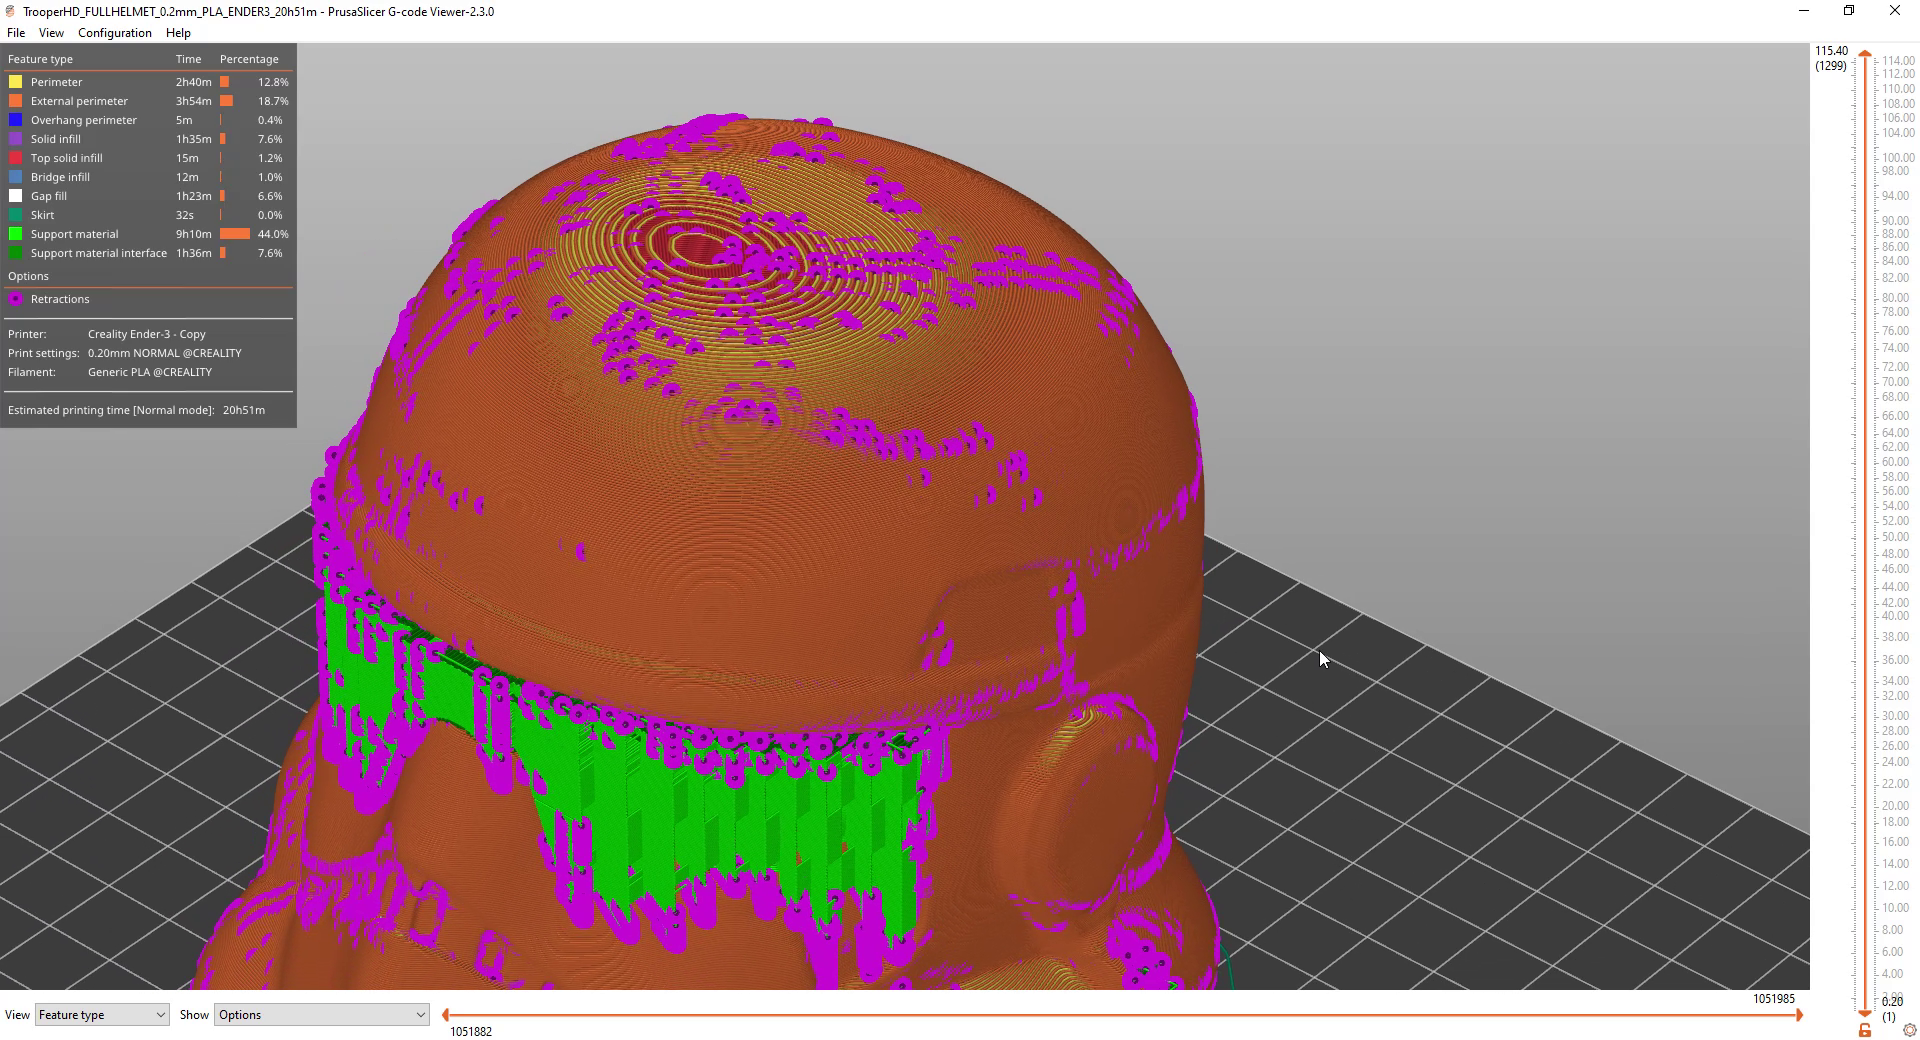
PrusaSlicer G-code viewer
When my boat previously failed, it was easy to spot because that was just when the bridging section on the model started.
On my latest print right here, it’s a little more complicated because there are no hard edges near where we failed, though there is a distinct pattern of retractions and moves only four layers before we stopped extruding. So the last layer that got printed was at 90.8 mm in height.
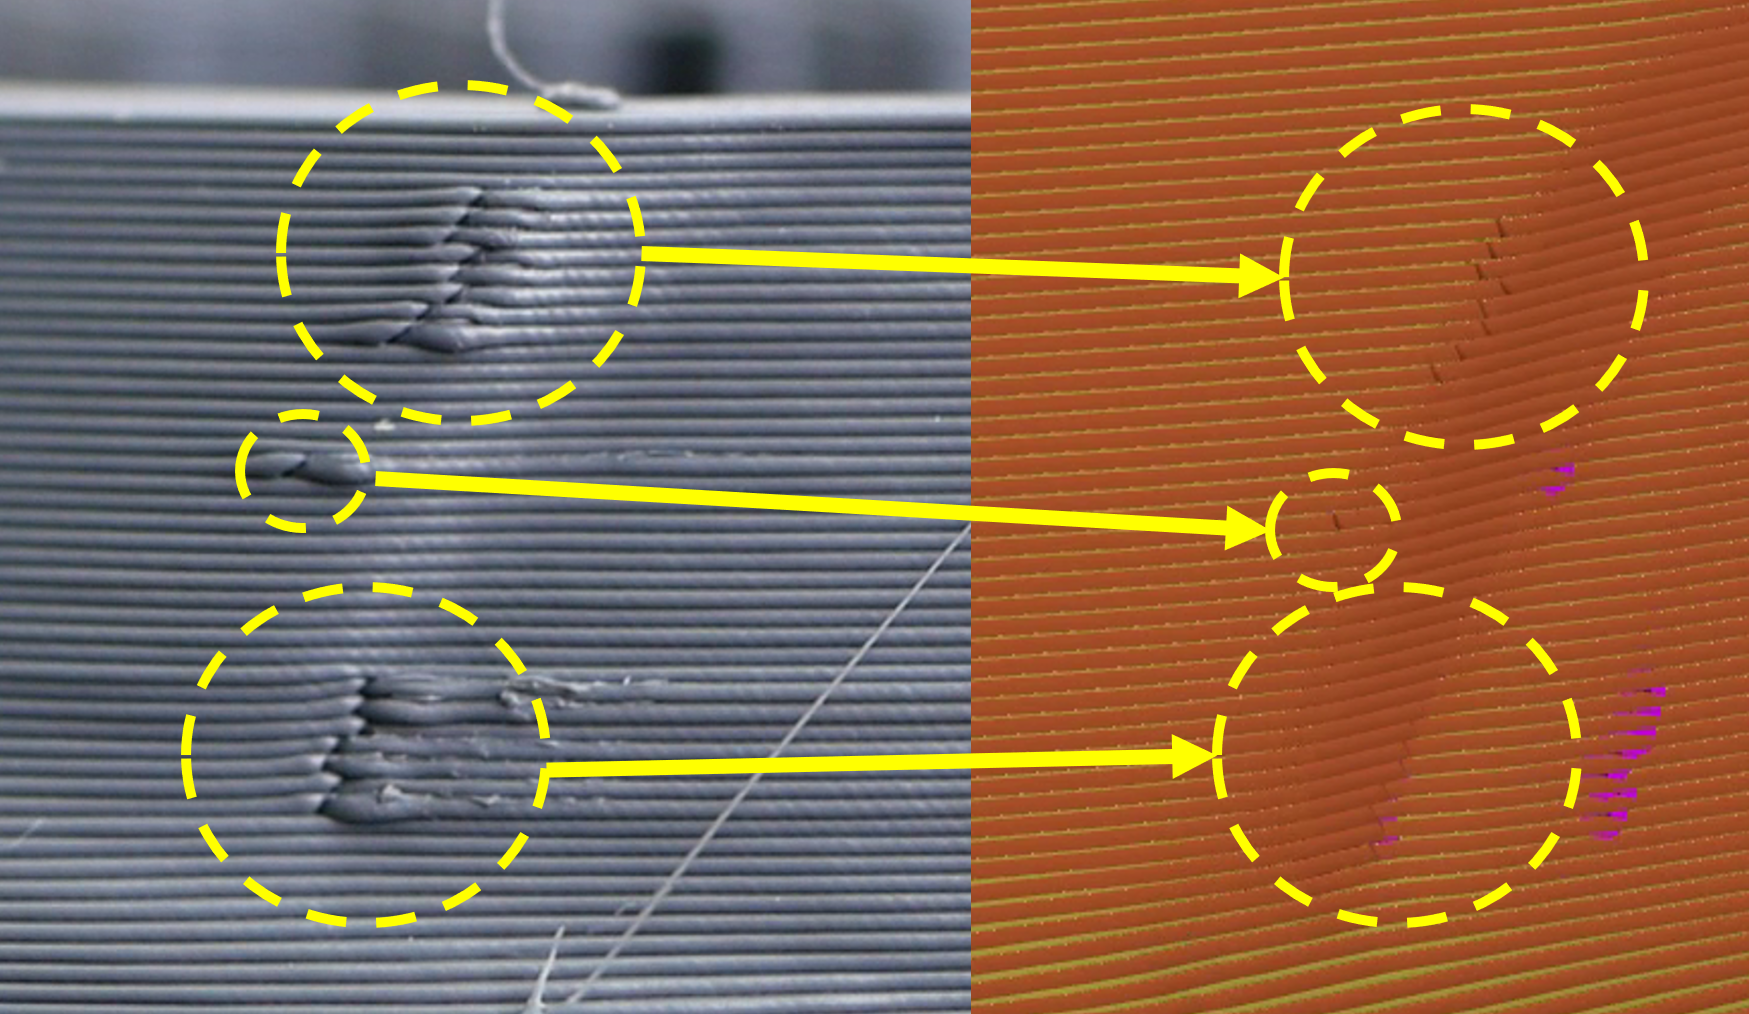
Features on print (left) and in the G-code viewer (right)
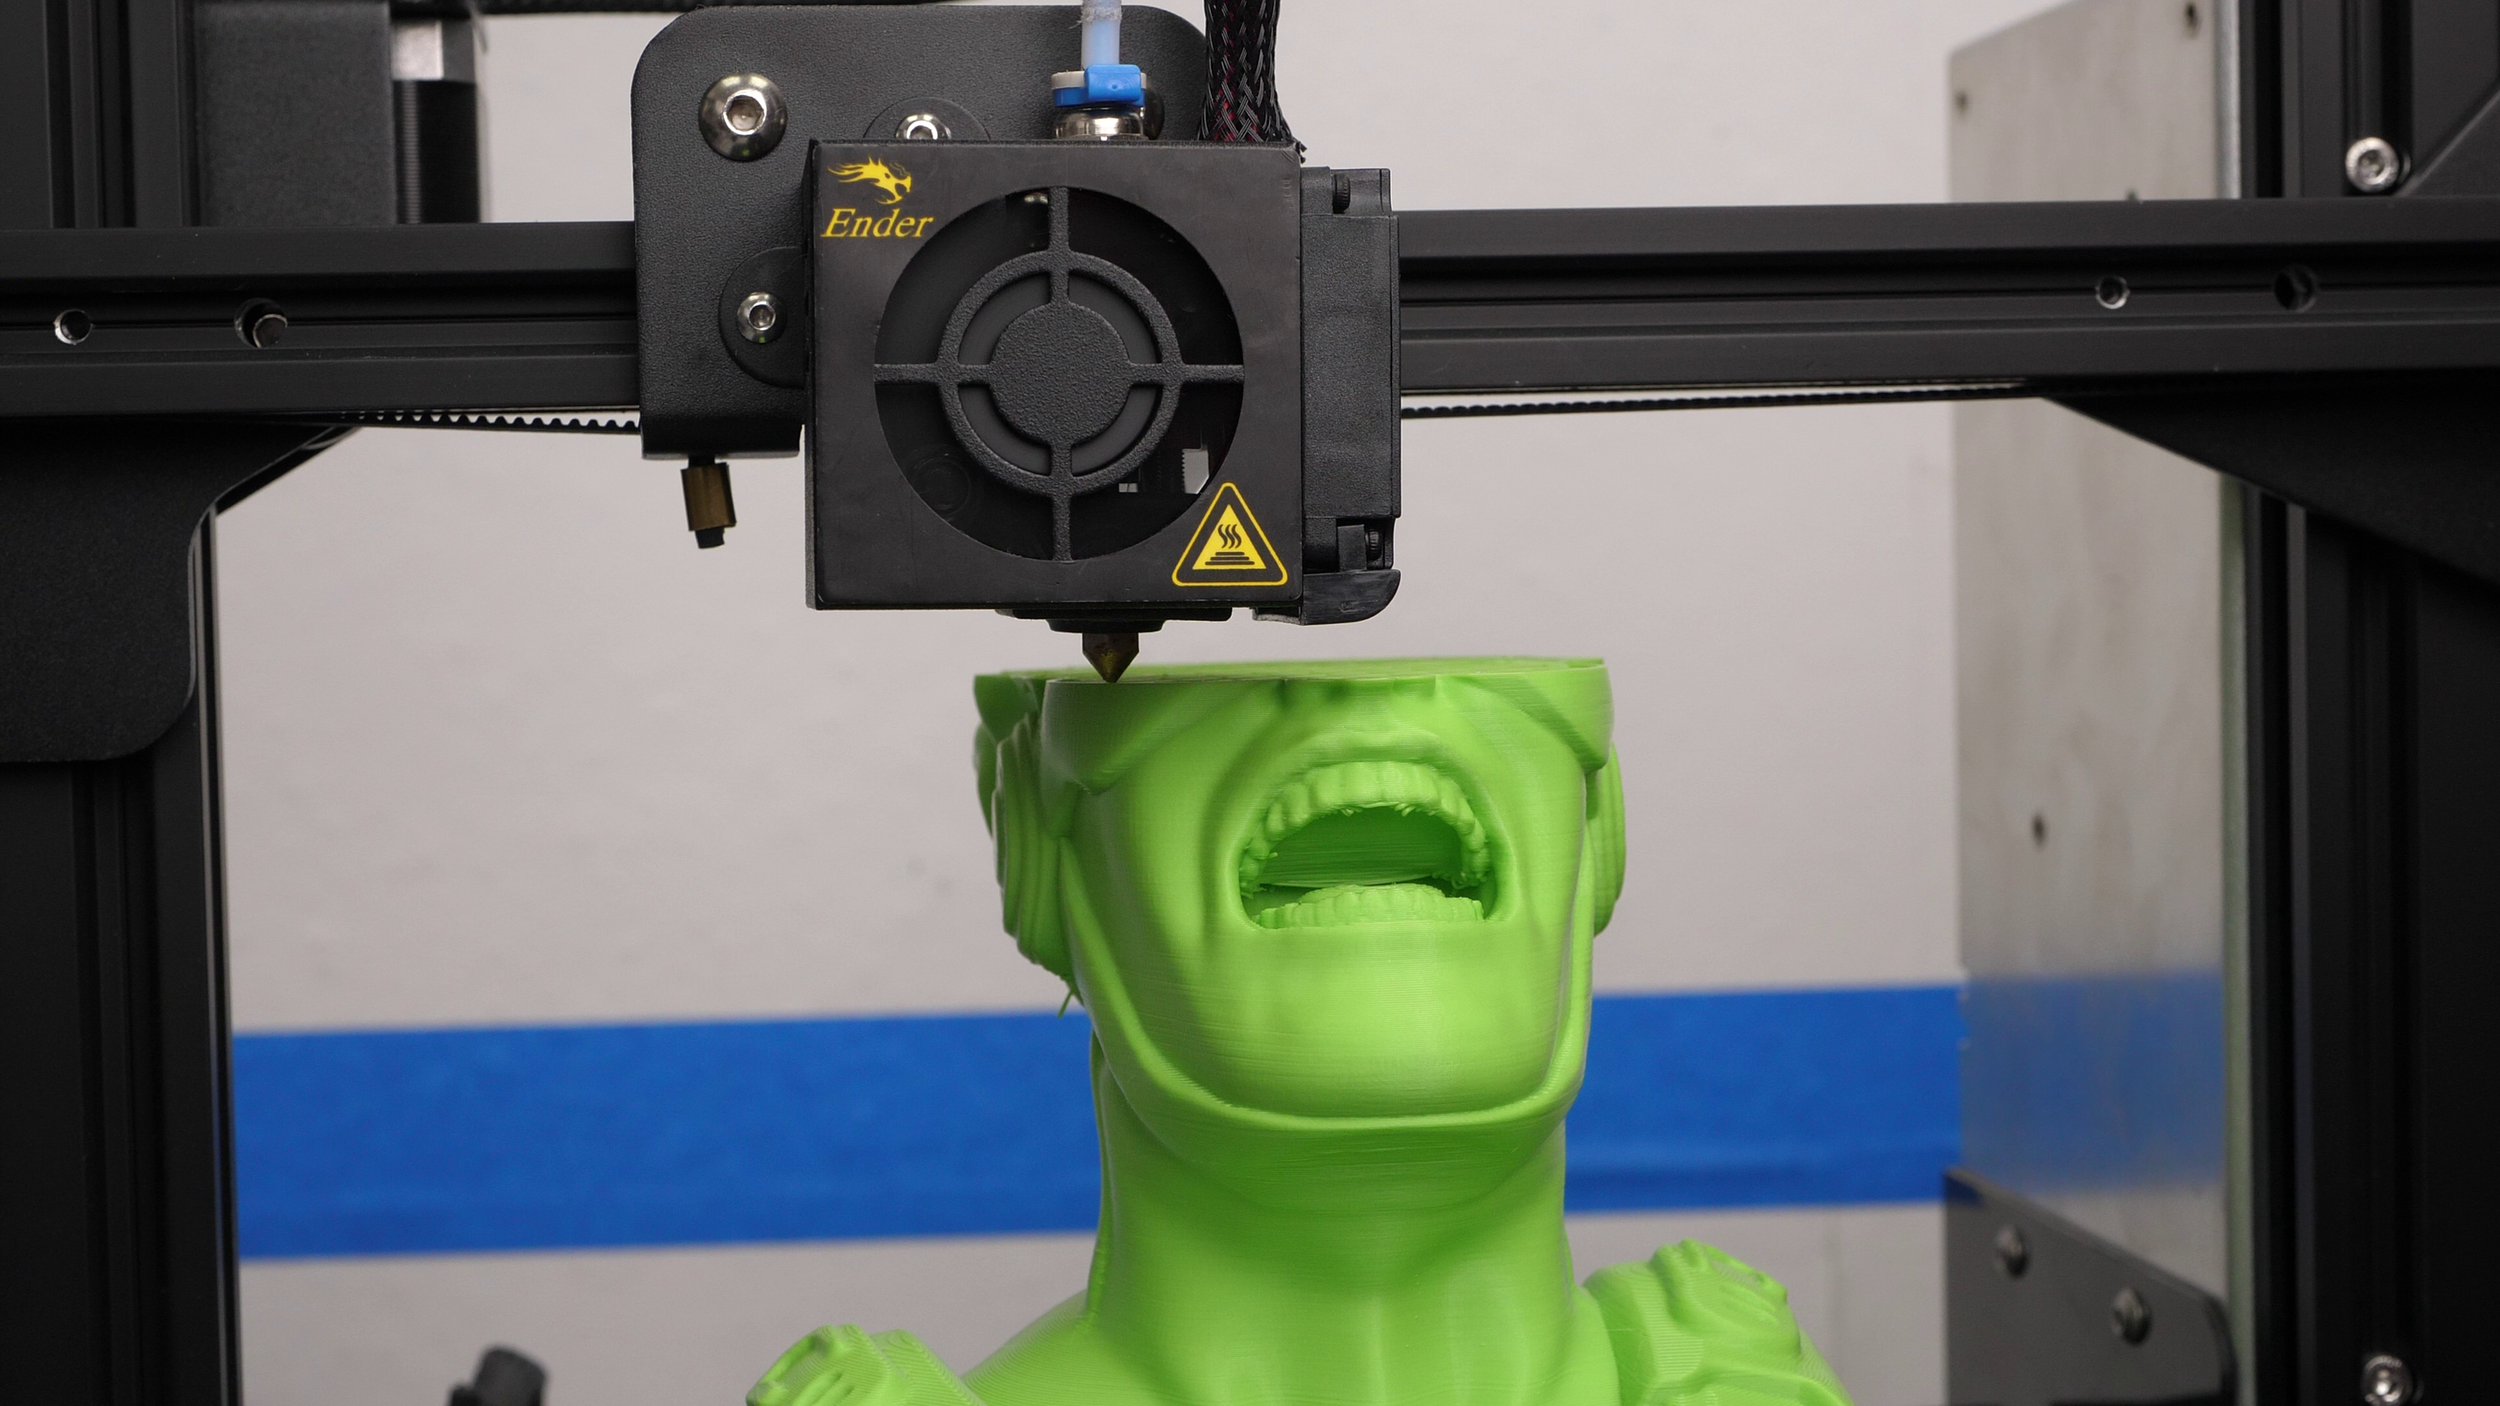
Step 2C: Using your 3D printer as a Coordinate-Measuring Machine (CMM)
The last method is great if you don’t have any equipment to precisely measure the height or no features on the print that you can use to determine where it exactly failed. We’ll use the 3D printer as a makeshift CMM or Coordinate-Measuring Machine. We’ll move the nozzle right to the point where it touches the last layer and read the height from the screen. For this, and in general, for resuming a print to work, we need to re-home the printer because we usually lose the absolute position once we stop printing. If your part is small and your printer usually homes at the edge of the bed, it’s easy, and you can use the normal homing routine. If it’s bigger, you need to make sure that there is enough clearance to not crash into the part. While you’re homing, if in doubt, always have your finger on the power switch to potentially kill it before it crashes into the print and rips it from the platform. If you don’t find a way to home z, don’t panic, there is still one last option I’ll show you at the end.
After homing, we make sure that the nozzle is clean and then move the print head in small steps to the part until the tip just touches it. We can then read the height either from our printers’ screen, or if there’s no display, we can send M114 to the controller. For my model, it was again 90.7 mm.

Step 3: Determine the resuming height
All three methods were able to provide similar model heights down to 1/10 of a mm. Which one you use is up to you. Since I printed a layer height of 0.2 mm, the closest next layer to the 90.7mm measurements is layer 90.8, which is the same one we also got from looking at the G-Code-Viewer. This means that this was the last layer that was at least partially printed.
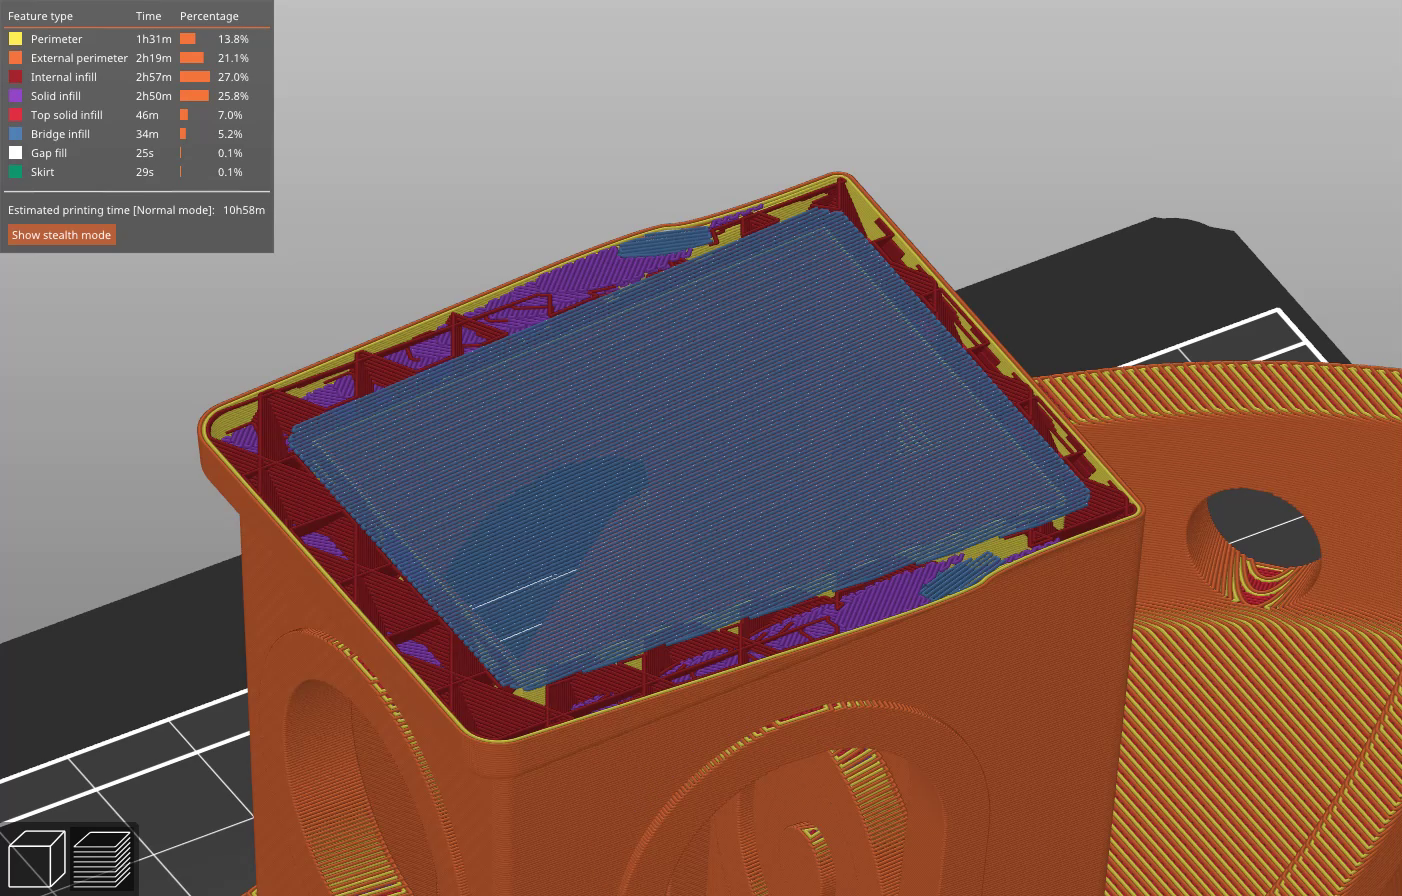
Now we need to determine at which layer we want to continue. Some might argue that we should reprint the last layer because it was probably not finished completely. In contrast to that, I tend to resume the print at the next layer because I want to avoid a double extrusion where the material gets all squished out, and the printhead might even get stuck. Since perimeters usually get printed before the infill, there is a good chance that we won’t even notice a gap on the outside, and a slight gap on the infill is usually not bad. I’ll therefore be resuming my printer at the height of 91 mm.
Over-extrusion at resuming location
Step 4: Modify the G-code
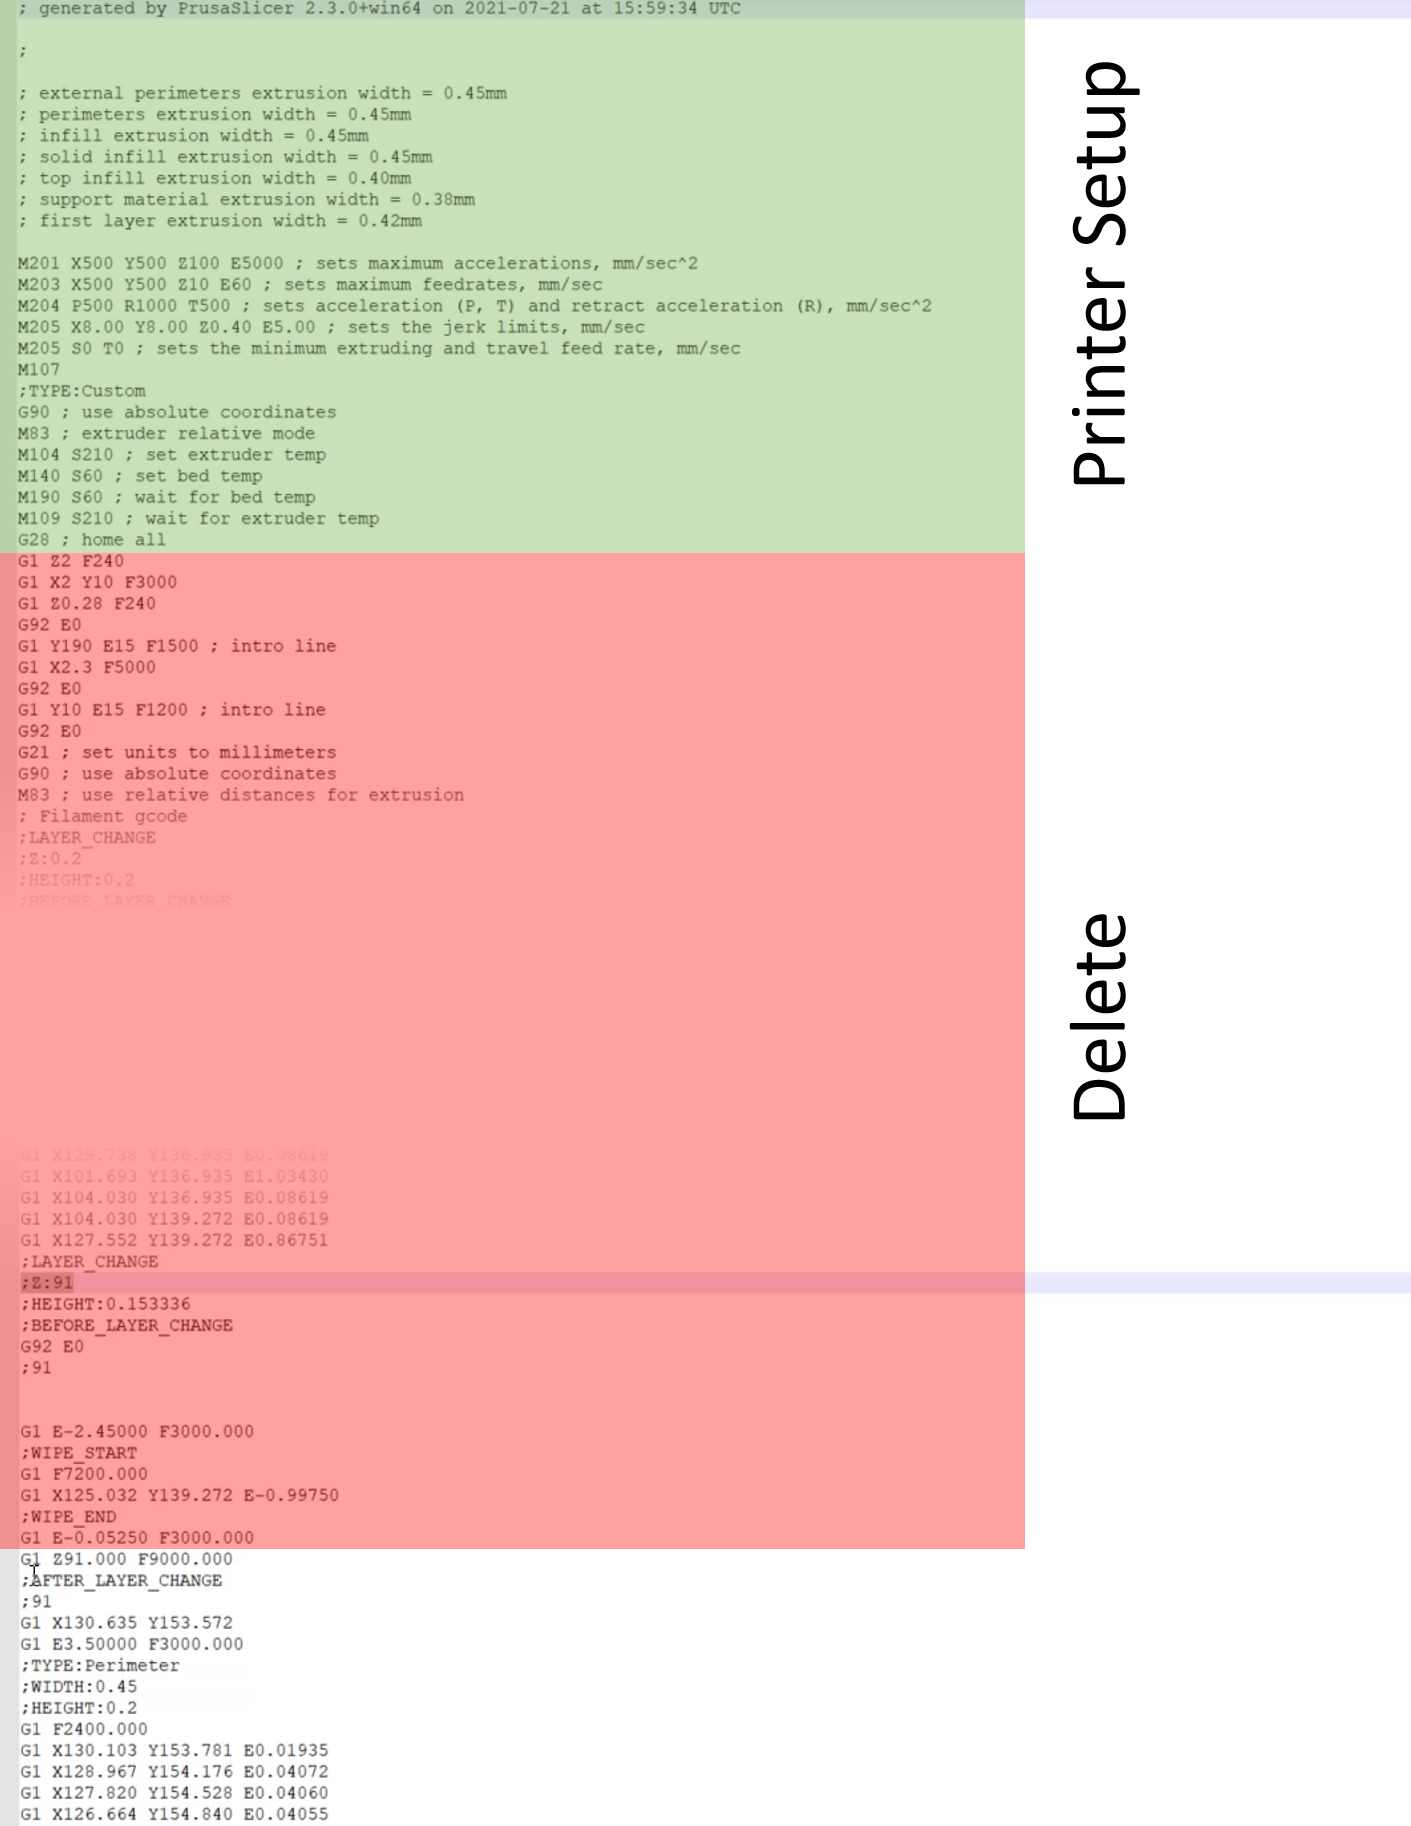
Now we need to slightly modify the G-code file we initially printed. Remove the SD card from your machine and open the G-code file in your text editor of choice. This might look intimidating at first, but G-code is really simple. Each line represents an instruction that gets processed one after the other. If you want to know what all the commands do, simply check out the Marlin G-code reference I linked below.
All the printing instructions up to somewhere in layer 90.8 mm were already processed, and we need to delete them. To do that, we need to find the section where the layer at 91 mm starts to get printed. Most slicers will add some comments when specific things happen, such as a layer change. Prusaslicer, for example, adds ;Z: and then the height. If you’re using CURA or you notice that your extrusions are set to absolute (M82), check the next paragraph for that approach. So we simply search for ;Z:91 and easily determine where the layer change starts. The following lines, in my case, are only the preparation steps for the layer change that are irrelevant to us, so we search the line where the printhead is lifted up to that layer, which is done with the instruction G1 Z layer height. We mark everything by clicking in front of the instruction, then holding the shift key and scrolling all the way up to the last instruction before the print starts, which is usually homing with the instruction G28. The only things that should be left in our G-code file are the initial setup and the instruction for setting extruder and bed temperature and homing. Then we directly move the printhead to the layer at 91 mm and continue printing. The only command I add manually is M106 S255 which turns the cooling fan on to 100%. If you’re not using a cooling fan or not the full power, adjust that value accordingly. Now simply save everything back to the SD card as a *.gcode file.
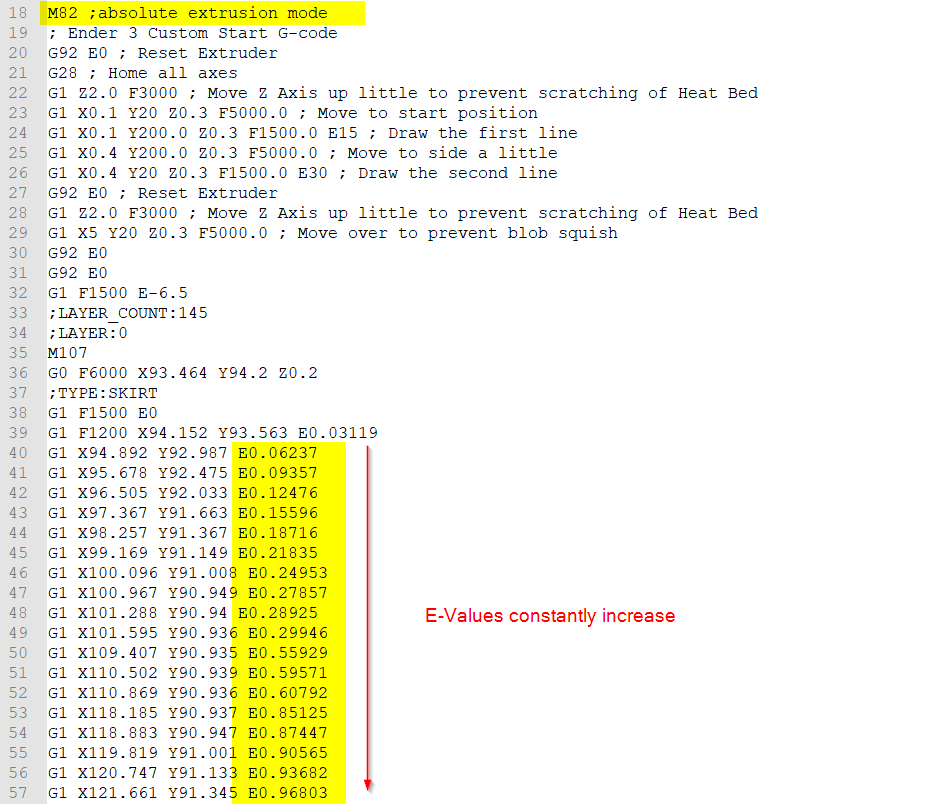
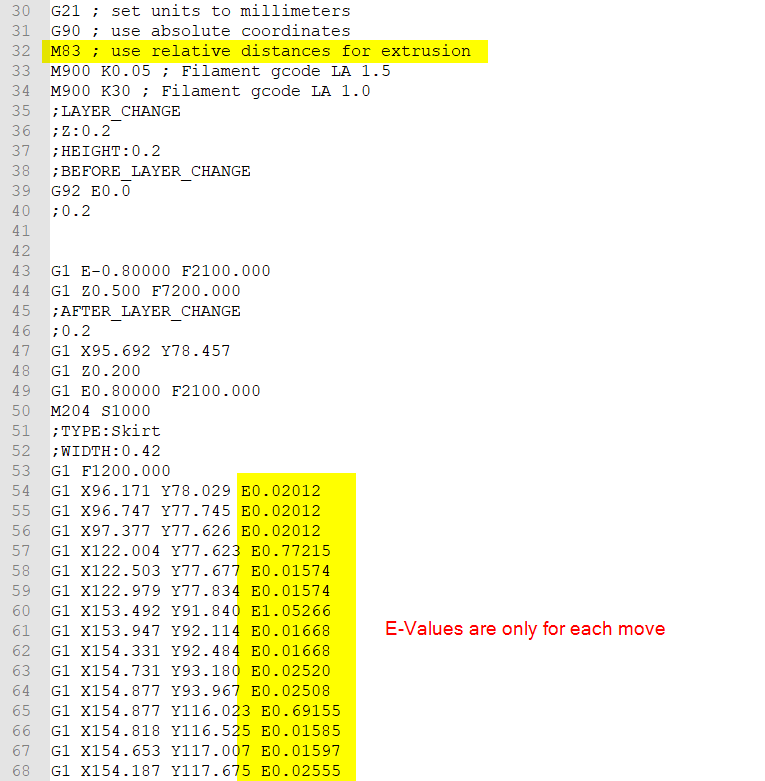
Step 4 with absolute extrusions (e.g. CURA): Editing the G-code
How the amount of extruded material gets sent to the printer varies from slicer to slicer or can even be even set in the slicer itself. The code I showed you before was prepared in PrusaSlicer which mostly uses relative extrusions, which means that for each move we only send the amount of material feed, that’s needed, instead of the absolute filament feed. CURA profiles often use absolute extrusions which can easily be spotted if you take a look at some G1 commands. If the E parameter slightly increases every line that’s an indication for that. It’s even simpler to spot if you find M82 in the header of the G-code file which sets the extrusion mode to absolute (instead of M83, which sets relative extrusions).
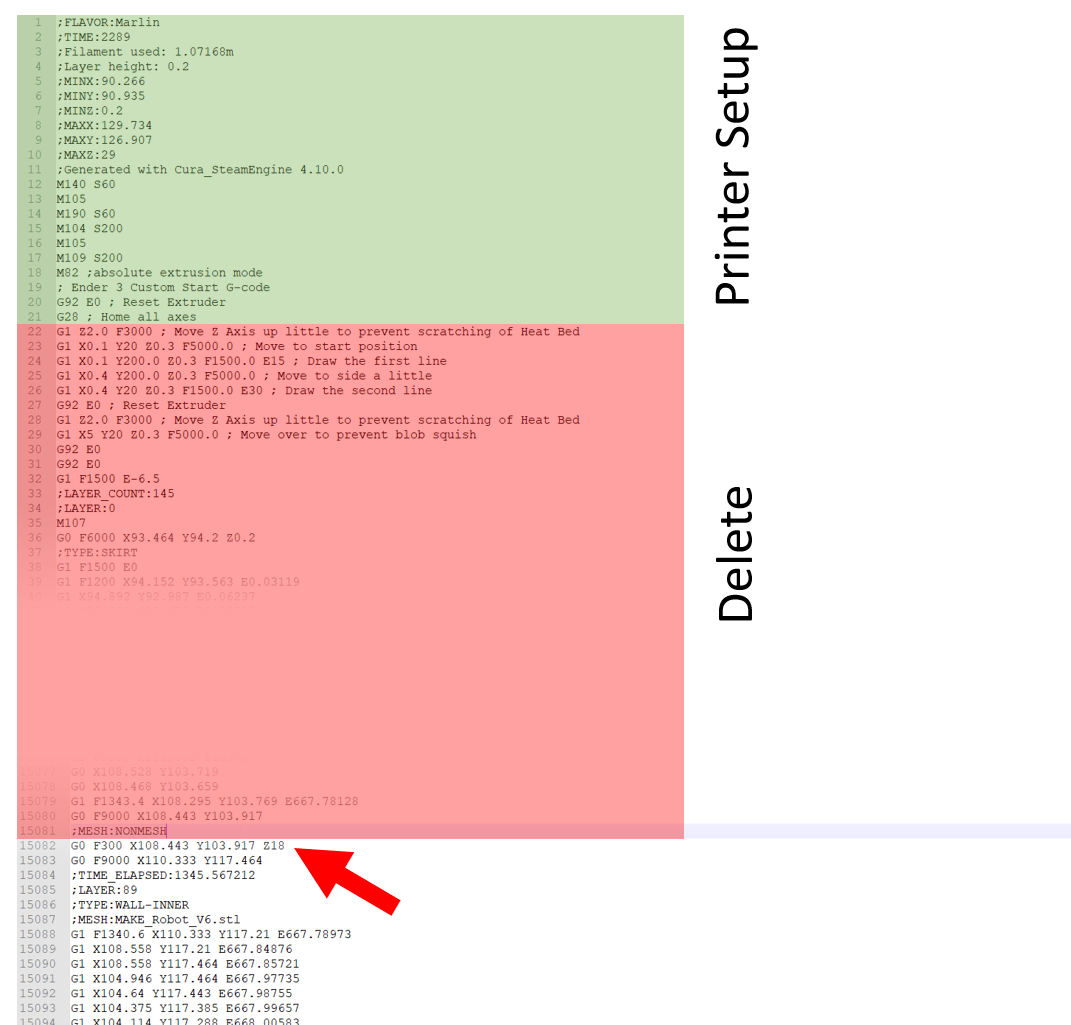
This is an important difference and requires you to add one additional line of G-code to your edited file. Also finding the right section where a new layer starts can be a bit more complicated in CURA because the comments in the G-code file are a little different. Just divide your resume height by the layer height you printed and you should get a rough estimation on which layer you want to resume your print. Then search for ;LAYER:XXX in the file and confirm the right height by the G0/G1 command with the Z parameter a couple of lines earlier.

Layer comment and layer height
Now again delete everything starting from before the Z-movement all the way up to the point where only the initial settings are done and the printer gets homed.
Now we need to add three additional lines manually:
M106 S255 sets the fan to full speed (adjust the values between 0 and 255 for different speeds)
G0 Z##.# go to the appropriate layer height (##.# will be the numeric value you measured)
G92 E##.# sets the extrusion amount to the right value. For this value use the next E parameter that you find in your G-code
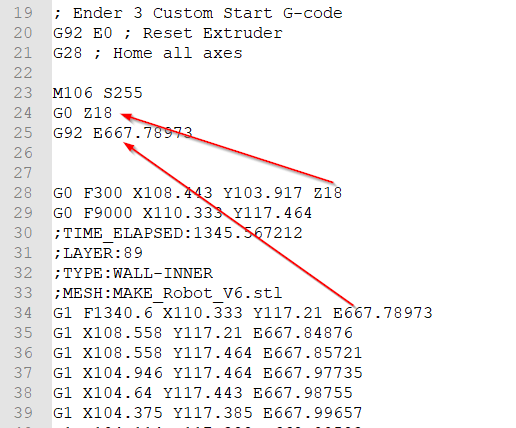
Manual G-code lines you need to add
Save everything and you should be good to go.
Step 5: Resume the print
Make sure you fixed whatever caused your print to fail in the first place and start the print. If everything goes well, the printer will heat up, home, and continue printing just where it failed before. I’d still recommend having your finger on the power switch to stop the machine if anything looks strange to give you the possibility to find out what you did wrong and have the chance to give it another try! In my case, the point where I resumed printing is practically invisible, even though the machine did nothing for several hours. What a great success!
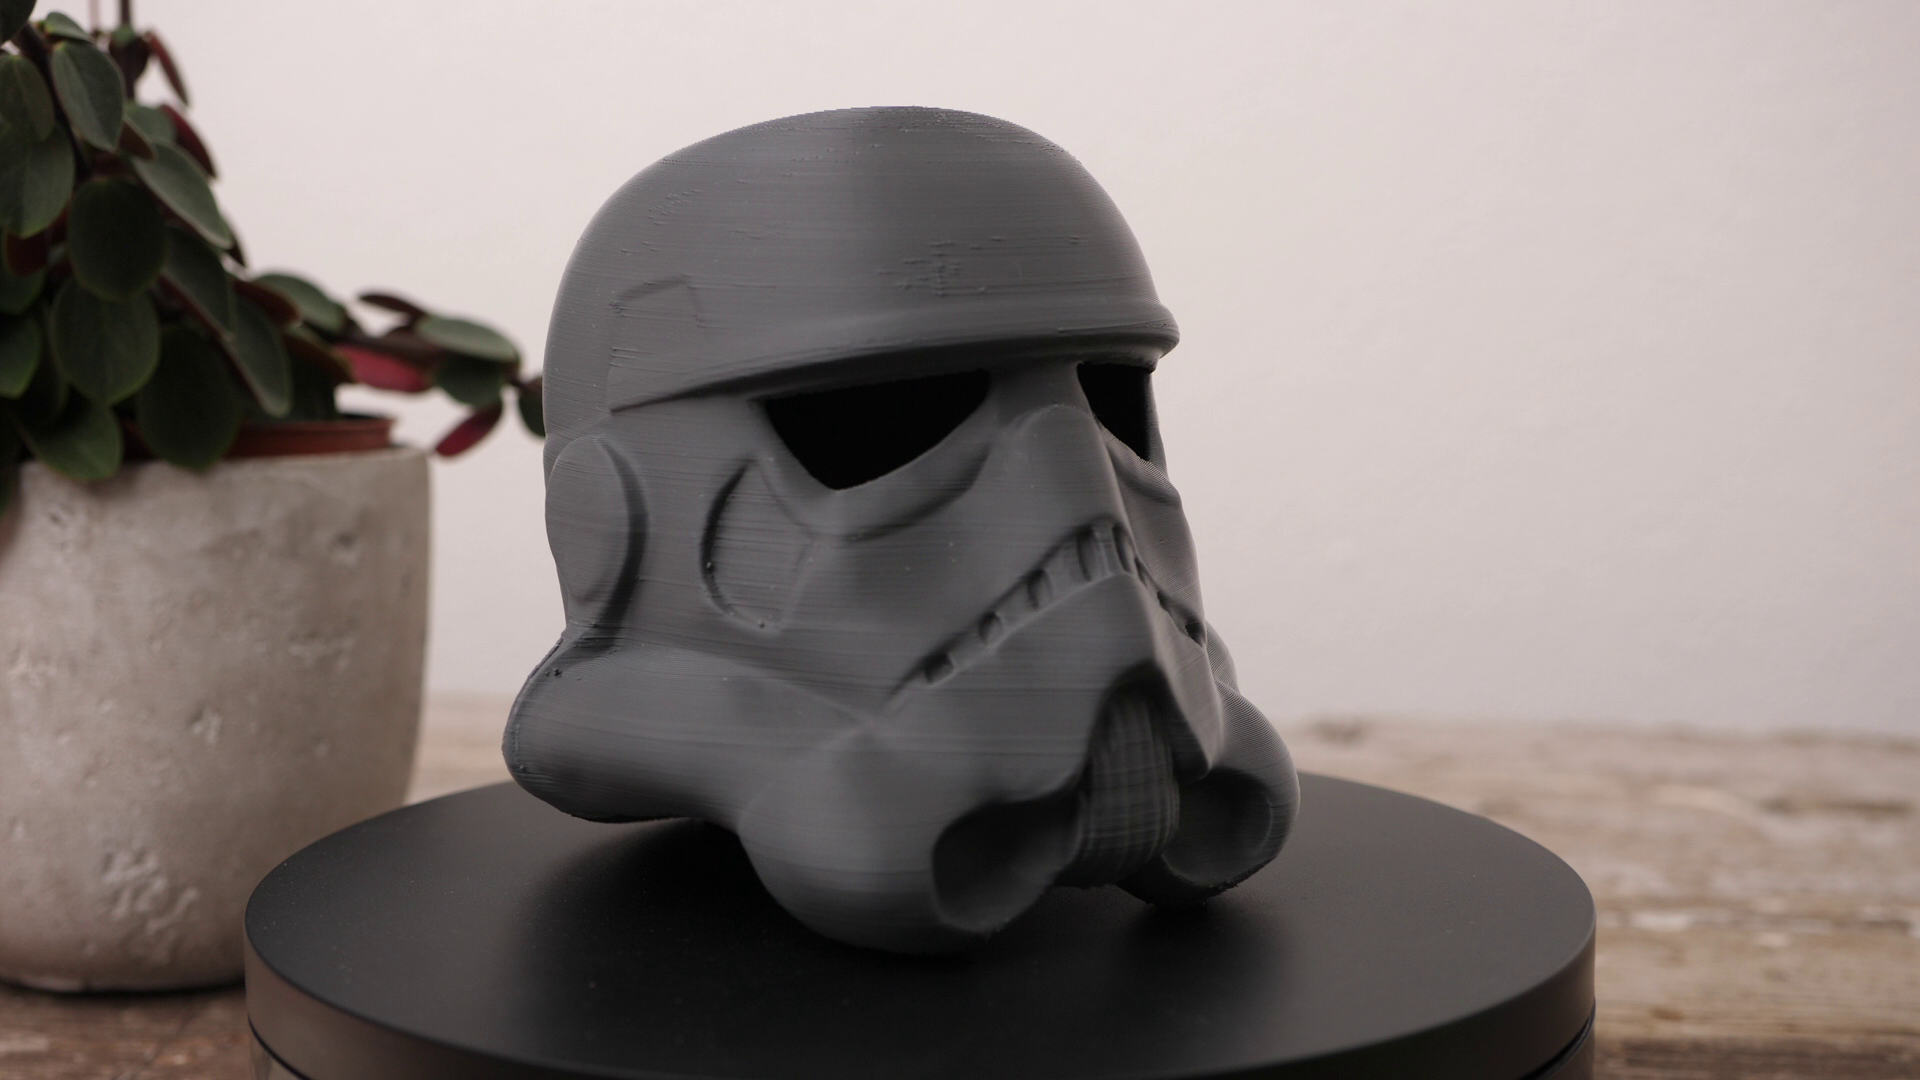
Storm Trooper helmet by Geoffro resumed after with barely any marks
Option 2: Z-axis can’t be homed
As I said before, there are cases where you are not able to home the z-axis because your print blocks the movement. In such a case, not everything is lost. You still need to measure or find the height where it failed in some way. When now editing the G-code file, make sure you also delete the G28 command, so the printer doesn’t try to home because we will do that manually. Everything else stays the same. Next, you manually need to move the printhead to the height of the last layer by connecting your laptop and using Proterface, for example. If you’re running Octoprint or use the DUET web interface, that works excellent as well. Many machines will not let you move the printhead if it’s not homed, so we need to trick the controller. First home only X and Y by sending G28 XY to the printer. The default position for the axes is often 0, and many printers won’t let you go to negative coordinates. Send M211 S0 to disable the software end stops. If the z-axis still can’t be lowered, try sending G92 Z0. Move the nozzle until it touches the last layer. Now send G92 Z and the failure height you measured. This way, you manually set the right z-height without homing. Be quick with starting your edited G-code file that the motors don’t switch to idle and lose their position. After heating the bed and nozzle, the print should continue normally, and you again might have saved days of printing and a ton of material!

Cyclops bust by Wekster resumed with a manually homed z-axis
