Big nozzles - How do they make your 3D prints stronger?
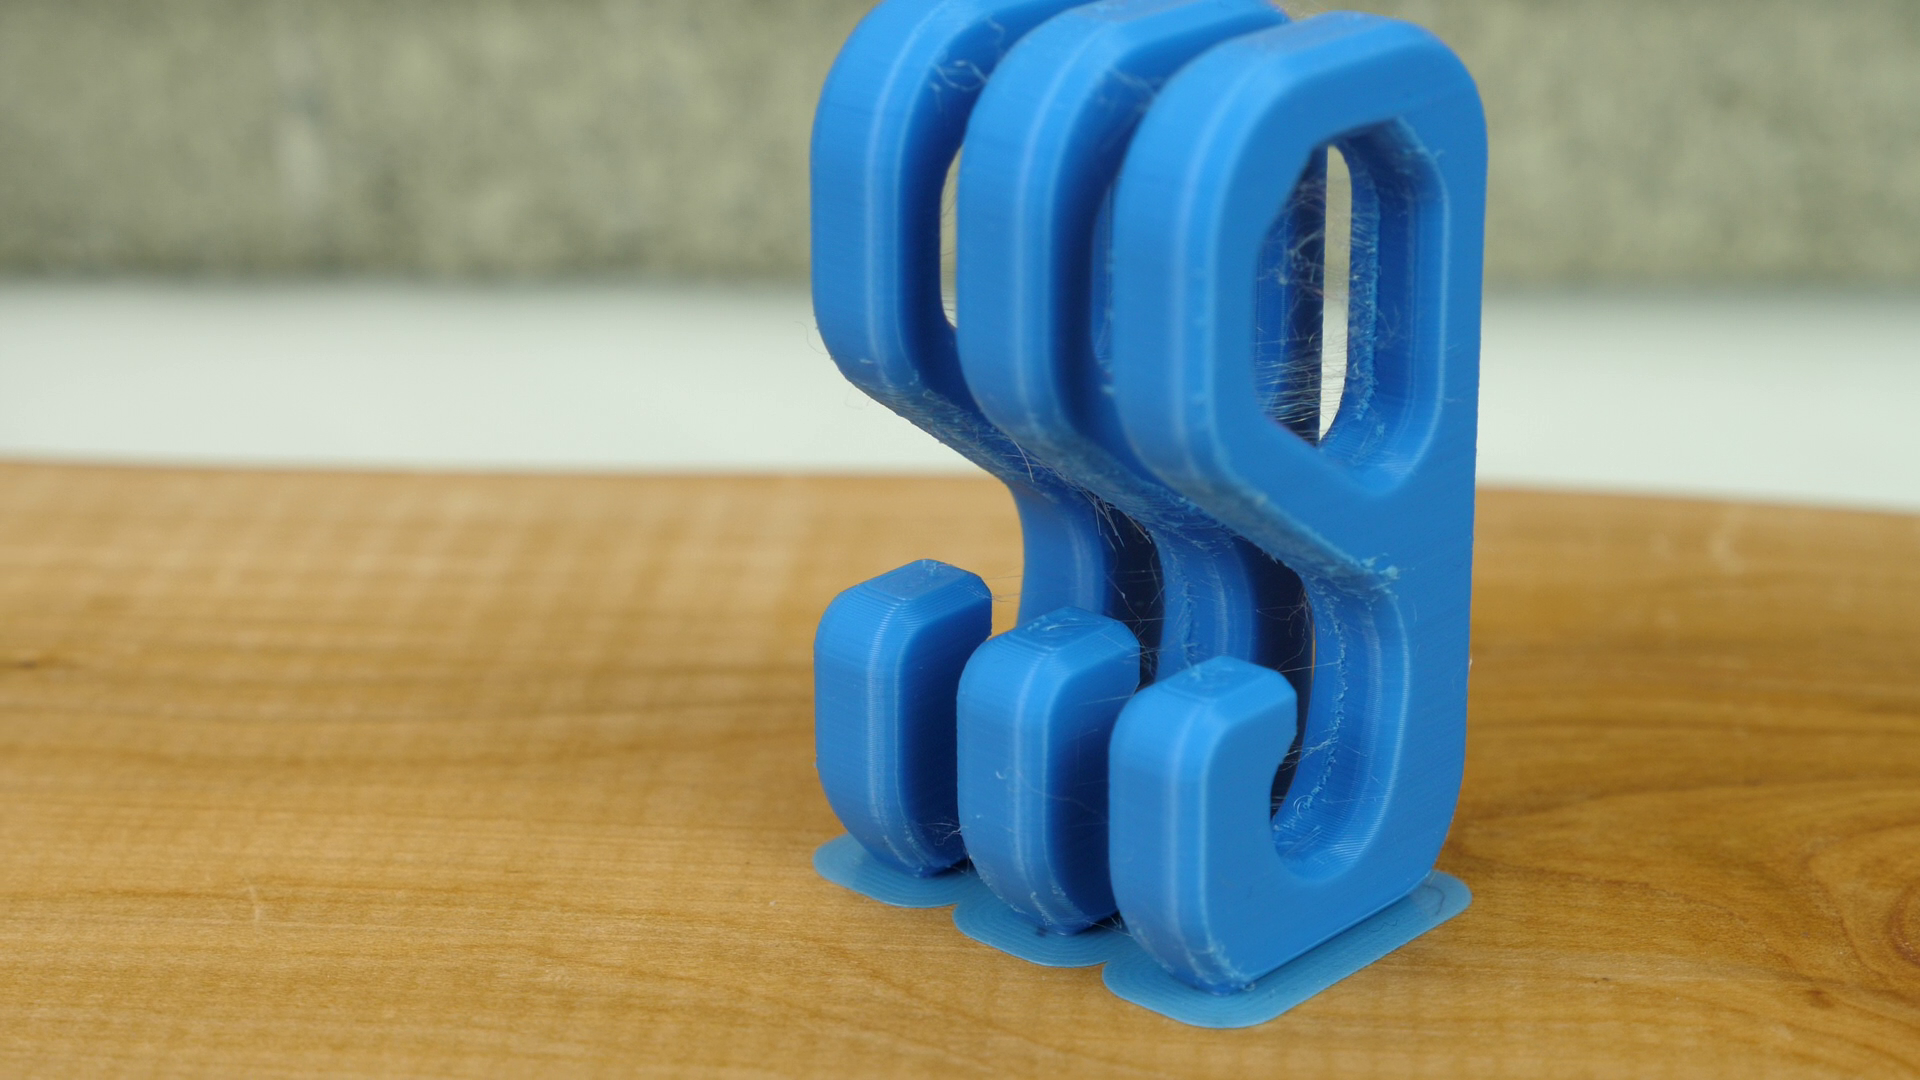
I’m sure you’ve all heard or even experienced it already that using a larger nozzle in you 3D printer seems to result in quite a bit more sturdy parts. I also had the same impression in the past but always asked myself if my 3D prints really are stronger because the layers bond together better or if it’s just additional material you put down that reinforce the parts. So, first things first, let me know in the comments if you regularly use bigger nozzles and for which purpose. In order to provide you with a proper answer I’ve investigated exactly that. For this reason, I printed my test hook in it’s standing orientation with a standard 0.4mm and a 0.8mm nozzle on my Original Prusa i3 MK3S. I chose this combination of diameters because it gives me the possibility to keep the wall thickness the same for both parts. If you’ve also watched my previous video, you’ll know that by adjusting the extrusion width you can not only fuse the layers at least a little better but also extrude quite a bit wider than the bore diameter of the tip. This also posed the question if instead of switching nozzles you could also use this setting to get the same effect.
1.2mm nozzle, 0.6mm layer height
In the end, I wanted to find out if parts printed with a bigger nozzle are stronger due to the additional amount of material or if somehow the layers bond together better. As a bonus I also tried if you can avoid switching out nozzles by just using higher extrusion widths. This is the test matrix I came up with. I printed parts with the 0.4mm nozzle using a standard extrusion width of 105% but we’ll also emulate the 0.8mm nozzle by using an extrusion width of 210% which is pushing material out of the nozzle quite a bit wider than the orifice. For the 0.8mm nozzle I printed parts with one and two perimeters which results in the same wall thickness as with the smaller nozzle and 2 or 4 perimeters. For one set of samples I also increased the layer height to 0.3mm which is more reasonable than 0.15mm on such a big nozzle. As I’ve shown in the past, layers that are too thin can result in worse printing quality. For each set of parameters, I printed 3 samples to at least have some statistics. For these tests I’ve also used no infill whatsoever because I noticed that depending on the position of the parts on the building platform and the infill algorithm in PrusaSlicer it can happen that the infill significantly reinforces the shell which will spoil our results and introduce more scatter. I also didn’t use my layer adhesion samples, even they probably would be more scientific due the pure tension they’re loaded with. They are a bit hard to tune in but the results correlate very well with the hooks which are just nicer to look at. All parts were printed in SpoolWorks PLA and I limited the material flow to a maximum of 3mm³ per second which is only a fourth or a fifth what a normal V6 hotend is able to handle. This way we don’t get different results due to insufficient melting.
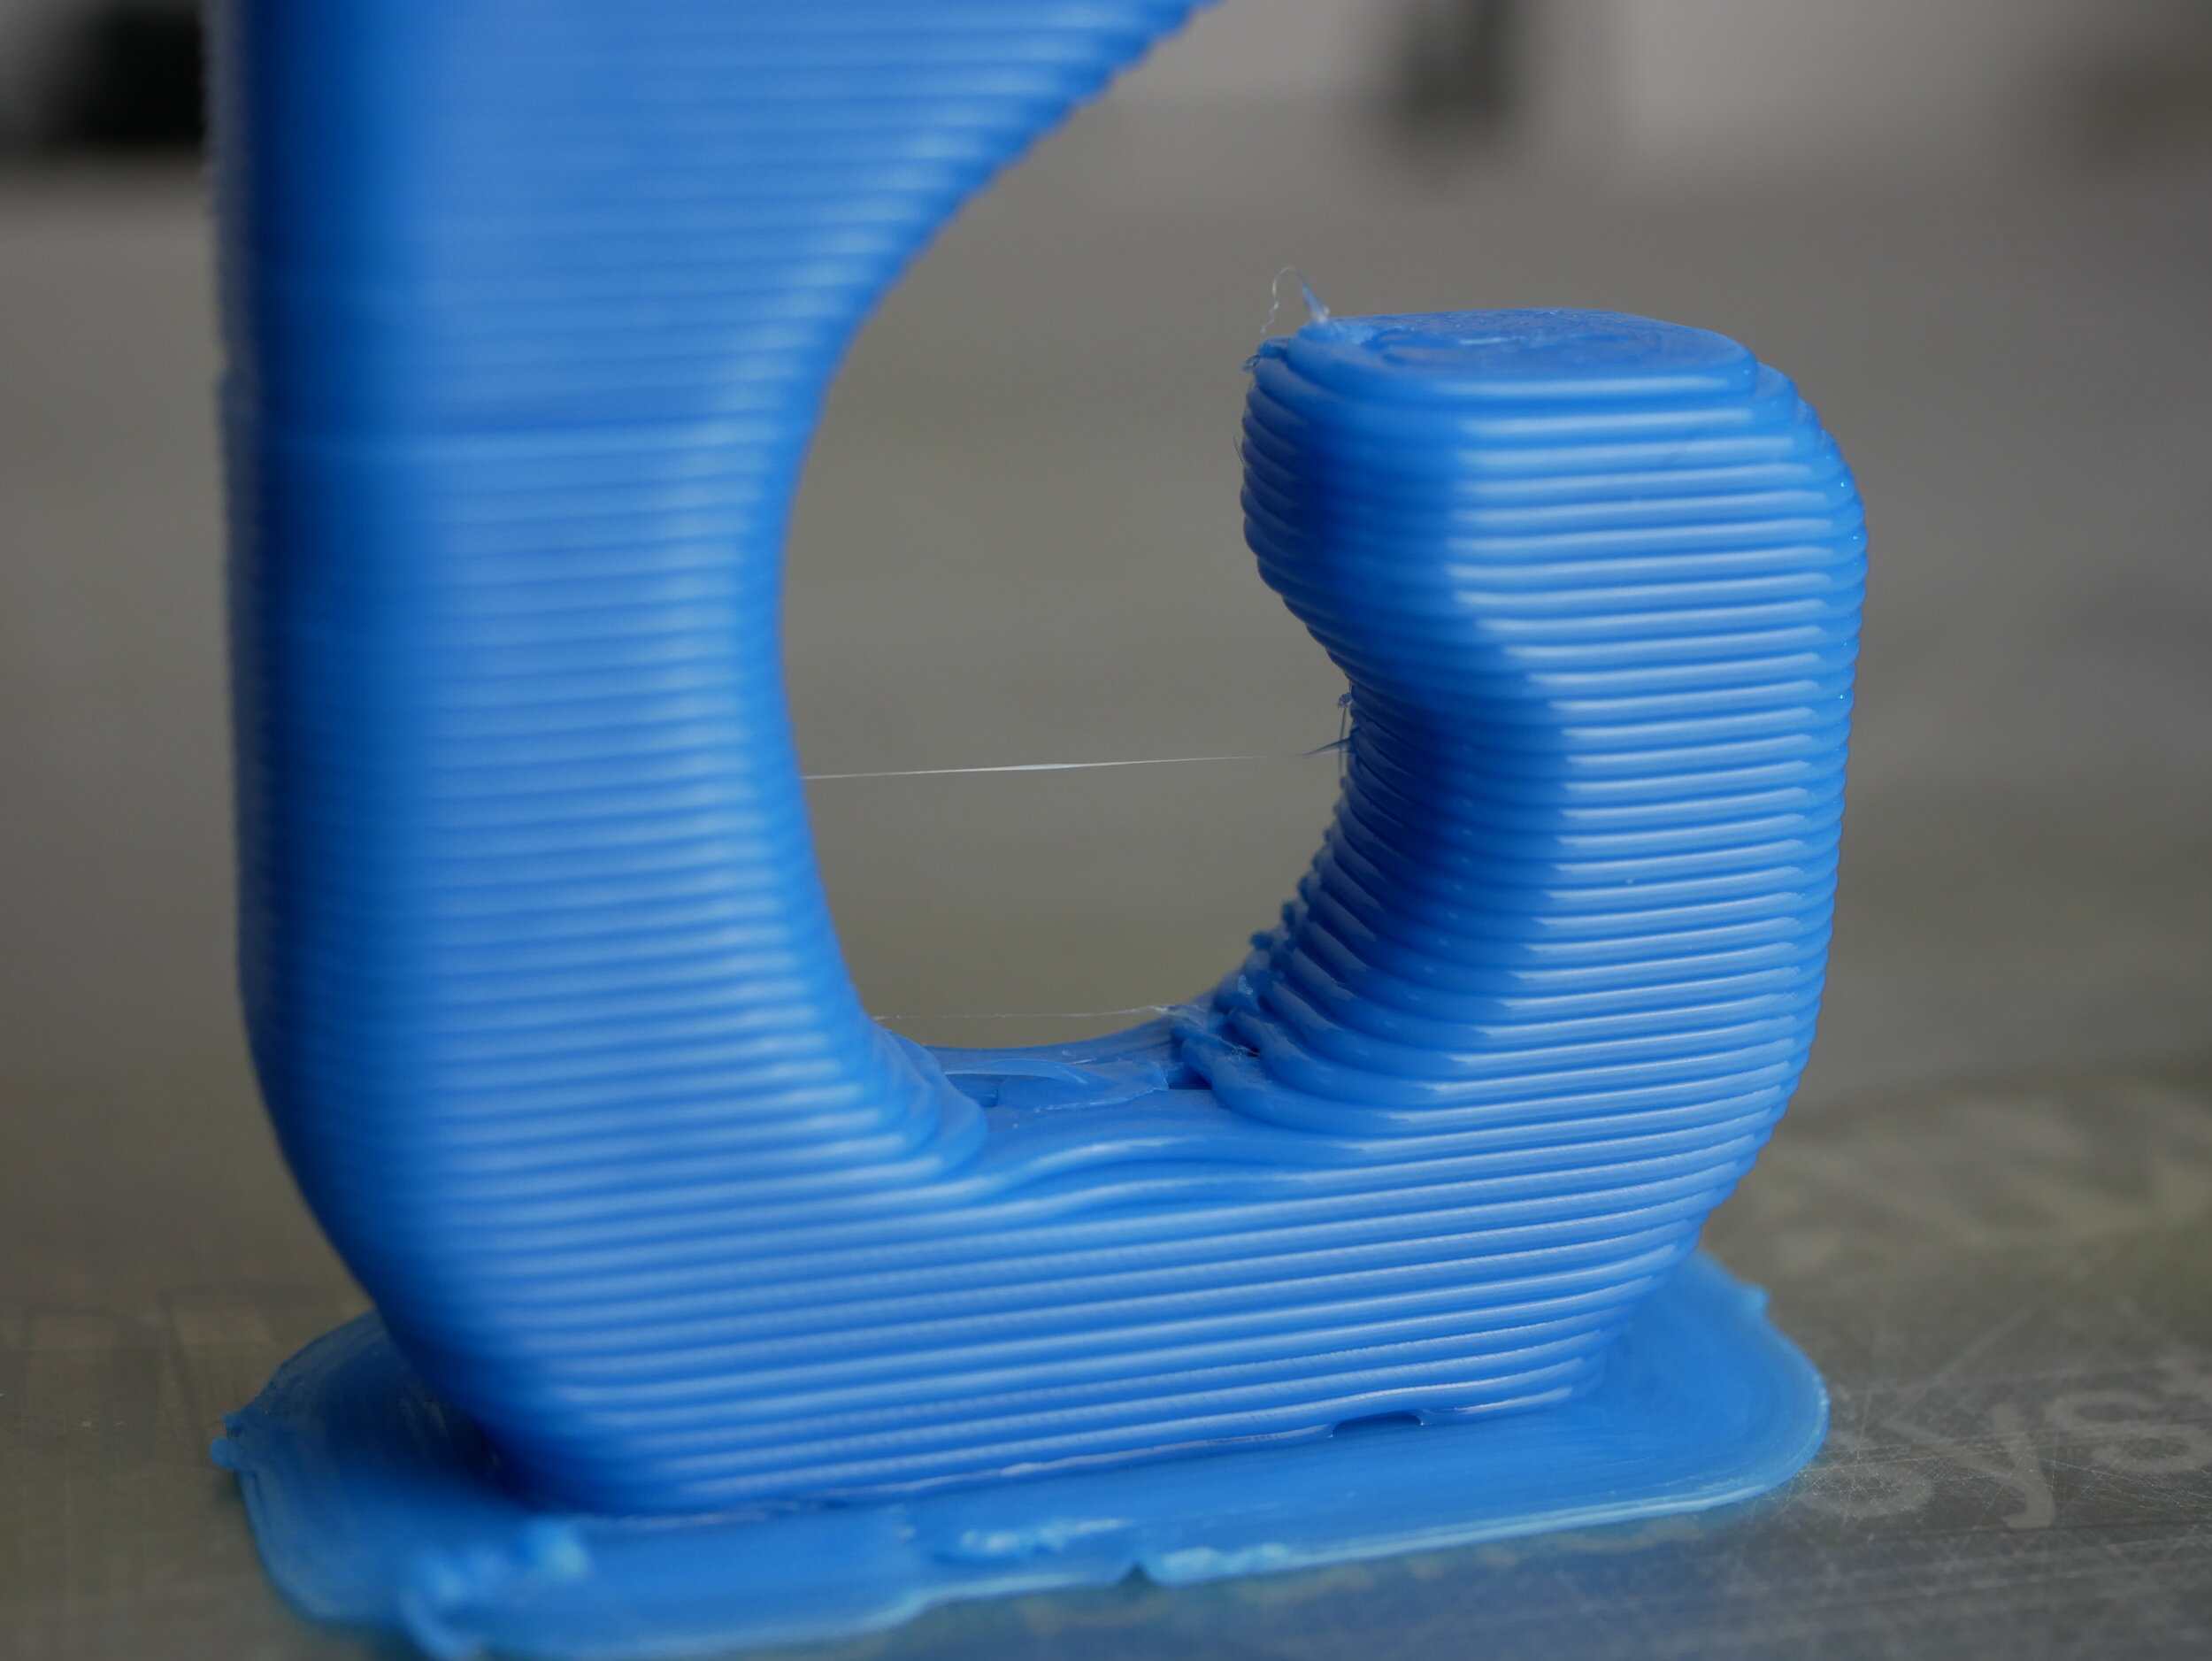
All parts printed without a problem. The only thing I was able to see was, that the quality of the hooks with the large 0.8mm nozzle at a layer height of 0.15mm didn’t look particularly well. This corresponds very well to my previous findings that you shouldn’t go below ¼ the nozzle diameter in layer height without extensive tuning. Interestingly the parts where I emulated a bigger nozzle by upping the extrusion width did basically look the same. When I increased the layer height to 0.3mm the print results were gorgeous again with the big nozzle. Interestingly the hooks printed with the 0.4mm nozzle at 210% extrusion width did look differently on the top surfaces. It looked like they were under-extruded but due to the small material flow and also a very similar weight that’s probably not the case. What that basically means is that you can emulate a bigger nozzle by upping the extrusion width but at some point, the flow dynamics under the nozzle will change.
0.8mm nozzle, 0.15mm layer height - stringing and bad quality in overhanging regions
For a reference of how far the standing hooks are away form the optimal lying printing orientation, I also printed flat hooks with 0.84mm and a 1.68mm wall thickness which is equivalent to 2 and 4 perimeters with the 0.4mm nozzle or 1 and 2 walls with the 0.8mm nozzle. Since you can’t always trust the weight values in the slicer, I also put all parts on a scale to see how heavy they really are. The parts with similar wall thickness weight pretty much the same, only the hooks from the lying printing orientation differed a bit, probably due to the slicing algorithm. I’ll take these values intro consideration later when we evaluate the strength by weight.
Let’s now finally get mechanical test that I performed on my DIY universal test machine. Before that, please make sure that, if you like this video, you are subscribed and selected the notification bell. Also hit the like button so that YouTube will recommend this video to more science and 3D printing interested viewers.
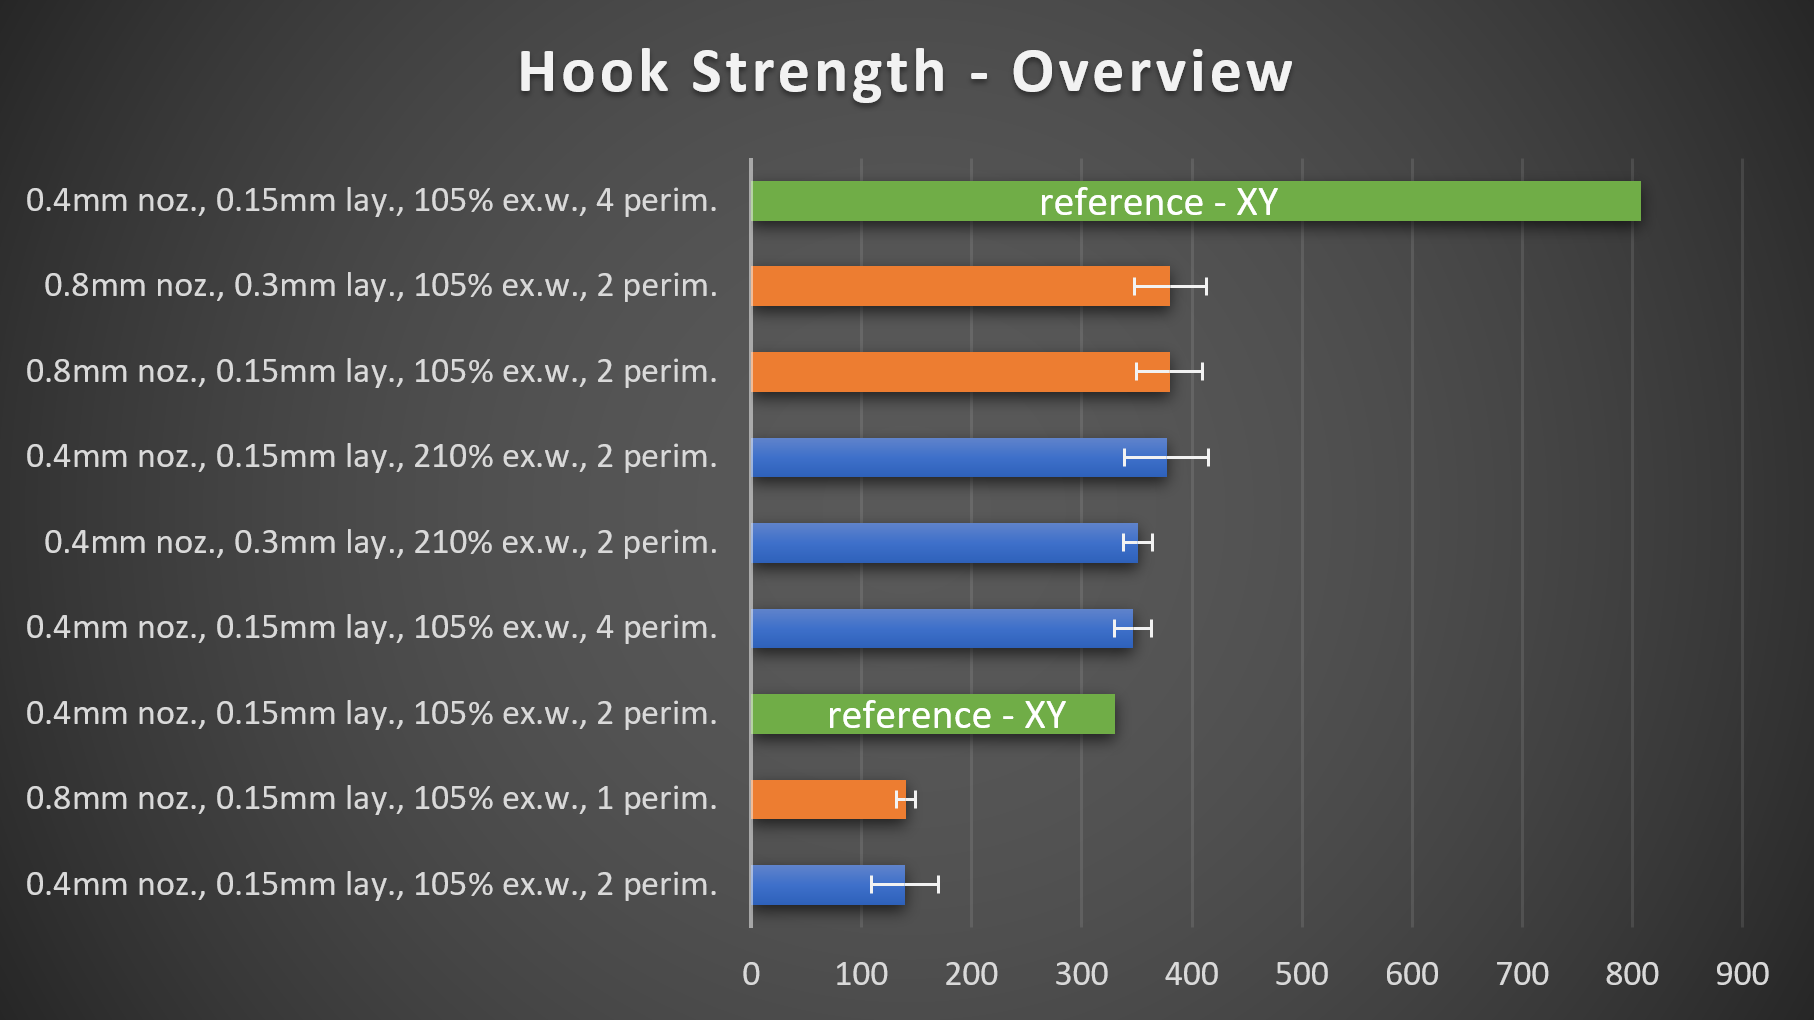
I mounted all of the parts in my DIY universal test machine and loaded them at the same speed to remove the human factor from testing. The load is constantly measured during the test so that in the end, I can easily determine the failure load. The 23 samples that I tested failed from 116N all the way up to 808N of force. The weakest one was the hook with the small nozzle and only 2 perimeters, the highest strength came from the reference hook that had 1.68mm wall thickness and was printed lying.
Load curves, all hooks (steps due to movement of the hook during loading)
Since my suspicion was that the higher strength of prints with a bigger nozzle results from the additional material, so in this case, thicker walls, I grouped the strength values for wall thickness. The results from the parts with the 0.84mm walls already confirm this because the average strength of the parts is almost exactly the same, though there is more scatter at the parts printed with the 0.4mm nozzle as with the parts printed using a 0.8mm nozzle and just one perimeter. The reference hook in the optimal printing orientation, was by the way able to handle 330N of load which is more than double the load bearing capability.
Now, let’s get to the hooks with double the wall thickness. Here again, if we also take the scatter into consideration, all parts broke on average at roughly the same level of load, again around 50% below the reference strength of the lying hook. Even the hooks printed with the emulated big nozzle, were I only increased extrusion width but kept the 0.4mm nozzle, did not perform worse which is great because that might mean that if you rarely want to print with larger nozzles, save yourself the hassle and just increase extrusion width. Sorry nozzle manufacturers…
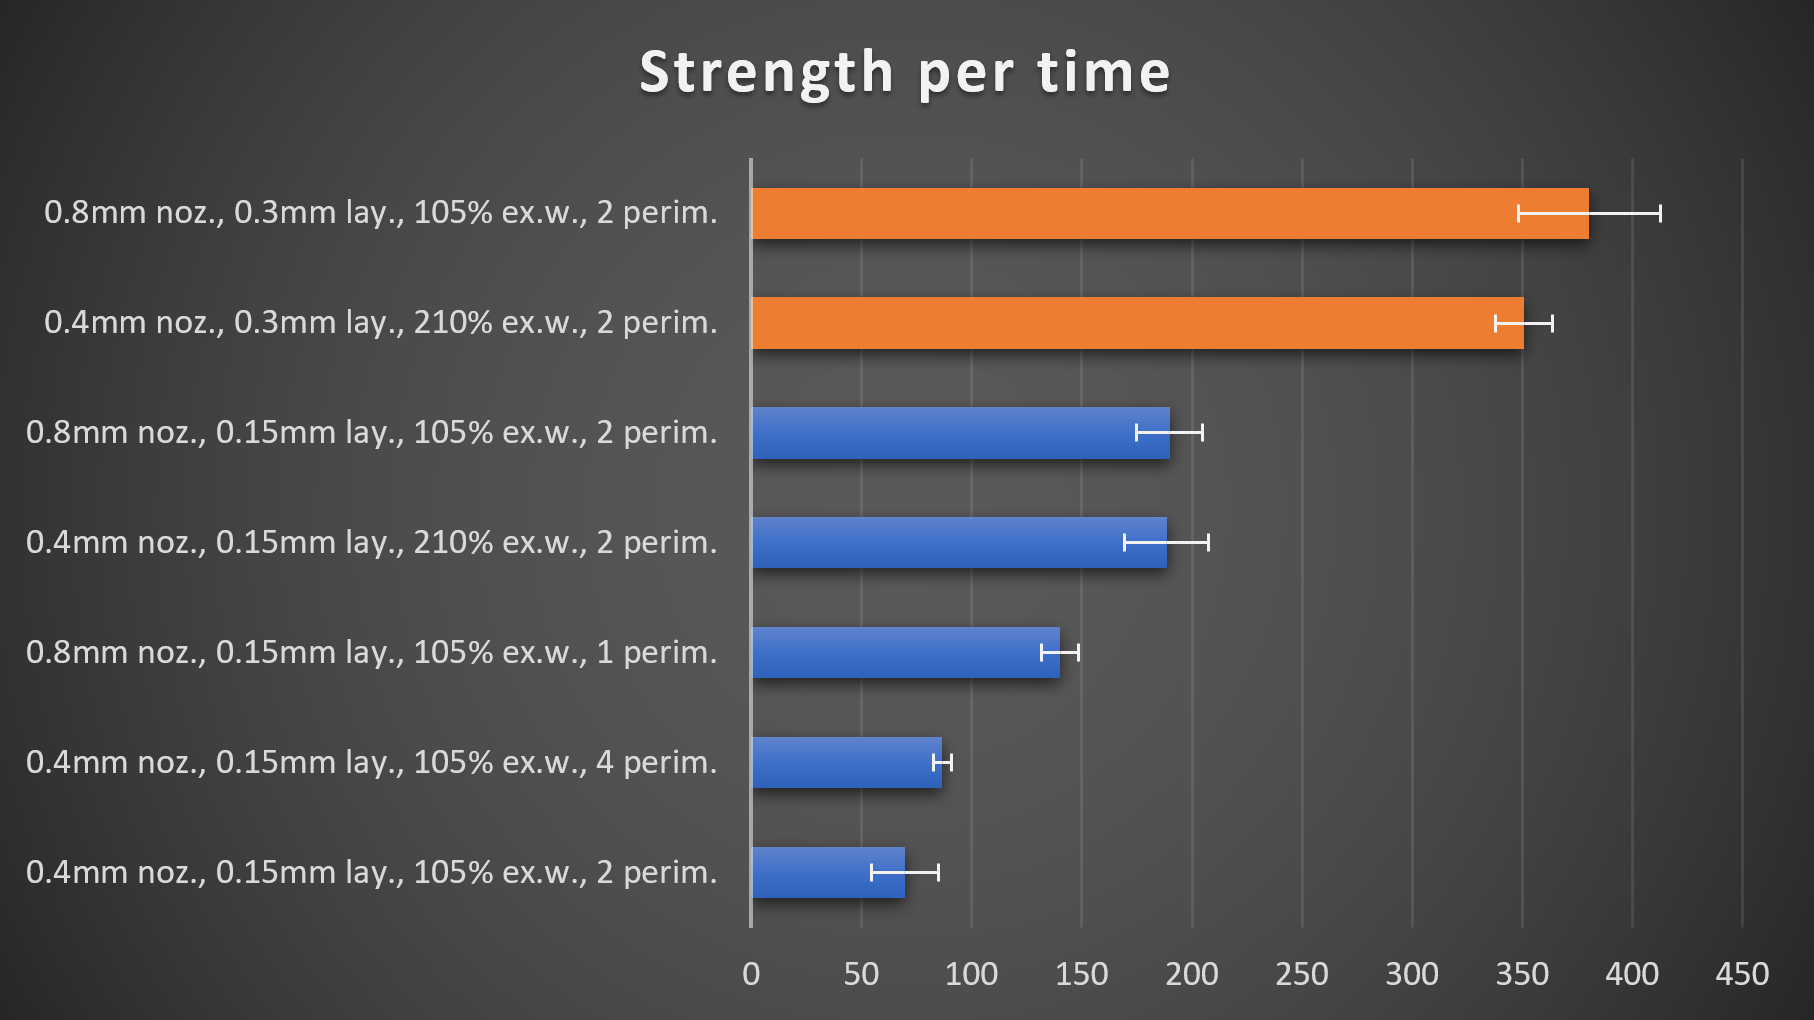
The results even barely change if we take the weight of the samples into consideration. The strength is basically proportional to the used amount of material and in this case, the wall thickness. This means that bigger nozzles don’t seem bond layers together better or reinforce the plastic. As I said in the past, I’m working in aerospace and here it’s usually important to use material efficiently, so maximum strength at minimum weight. If you’re not concerned with weight, you’ll also be able to achieve the same strength of your parts at similar wall thicknesses and infill ratios regardless of the nozzle. Though, I guess the interesting point here is in what amount of time will you achieve which strength. This is where the advantage of bigger nozzle comes into play, because they allow you to push more material out in the same amount of time. Disregarding maximum flow rate, cooling issues and keeping speeds the same, a 0.8mm nozzle at double the line width and double the layer height pushes out 4 times as much material out in the same amount of time in comparison to a standard 0.4mm nozzle. If we apply this to our tested samples, we can finally see, where the bigger nozzles shine and the impression that parts with a bigger nozzle are stronger, comes from. The strength per time is by factors higher if you print with larger nozzles and larger layers. In this test you can even get a similar effect by just upping the extrusion width and layer height on standard nozzles, though there are limits in the end!
I think I was able to nicely show that the additional strength of prints with bigger nozzles results from the additional material that is printed and not any reinforcement in the plastic. I’ve already made a video in the past about the most efficient way to improve the strength of 3D prints and that is not the infill ratio but the wall thickness. If you keep the number of perimeters the same and just use a bigger nozzle, especially the walls will be thicker and therefore the strength is improved significantly! Though, these thick walls can be achieved with a big or a small nozzle by adjusting the number of perimeters. The big advantage of bigger extrusions is if you take the time factor into consideration as well because the with a bigger nozzle you can increase the strength of a part by factors in a similar amount of time. I’ve also shown, that you might not always need a larger nozzle for that effect because if you stay within the capabilities of your system you can emulate bigger nozzles just by increasing extrusion width and layer height. Going all the way to double the extrusion width and layer height might be a bit much but emulating a 0.6mm nozzle with a 0.4mm nozzle and therefore more than doubling your strength per time should be possible without an issue. So consider creating yourself a fast and strong printing profile for your current printer! But what do you think of these results? Leave your thoughts down in the comments!


