Multi-material Coat Hook on the E3D Toolchanger
These coat hanger hooks were one of my first practical 3D prints I did years back when I got my first 3D printer and they served us very well. As you might know, we’re currently renovating, which also meant re-painting the staircase railing. The old hooks were fine, though they scratched the paint and also regularly fell off while removing a jacket. For this reason, I thought that it was finally time to create a version 2 of it. I wanted to retain the general shape of the hook because that worked well though I wanted to add a soft padding that touched the railing. This way I could make it fit snuggly so that it’s safer in position and it also doesn’t scratch the paint. I could have just taped some felt on the inside of the old design, but hey, why do I have all of these fancy 3D printers? (That’s at least what my wife tends to ask.)

E3D Toolchanger with 3 Hemera extruder and one Omniadrop extruder
As you also might know – I’ve had an E3D Toolchanger for around a year now. That machine is special because it features four individual Toolheads. This doesn’t only let me combine different colors of filament but I can also put different types of material in each toolhead. Why is that important? Systems like the Prusa MMU or the Mosaic Pallete that use the same nozzle for all materials are great if you use the same polymer, mostly PLA, just in different colors or use at least kind of compatible materials like PLA and the water-soluble PVA. When they start struggling is when you try to print materials that don’t work that well together like PLA and Nylon or in my case PLA and TPU due to different extrusion temperatures or just non-adhering polymers. Even if you can run your materials through a single nozzle you would need significant amounts of purging, so pushing out the old filament, to not run into layer adhesion problems. And this is where a multi-nozzle or even a multi-tool setup like the E3D Toolchanger comes into play. Every nozzle gets loaded with its own material and then just the small amount of molten material that sat in the hot nozzle during idle is purged before it’s ready to print. People tend to ask why I still use a purge tower with the toolchanger and this is the reason, though it’s way smaller than with a MMU or a Palette. You can even install different extruders on the machine. So tool one, two and tree are general-purpose Hemera extruders and the fourth is an Omniadrop extruder that is specially designed to printing every flexible material you can imagine!

Print with small purge block (6-10mm³ per purge)
Let’s now quickly look at the design that I made in Fusion 360. First, I designed a simple hook shape. Noteworthy is maybe that I ted to use the surface tools for these thin parts, which I then thickened to a solid body. In my opinion, the cleanest way to create parts that you’d like to have with a consistent wall thickness. Then I made the internal padding by also just thickening part of the surface, but in the other direction. If you’d use two materials that adhere well to each other, you’d already be good to go. PLA and TPU, even though they stick okay to each other, have a significant weakness at their interface and might potentially de-laminate. To prevent that, I designed pockets with undercuts into the hook, in which the TPU can later properly grab into. This is basically similar to what they do in injection molding when, for example, over-molding your Nylon cordless drill housing with TPU. The Nylon part also features several holes in which the overmolding can later flow to improve bonding. To do this, I simply extruded rectangles and then used the draft tool to generate the undercut. At first, I only did this to the TPU padding and, in one of the last steps, used a Boolean operation to subtract the material from the PLA hook. Finally, I just decreased the hook’s width in the front for better usability and exported both hook and padding as separate STLs.

Fusion360 design with internal pockets
Let’s next jump into PrusaSlicer, which I used to setup the print and which caused me quite some headaches until I got nice results. The process is, in general, pretty simple. You load both stls at once, which will then automatically merges the parts into a group. I assigned regular PLA to the hook part and Foaming TPU to the padding. Collorfabbs VarioShore TPU is a really cool material, that let’s you adjust its density depending on the print temperature. So, in order to make it as soft and squishy as possible, I printed it at 215°C and reduced the material flow to only 55% because the material expands almost to double its volume! The big problem with this material though is, that it horribly oozes out of the nozzle during travel moves. If we don’t do anything against that, the parts will look horrible in the end because the nice, matte PLA surface will be covered with strings and pimples. Unfortunately, PrusaSlicer doesn’t offer an ooze shield, which is basically a second layer around the part, where oozed out material will be wiped off and therefore should reduce those artifacts to a minimum. The second option is “Avoid crossing perimeters”. This means that travel moves don’t go in straight lines from start to end anymore, but the slicer tries to re-route the paths in a way that perimeters should not be crossed. This is a complex process, and unfortunately, it’s also not working perfectly in PrusaSlicer. Sometimes it worked great; other times, it just didn’t re-route the moves. This feature has been re-worked in the latest Prusaslicer release to work way more reliably – unfortunately not with my problem. The developers only fixed travel-moves within the parts, and basically don’t even consider outside moves anymore. A pity and I hope that they will further improve the algorithm because CURA, for example, does a way better job in that regard. Anyways, I ended up rearranging the parts in a way that travel moves didn’t cross any perimeters and got to printing.

“Avoid Crossing Perimeters” Problem in PrusaSlicer 2.3
And here we go. After some minor cleanup, we end up with these beautiful multi-material coat hangers. Overengineered? Maybe. Cool looking and feeling? Definitely! And in the end, I think this was a fun project and shows what the E3D Toolchanger is really useful for. Yes, it can multi-color print really nicely, but it starts shining at more challenging tasks like multi-material printing.
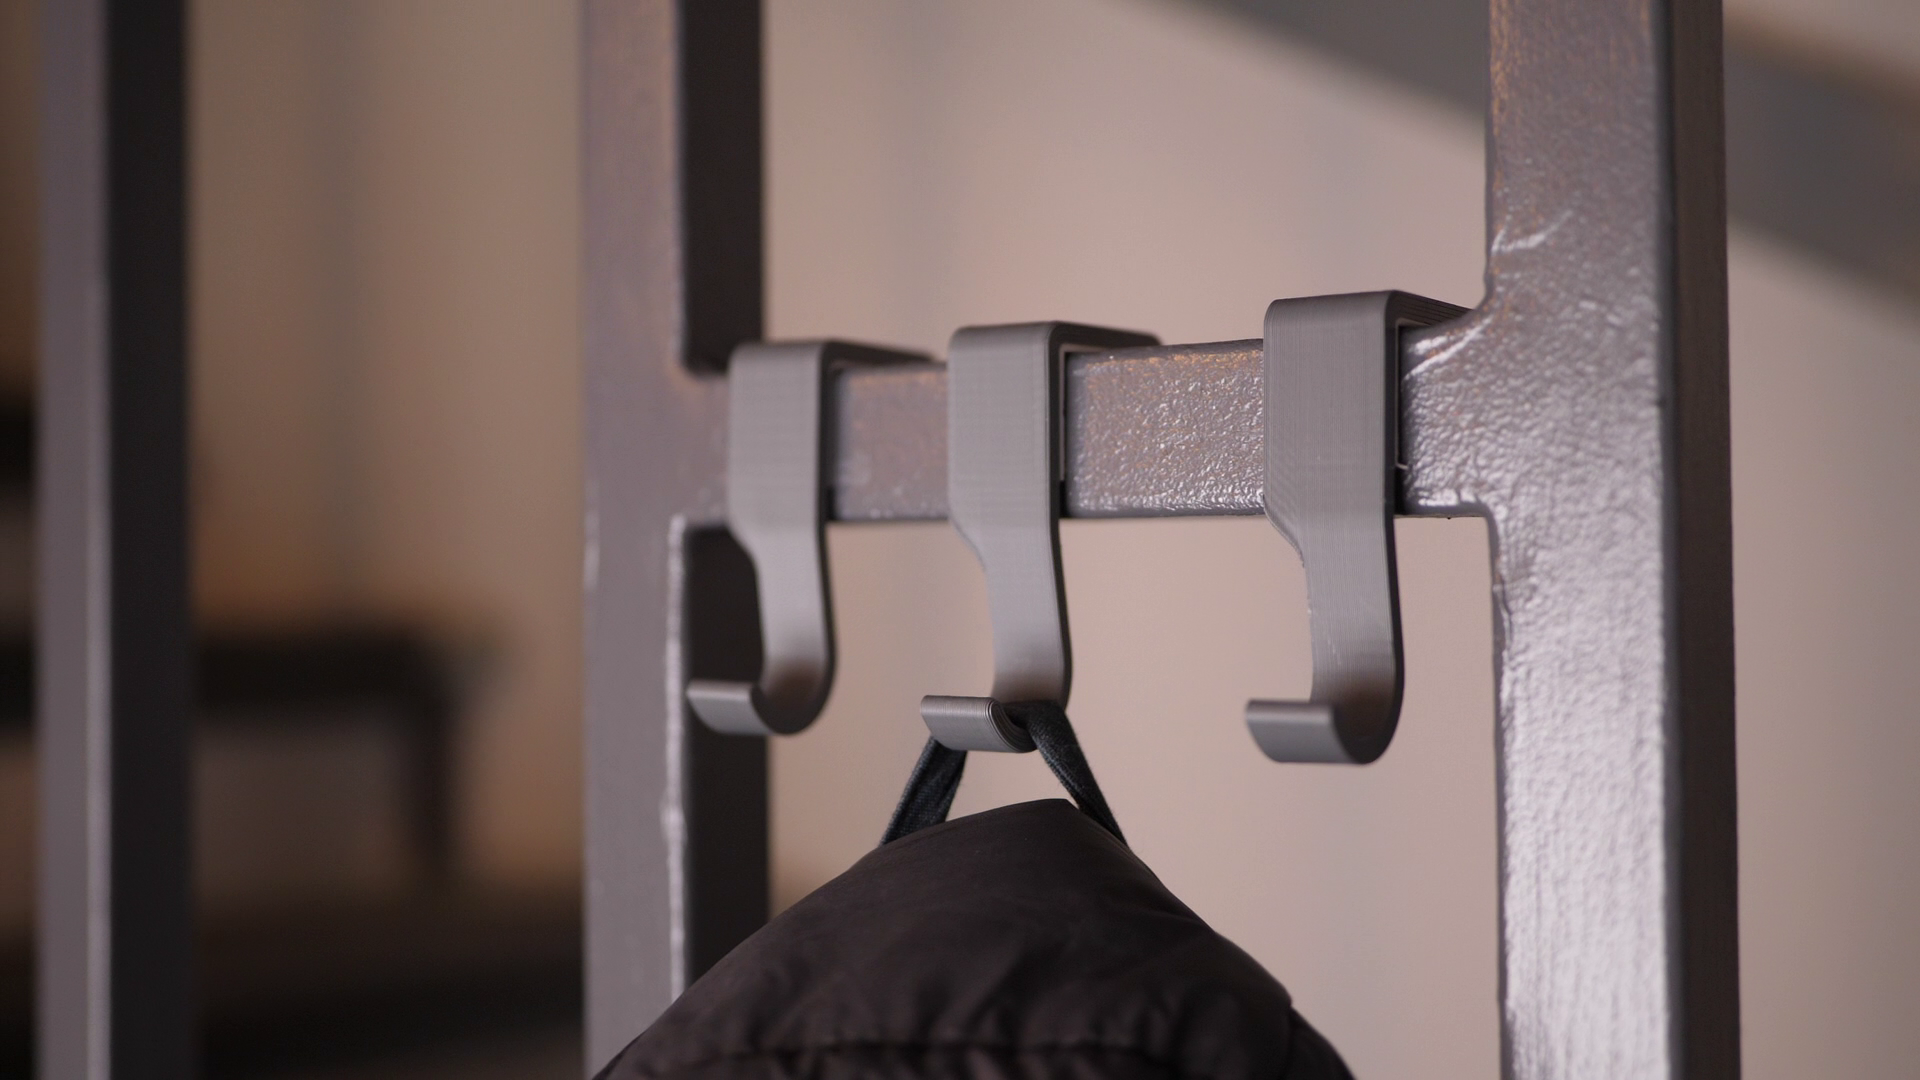
Three Hooks installed on the railing
🛒 Equipment used for this project:
E3D Toolchanger: https://e3d-online.com/pages/toolchanger
E3D Hemera Extruder (available again Monday 18th January!!): https://e3d-online.com/pages/hemera-feature-page
DropEffect Omniadrop Extruder: https://www.dropeffect.com/
colorFabb varioShore TPU (Affiliate): https://geni.us/ADh38Y
Extrudr NX2 (Affiliate): https://geni.us/CNCKExtrudrNX2