HOW MUCH abrasive filaments damage your nozzle!
In the past I never really worried much about nozzle wear because I rarely printed abrasive materials and when I did, I switched my nozzle for a hardened steel one. One day I noticed after I inspected my changed nozzle a bit more closely that it showed severe marks of wear even though the only thing I printed before was just standard materials but probably for more than 1000 hours. At this point I asked myself where this abrasion is coming from and what influence it has on the print quality of my parts.
3D printer nozzle after long usage
So what we will be doing in this video is simulating the nozzle wear with different sized nozzles. Then, we’ll print abrasive materials with new brass nozzles and see how they actually wear and check the influence of this wear on print quality. We’ll also take a close look at the nozzles with imprints using cold pulls and I’ve also cut a couple of them open to see how they look inside, so make sure you stay until the end. A lot of interesting investigations to look forward to!
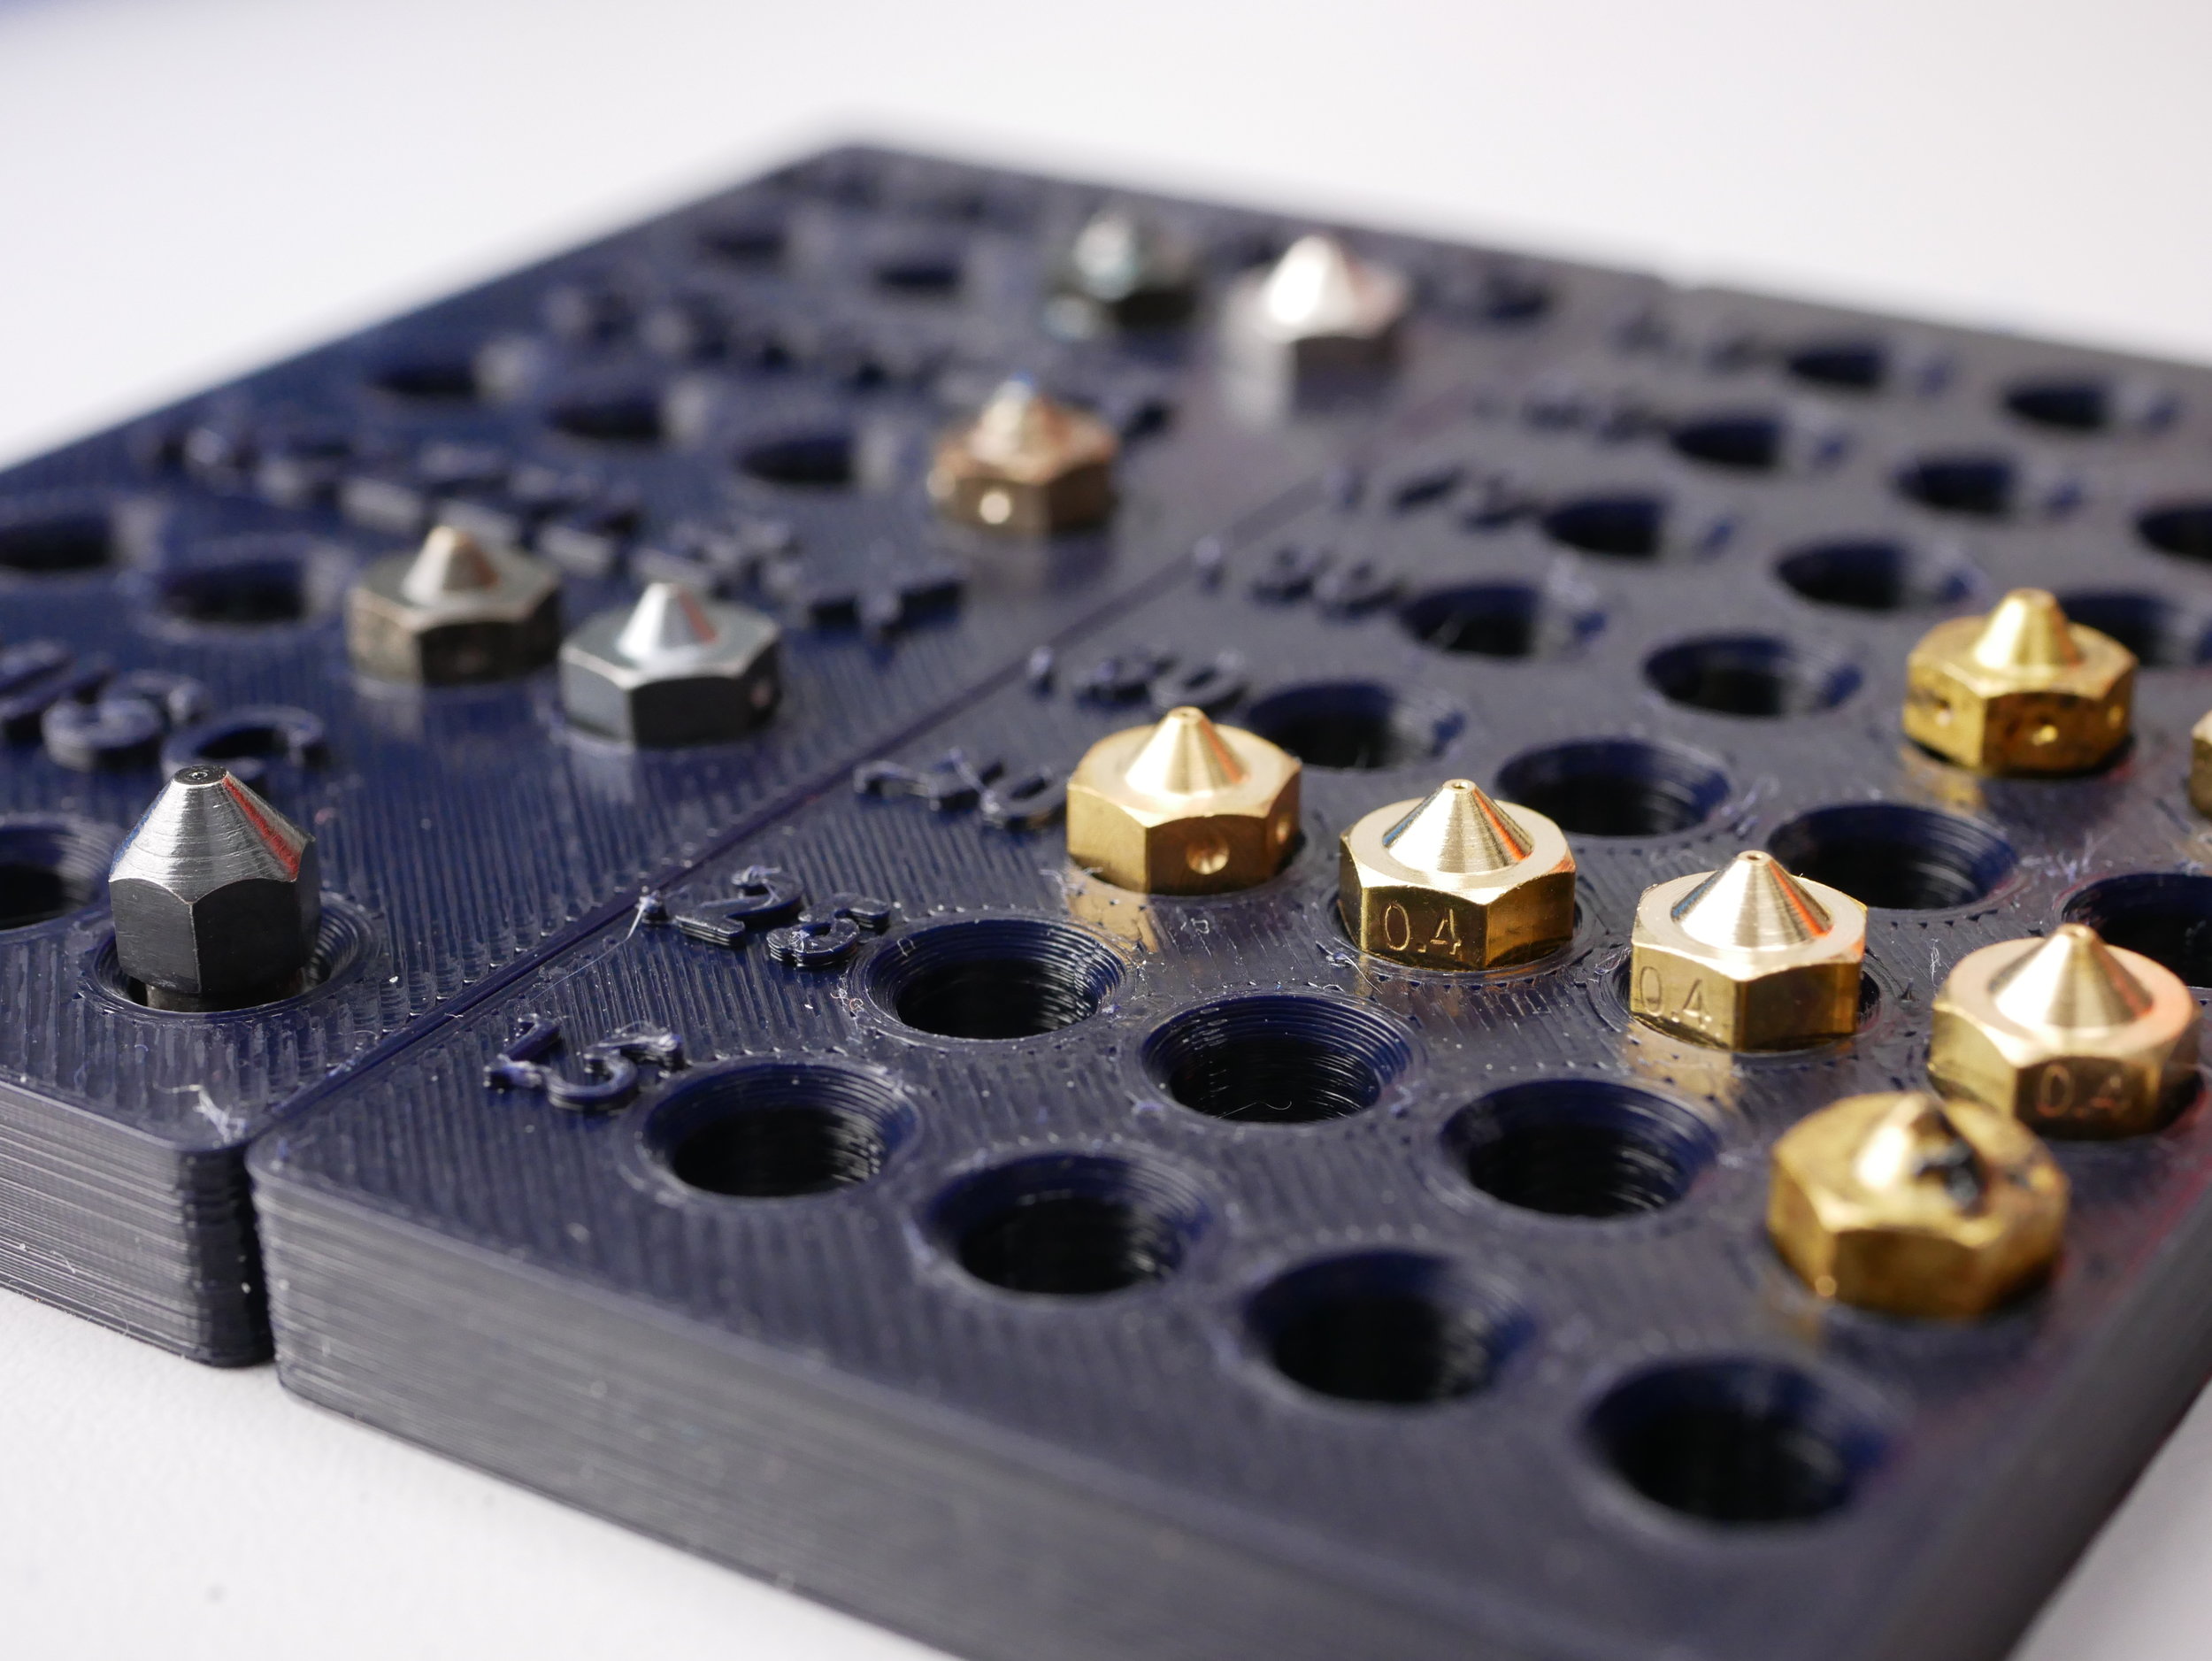
Nozzle collection
Before we start with the investigation some words on nozzles and abrasive filaments. Nowadays most of our 3D printers nozzles are machined from brass. Due to it’s ease of machining and very good thermal properties it’s an ideal material for this application with an important downside. Brass isn’t the hardest material and has the tendency to wear over time. For most of the materials we print with, this isn’t an issue. PLA, PETG, ABS and so on are not really abrasive by themselves and you can print many hundred hours and probably a dozen kilos and don’t see anything at all. Though, these polymers get more and more abrasive depending on what they are mixed with and this already starts with the pigments. White materials for example can contain titanium dioxide which is a very common white pigment but just as in your toothpaste that also contains it, this ingredient can increase the wear during printing. It gets really bad with glow in the dark filament because the strontium aluminate that is used as the component that glows in the dark can chew away a brass nozzle only after a couple of hundered grams of material. I found a thread on reddit where a user has collected some experiences. Take a look at them. Next, we come to the materials probably most are aware of and these are the fiber filled ones. Carbon fiber or even glass fiber reinforced materials can chew away a nozzle in no-time and this is actually something we’ll test later. Also be aware of wood filaments, because these fibers can also cause an early death of your shiny nozzle. The same is also true for metal filaments. I also learned that standard materials can be mixed with other things to improve properties like warping and can also lead to more wear.
When I started with this project idea, I thought that nozzle wear will primarily increase the diameter of the orifice. In order to simulate that I sliced a 3DBenchy with a normal 0.4mm profile in PrusaSlicer and then printed always the same file with nozzles starting from 0.4mm all the way up to 0.8mm to see the effect on print quality. Just because I was curious, I also printed the same GCode with a 0.25mm nozzle. So first things first, all parts printed and finished which is already something. Our baseline 3DBenchy printed with the suitable 0.4mm nozzle came out very nice besides a bit of stringiness. The first thing that was notable was that the amount of stringiness increased the bigger the nozzle diameters got. At 0.6mm we can also see a significant number of holes forming in the outer shell of the parts and 0.8mm already looks quite nasty. We also are able to see that details slowly get lost and overhangs become worse. Interestingly the part printed with the small 0.25mm nozzles looks even cleaner, was without strings and I might be doing more tests in the future if that could be a way to improve printing quality and due to the higher line width improve the adhesion of the layers. Though you have to be aware that smaller nozzles have a higher tendency to clog. So we have seen, that a worn out orifice diameter can be noticed in decreased printing quality. So maybe take a closer look at your nozzle when you notice some wired change in printing quality. The cold pull method I use to measure the nozzle diameter will be covered later.
3DBenchys printed with different nozzle diameters
This was the simulated worn out nozzle test but how fast and in which way do nozzles really wear. In order to find that out, I bough a bag of cheap Chinese nozzles that will be sacrificed for science. In hindsight it probably would have been better to use genuine, good quality E3D nozzles but I didn’t have anything else at that point. I don’t want to say that all cheap nozzles are that bad but there is a high ,chance that you get what you payed for! I’ll test two different materials: DAS FILAMENT Glow in the dark PLA and some leftover Colorfabb XT-CF20 which is Carbon fiber PETG. For each material I’ll at first print a 3DBenchy with some regular PLA, then print a block of the abrasive filament, and print another Benchy to see if the print quality changed. I’ll try to judge nozzle wear with some close-up pictures I took with my macro lens and do a cold-pull to measure the diameter of the orifice. This is actually a really cool method, though violently looking, to get a perfect imprint of the internals of your nozzle. I’m usually using very dry PLA filament because if you get bubbles the results will be unusable. I heat the nozzle up to 180°C, feed a couple of mm of the material and let it cool down to below 40°C. I disengaged the extruder gears so they don’t imprint on the surface. I carefully remove the leftover material that oozed out of the nozzle during cooling. Then I heat it up again and as soon as it reaches 65°C I pull hard on the filament while supporting my printhead. As easy as it sounds I wouldn’t recommend this method to everyone since, if the temperature is only slightly off, you can really horribly block your filament path. That has already happened several times to me and taking the whole hotend apart isn’t something for everyone. The Imprint can then be used to judge surface finish and even to measure the nozzle diameter. Make sure before you measure that you don’t accidently measure the chamfered part and get values that are too high.
The glow in the dark material was spectacular to print, especially when you turn off the lights but the wear I had been expecting from the reddit post was really underwhelming. After 330g of material there was more or less no wear detectable. The cold-pull still showed the same nozzle diameter as in the beginning. Maybe the edges were a tiny bit rounded but nothing really serious. Much more interestingly was to see how the internal surface finish of the cheap nozzle looked like. There was actually a spiral pattern in all of the cheap nozzles from the drilling procedure which we’ll see in more details in the cutups later. The thing is that if I was asked to machine a pattern like this, I wouldn’t even know how to do it. So if you have a clue how to make this, then let me know in the comments! Also, our 3DBenchy just looked like the control. So there is obviously a difference in glow in the dark filaments and some wear more than others. I checked back with DAS FILAMENT and they confirmed that they do use strontium aluminate as a pigment but maybe particle size and shape might play a role there.
Nozzle after 330g of Glow in the Dark filament
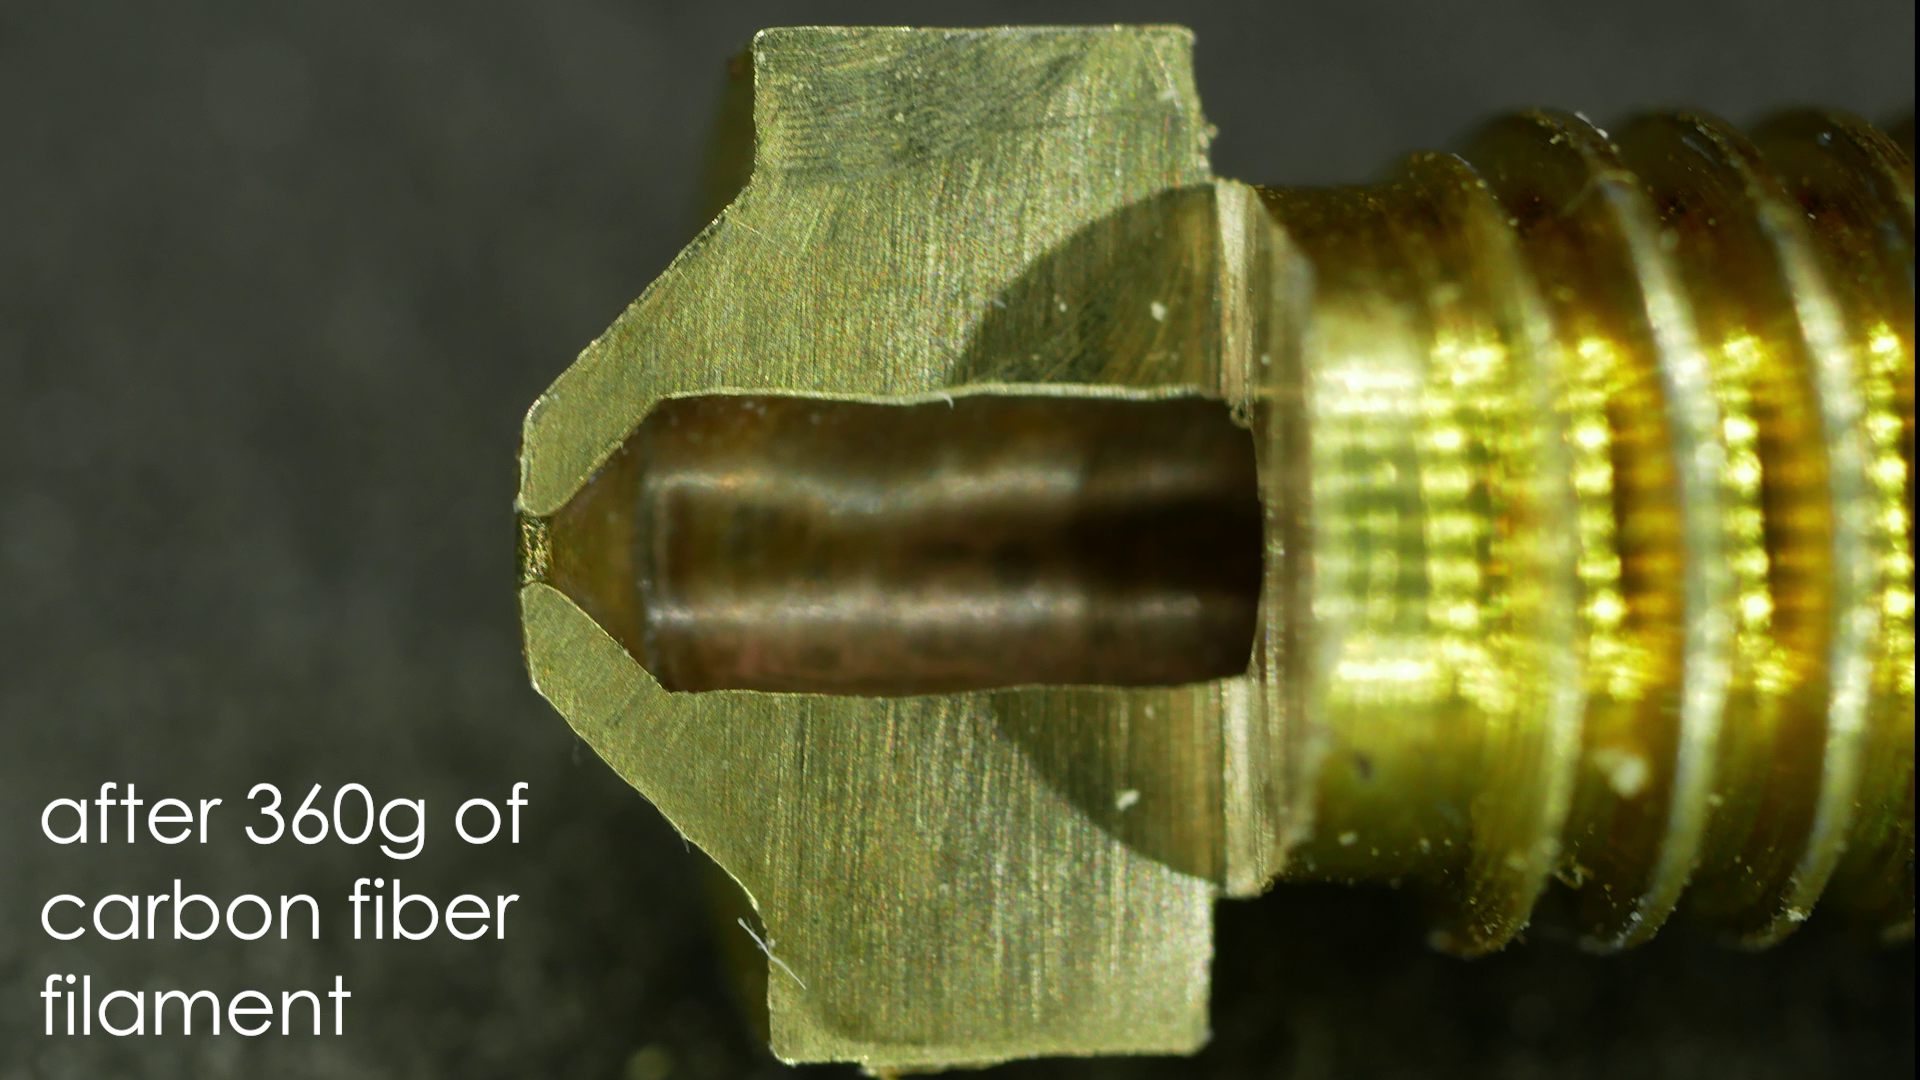
Next, we’ll get to the more interesting material and that is Carbon Fiber filled PETG. It was hurting me a bit on the inside to just print blocks of plastic with it but hey, it’s for science. The blocks were really just 100% infill boxes to get the material as fast as possible though the nozzle. These results were very interesting for me because I noticed that the diameter of the orifice wasn’t really changing during the tests. What I was able to spot though was that the tip was horribly wearing. This wasn’t only visible on the macro shots but I also noticed that the first layer thickness increased over time due to the nozzle becoming shorter and shorter. Also, the abrasive carbon fibers rounded off all of the edges which is a very clear sign that something is wrong. The pattern you can see on the nozzle is due to the fact that with my generic test parts, the printhead is only moving in X and Y direction and +-45°. After 360g of material my leftover filament was gone and the same goes for the nozzle. Interestingly the print quality wasn’t impacted as much as you would think. There is a definite increase in strings, you can spot holes on the parts, overhangs don’t look remarkably good and some details are gone but not as bad as our 0.8mm nozzle test. The thing is, that if I would have gone further with this test I would have at some point started to wear it down to the point where the internal chamfer starts and this will increase the orifice drastically with every but more of wear until you get to the point where your filament can pass right through the nozzle orifice.
Now let’s really take a look on the inside of some nozzles to find out how their internal geometry looks like and which wear marks we can see. For this I’ve screwed the nozzles one by one into an old heaterblock and mounted that in my small vise on my GoCNC Next3D CNC router. I mounted it on the right side so that the cutting forces won’t unscrew to nozzle from the block. I used a 6mm, 4-flute carbide endmill that I mostly buy from Banggood and that are really good to be honest. A link to those is in the description by the way. I moved the tool to its zero position with my newly added gamepad controller. I programmed a short cycle where I face mill the brass part at 500mm/min at 25000rpm spindle speed. In each cycle I removed half a millimeter of material until half of the nozzle was gone. I did my best to deburr the edges with an exacto knife and polished the machined surface with a sharpening stone.
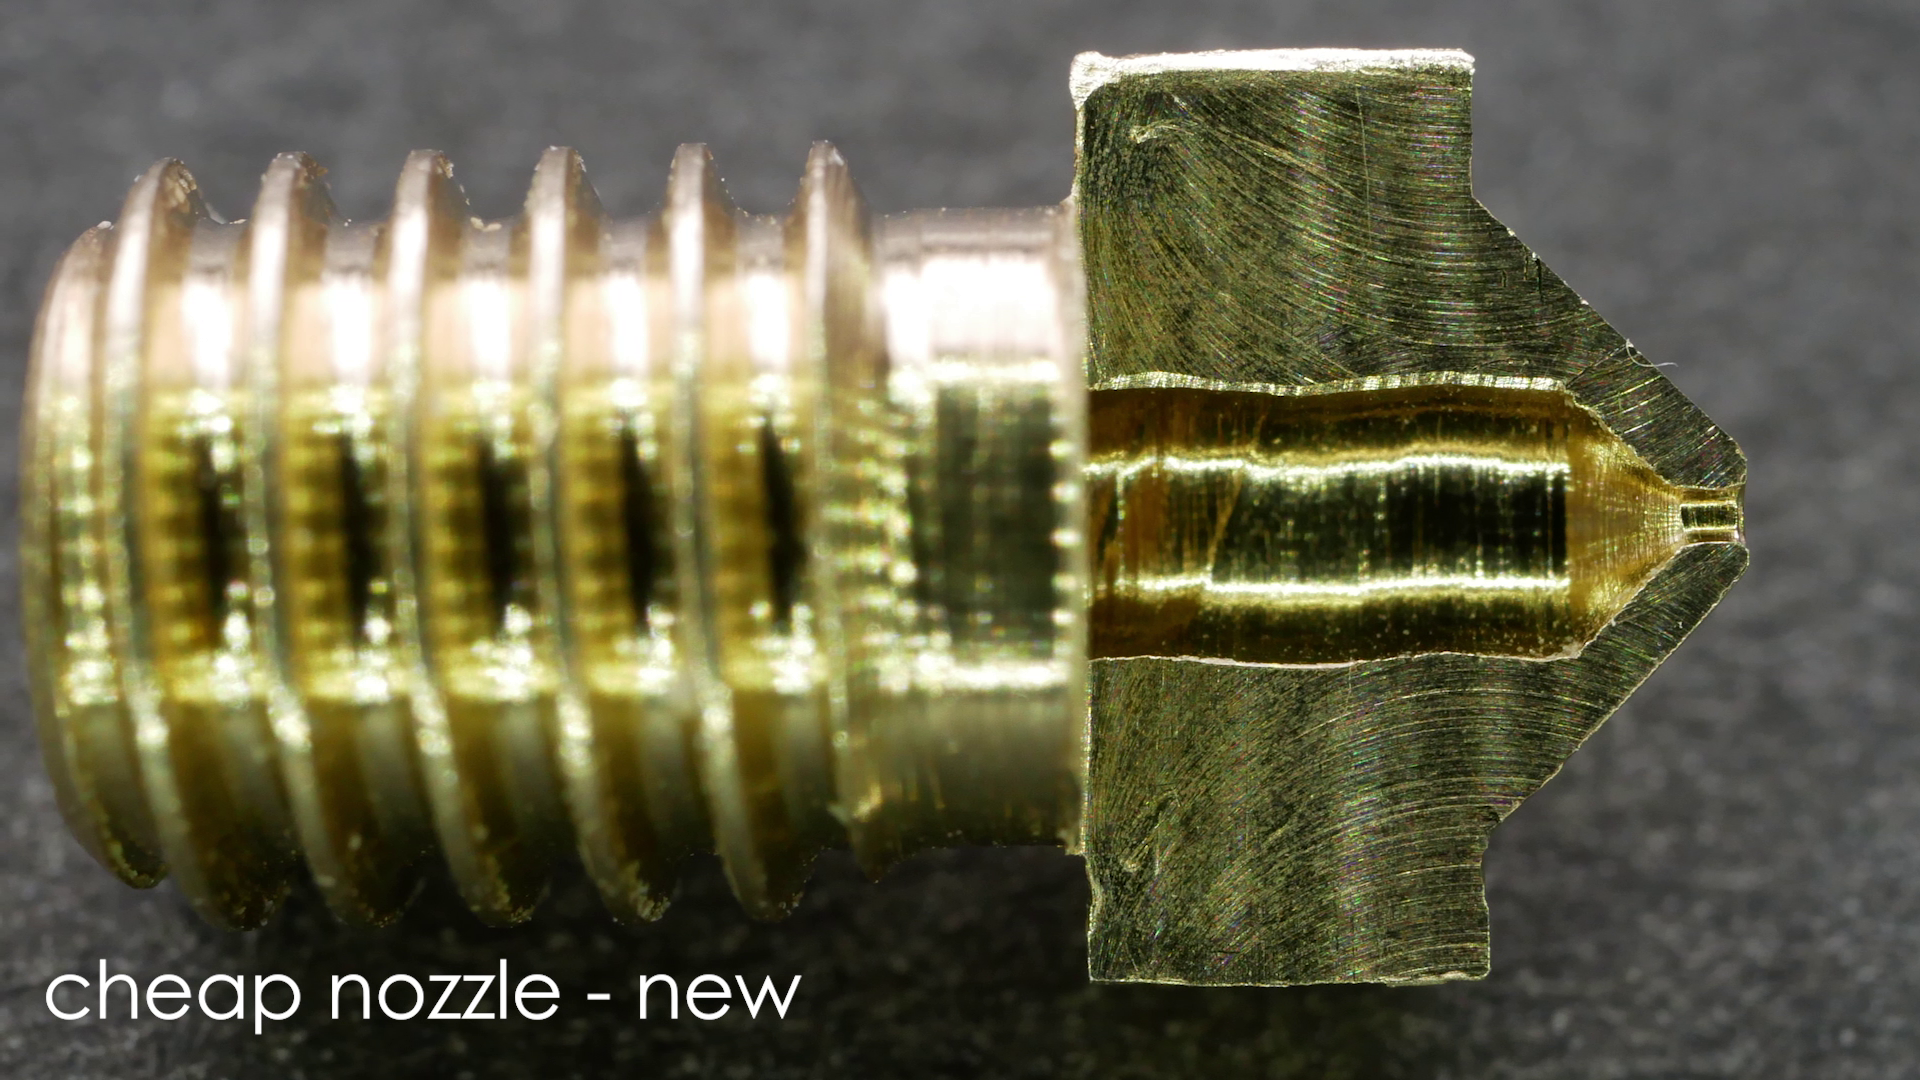
Cheap nozzle - new
The cutup of the cheap Chinese nozzle confirmed the rough spiral patter, I still can’t explain how they even managed to machine. If we also take a look at the nozzle that was tortured with glow in the dark filament, there isn’t much of a change besides the color change on the inside. The interesting part is the one I printed carbon fiber filament with. Here the tip is almost worn away and very rounded off. The orifice is only slightly enlarged and the wear on the diameter is not that high. But probably only a couple of hundred grams of more materials and it would have completely destroyed itself. I still think this is a very interesting sectional cut. Out of curiosity I also murdered a brand new E3D V6 nozzle where we have a great internal surface finish. Besides that, there are two major differences that I noticed and that is that the E3D nozzle uses a point angle of 60° instead of 90° that the knockoff has which is probably beneficial for the flow behavior. Much more importantly is probably the tip itself or better the end of the nozzle bore. The ones I’ve tested were slightly chamfered whereas the E3D nozzle shows a sharp transition. The interesting thing is and this is, I promise, no marketing shenanigan, that with the E3D nozzle our Benchy is free of stringing, with the Chinese nozzle, it’s not. I’m quite sure that the internal surface finish plays only a minor role in print quality and more the point where the molten material leaves the nozzle. I’m not sure why this is the case but I could imagine, that having the chamfer on the edge causes the nozzle to act like a bigger one and we know what the result of that is. Another possibility could be that the nice laminarly flowing molten plastic gets a way better flow separation at the edge then it does with a rounded or chamfered one. What do you guys think? The reason why we probably see the chamfer on the cheep nozzle is, that this is an easy way to remove the burr from drilling. Interestingly my worn out E3D nozzle I talked about in the beginning shows kind of a similar geometry where the once sharp edge was rounded by wear, degenerating the print quality slightly. So, does this actually invalidate my results since I didn’t start with ideal conditions? I think maybe and no. Maybe because the initial stringiness was already due to a low quality nozzle and therefore I cant tell you at which point a good nozzle would have started with this behavior. But also no, because this is just an initial small problem and printing quality only starts to really degenerate when there is way more wear. One of the main points also was to understand how the nozzles wear, how bad that is and how we can check for it. But what do you think, what should I have done differently and what would be something for future tests? Let me know your comments down below!
Brass nozzle after 360g of Carbon Fiber filament
But now to sum this all up. Brass nozzles do wear. The speed is depending on the material you print with. Rather than the diameter of the nozzle, the tip will primarily wear at first until we reach the inner tapered section and the wear of the tip results in an increased nozzle diameter. If the nozzles only wear slightly and even the nozzle diameter increases there is a change in print quality visible though not as bad as I thought and most significantly we can see that in the amount of stringing. If you want to check your nozzle for wear, take a look at the tip at first, and see if material is missing and if you can see rounded edges. If you want to buy cheap nozzles, make sure that they are not chamfered, if you don’t what to risk that buy genuine E3D nozzles or from some other reputable manufacturer. For not worrying about nozzle wear, get yourself a wear resistant nozzle, be it hardened steel, ruby, tungsten carbide or whatever and this will be something I’m actually planning to test in one of the next videos, so stay tuned for that.
Genuine E3D nozzle VS cheap nozzle


